The Tri Motor V!!!
I still have my drawings! It’s funny that you mentioned this, This year, I have decided to get back involved in building acoustic/resonator style instruments. The Tri Motor V was one of the designs that popped up.
Let’s do this!
The Tri Motor V!!!
I still have my drawings! It’s funny that you mentioned this, This year, I have decided to get back involved in building acoustic/resonator style instruments. The Tri Motor V was one of the designs that popped up.
Let’s do this!
I still have my drawings for the Dano’ Del Ray as well. I just realized that was 8 years ago… ![]()
Time flies!
My wife recently had surgery and I have been taking care of her. I have had the shop closed for this period (She came through amazingly, I’m Thankful.). She is coming along well, she will be in recovery for a bit, but She’s happy to be home. Me too.
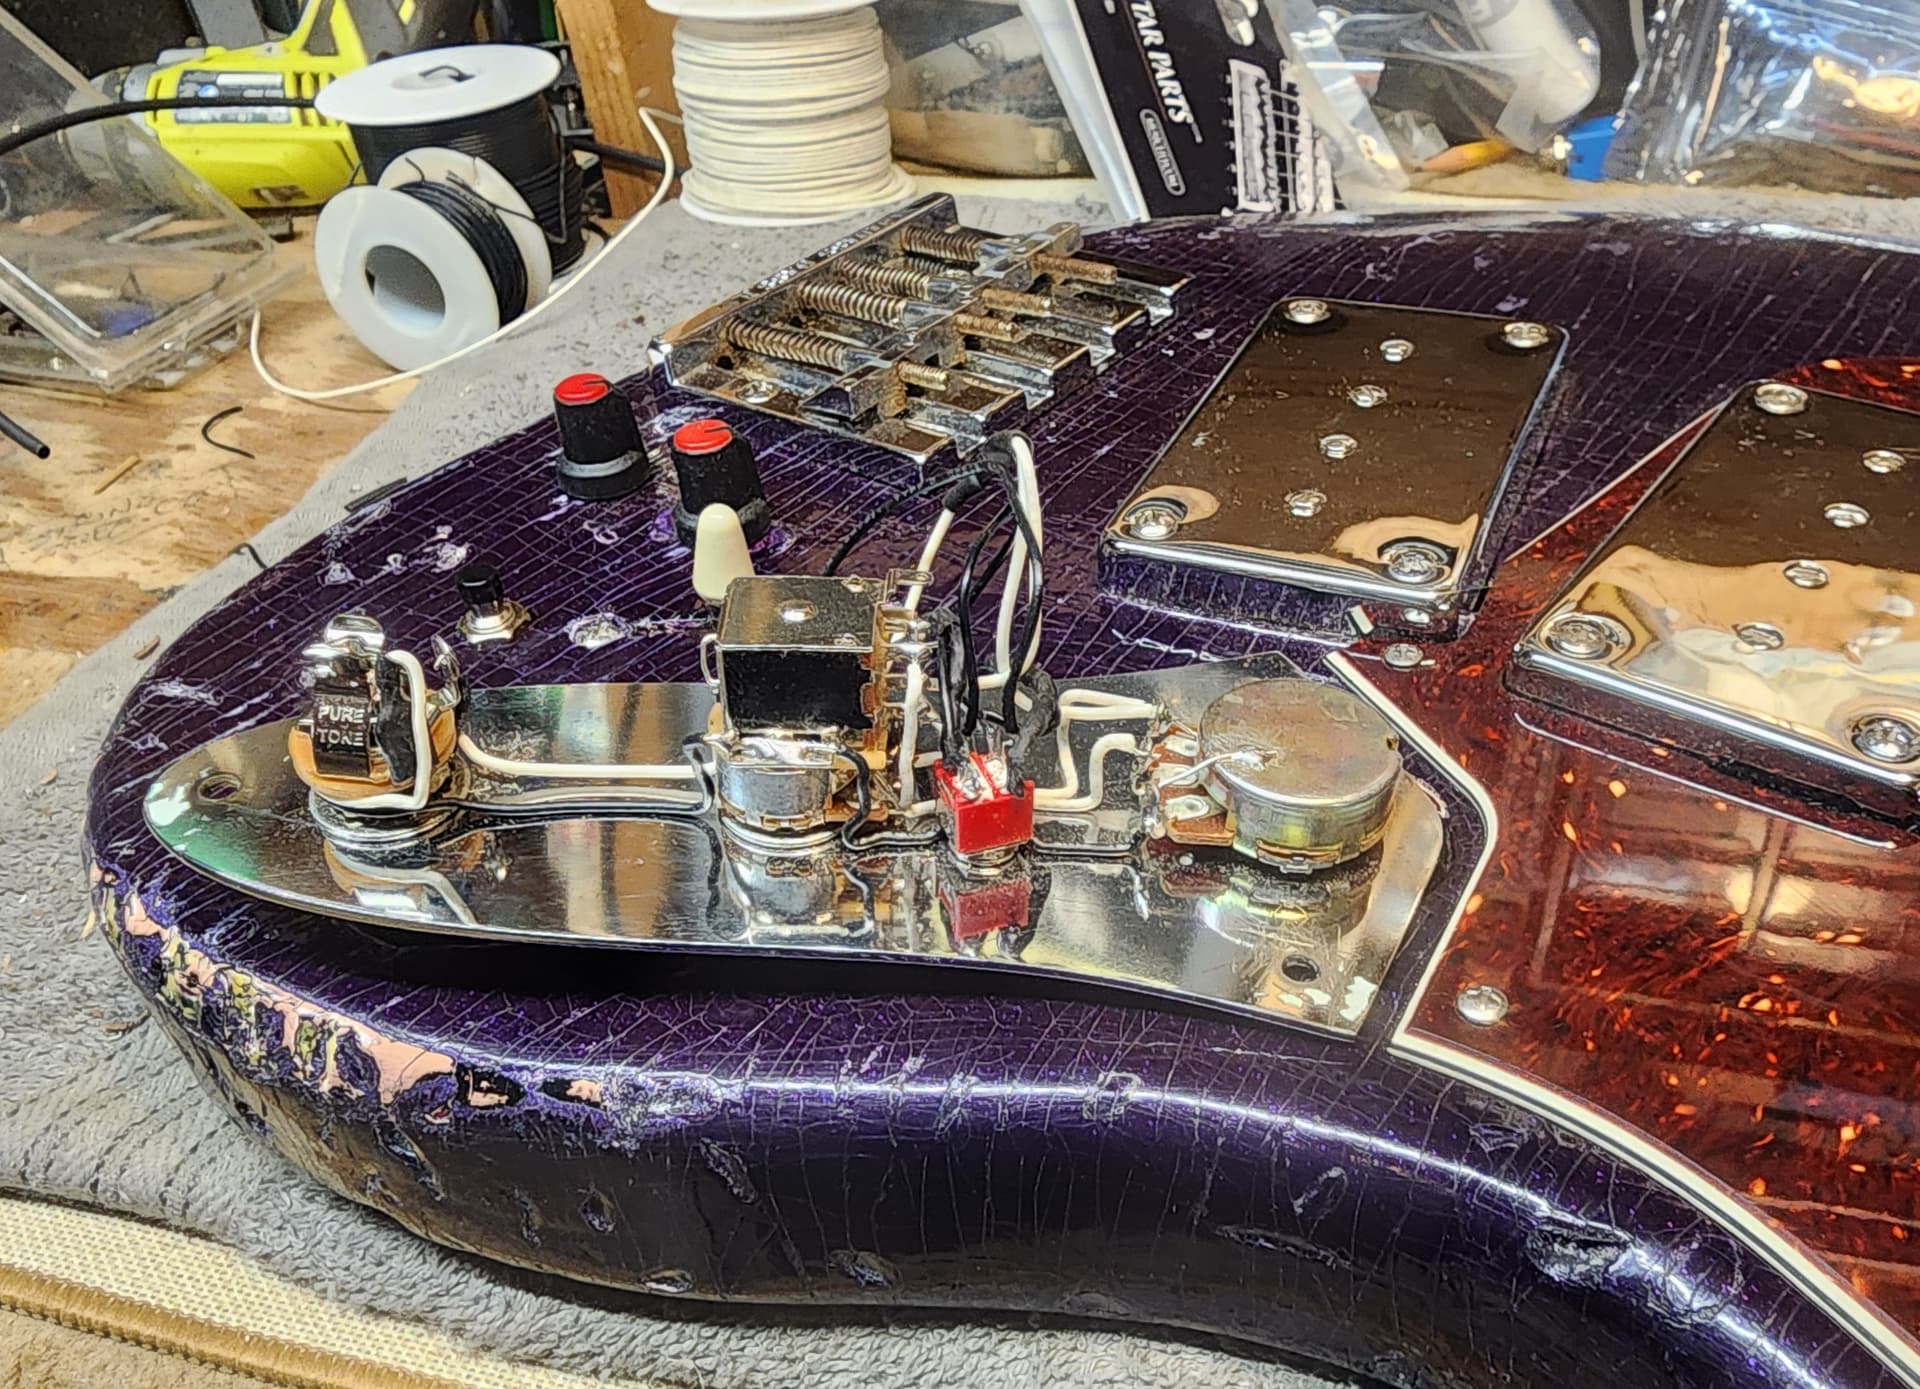
My shop is below our cabin. A couple of days ago, I had the chance to get in the shop and mess around a bit. My Jazz project was on my bench, I decided to go ahead and get it wired and set up.
I jumped into getting it wired up. Honestly, this looks like some of the wiring jobs that I did when I first started learning this stuff, all kinds of knobs and switches. 100% mission control wiring. You think I would of learned. Lol. Another juvenile thing I did was jump right in without drawing a diagram, or really planning anything. Doh.
I’ve been doing this stuff for a long time, I have also been planning this in my head for awhile now. Another reason was I was in a hurry (never good). I have customer repairs/builds to do, but it would be good to get this out of the way. Plus I really want to play this thing.
As I previously mentioned, the controls on this bass are fairly complex. The majority of the controls were well thought out, while at least one (kill switch) was totally “what the heck, let’s try it”. I learned a long time ago that when it comes complicated controls, you usually pick that one sound that you like and disregard the rest. I am hopeful that this one will be at least a little versatile.
The controls are as follows:
Both pickups are four wires, plus a ground wire. This allows for two separate coils that can be wired to split coils, or series/parallel, etc… Each pickup starts by going into a potentiometer, that allows one coil to be rolled off, from full on to completely off. It also offers that coil to be blended in with the always on coil. I’ve used this previously and I like how it sounds.
Next, each pickup goes to tiny, three way (on/on/on) micro switch which is basically a passive boost/cut for each pickup when the two pickups are combined.
From there the pickup wires go to the three way blade pickup selector switch, the output wire goes to the kill switch.
From there the output goes to a push/push switch located on the tone pot. This allows the output to be switched to going straight to the jack, bypassing the volume/tone controls.
The rest of the wiring is pretty standard; 500k vol./tone pots with a .047 cap. I used a Pure Tone multi contact output jack. I’m sure there’s other versions, but having two opposing contact points makes such a difference.
So I went for it. I like soldering and wiring in general, I like to get it as neat and compact as possible. It felt good to get back to work, I worked for a couple of hours, then came down yesterday to complete it.
I was happy with how it came out.
Until I plugged it in. Nothing .
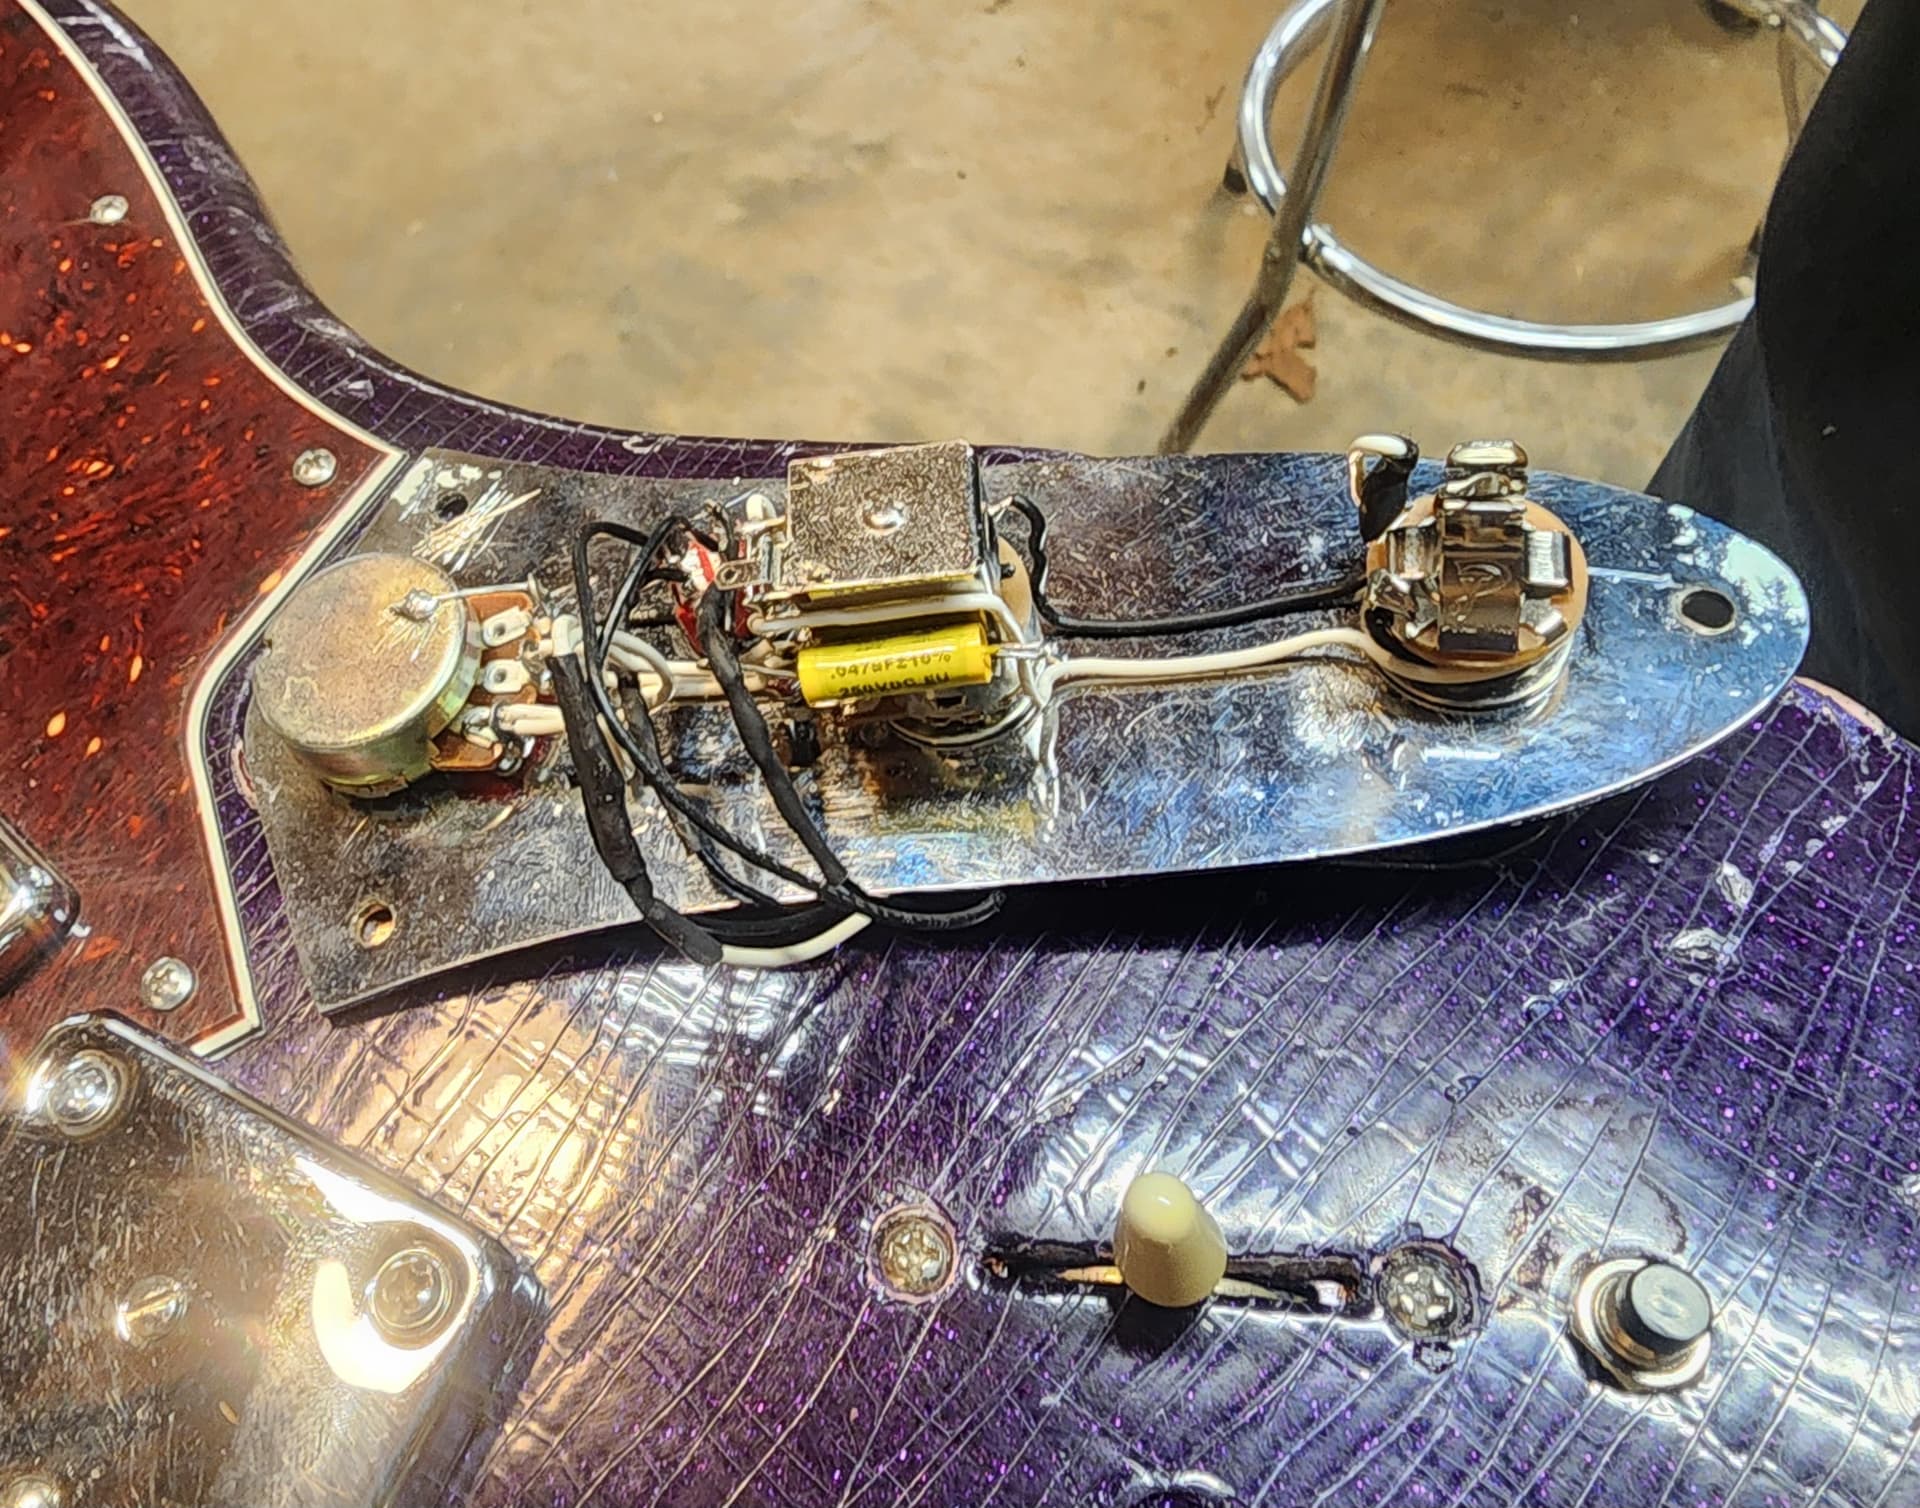
Right off, I knew it was a grounding problem, First I got out my multi meter and tried to follow the path to find the issue to no avail. Then I went old school… plug it in and start touching stuff. still nothing.
I unsoldered the pickup(s) wires and hooked them up to a cable I made to test connectivity, both pickups work, as do the coil roll of pots. The boost/cut switch appears to be working as well.
I could not get the three way pickup selector to work, that seems odd, I’m also having issues with the push/push tone pot. I got it off of amazon and it is very cheaply made, there is hardly any friction when the knob is turned. I kept removing wires to by pass things. but finally I decided to admit defeat and start all over again, this time checking every time the connections as I go.
Simply, I got ahead of myself. I’ll be back.
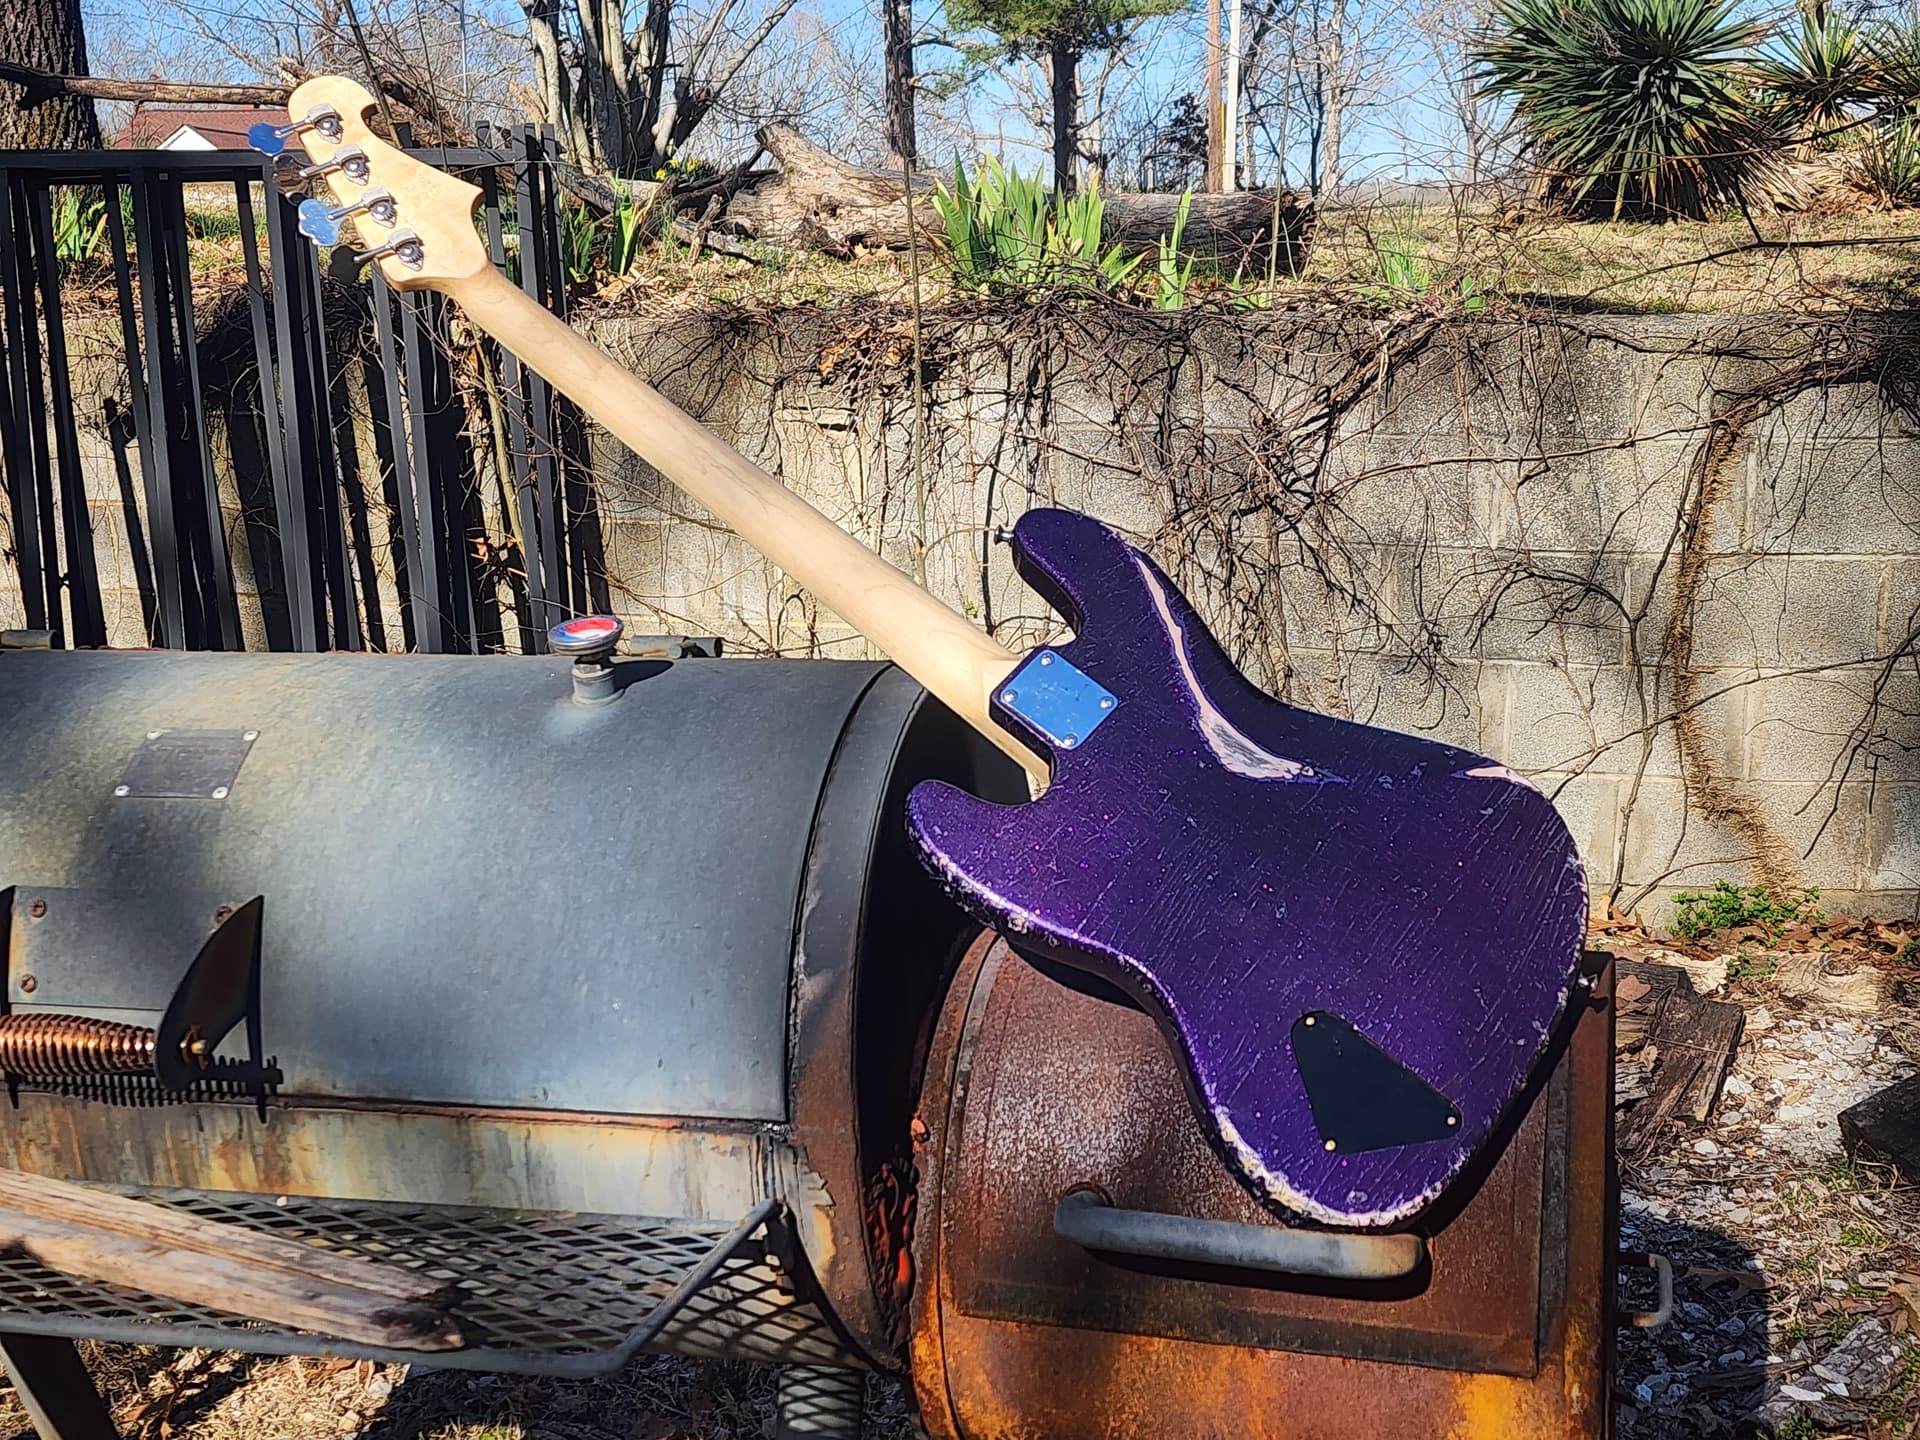
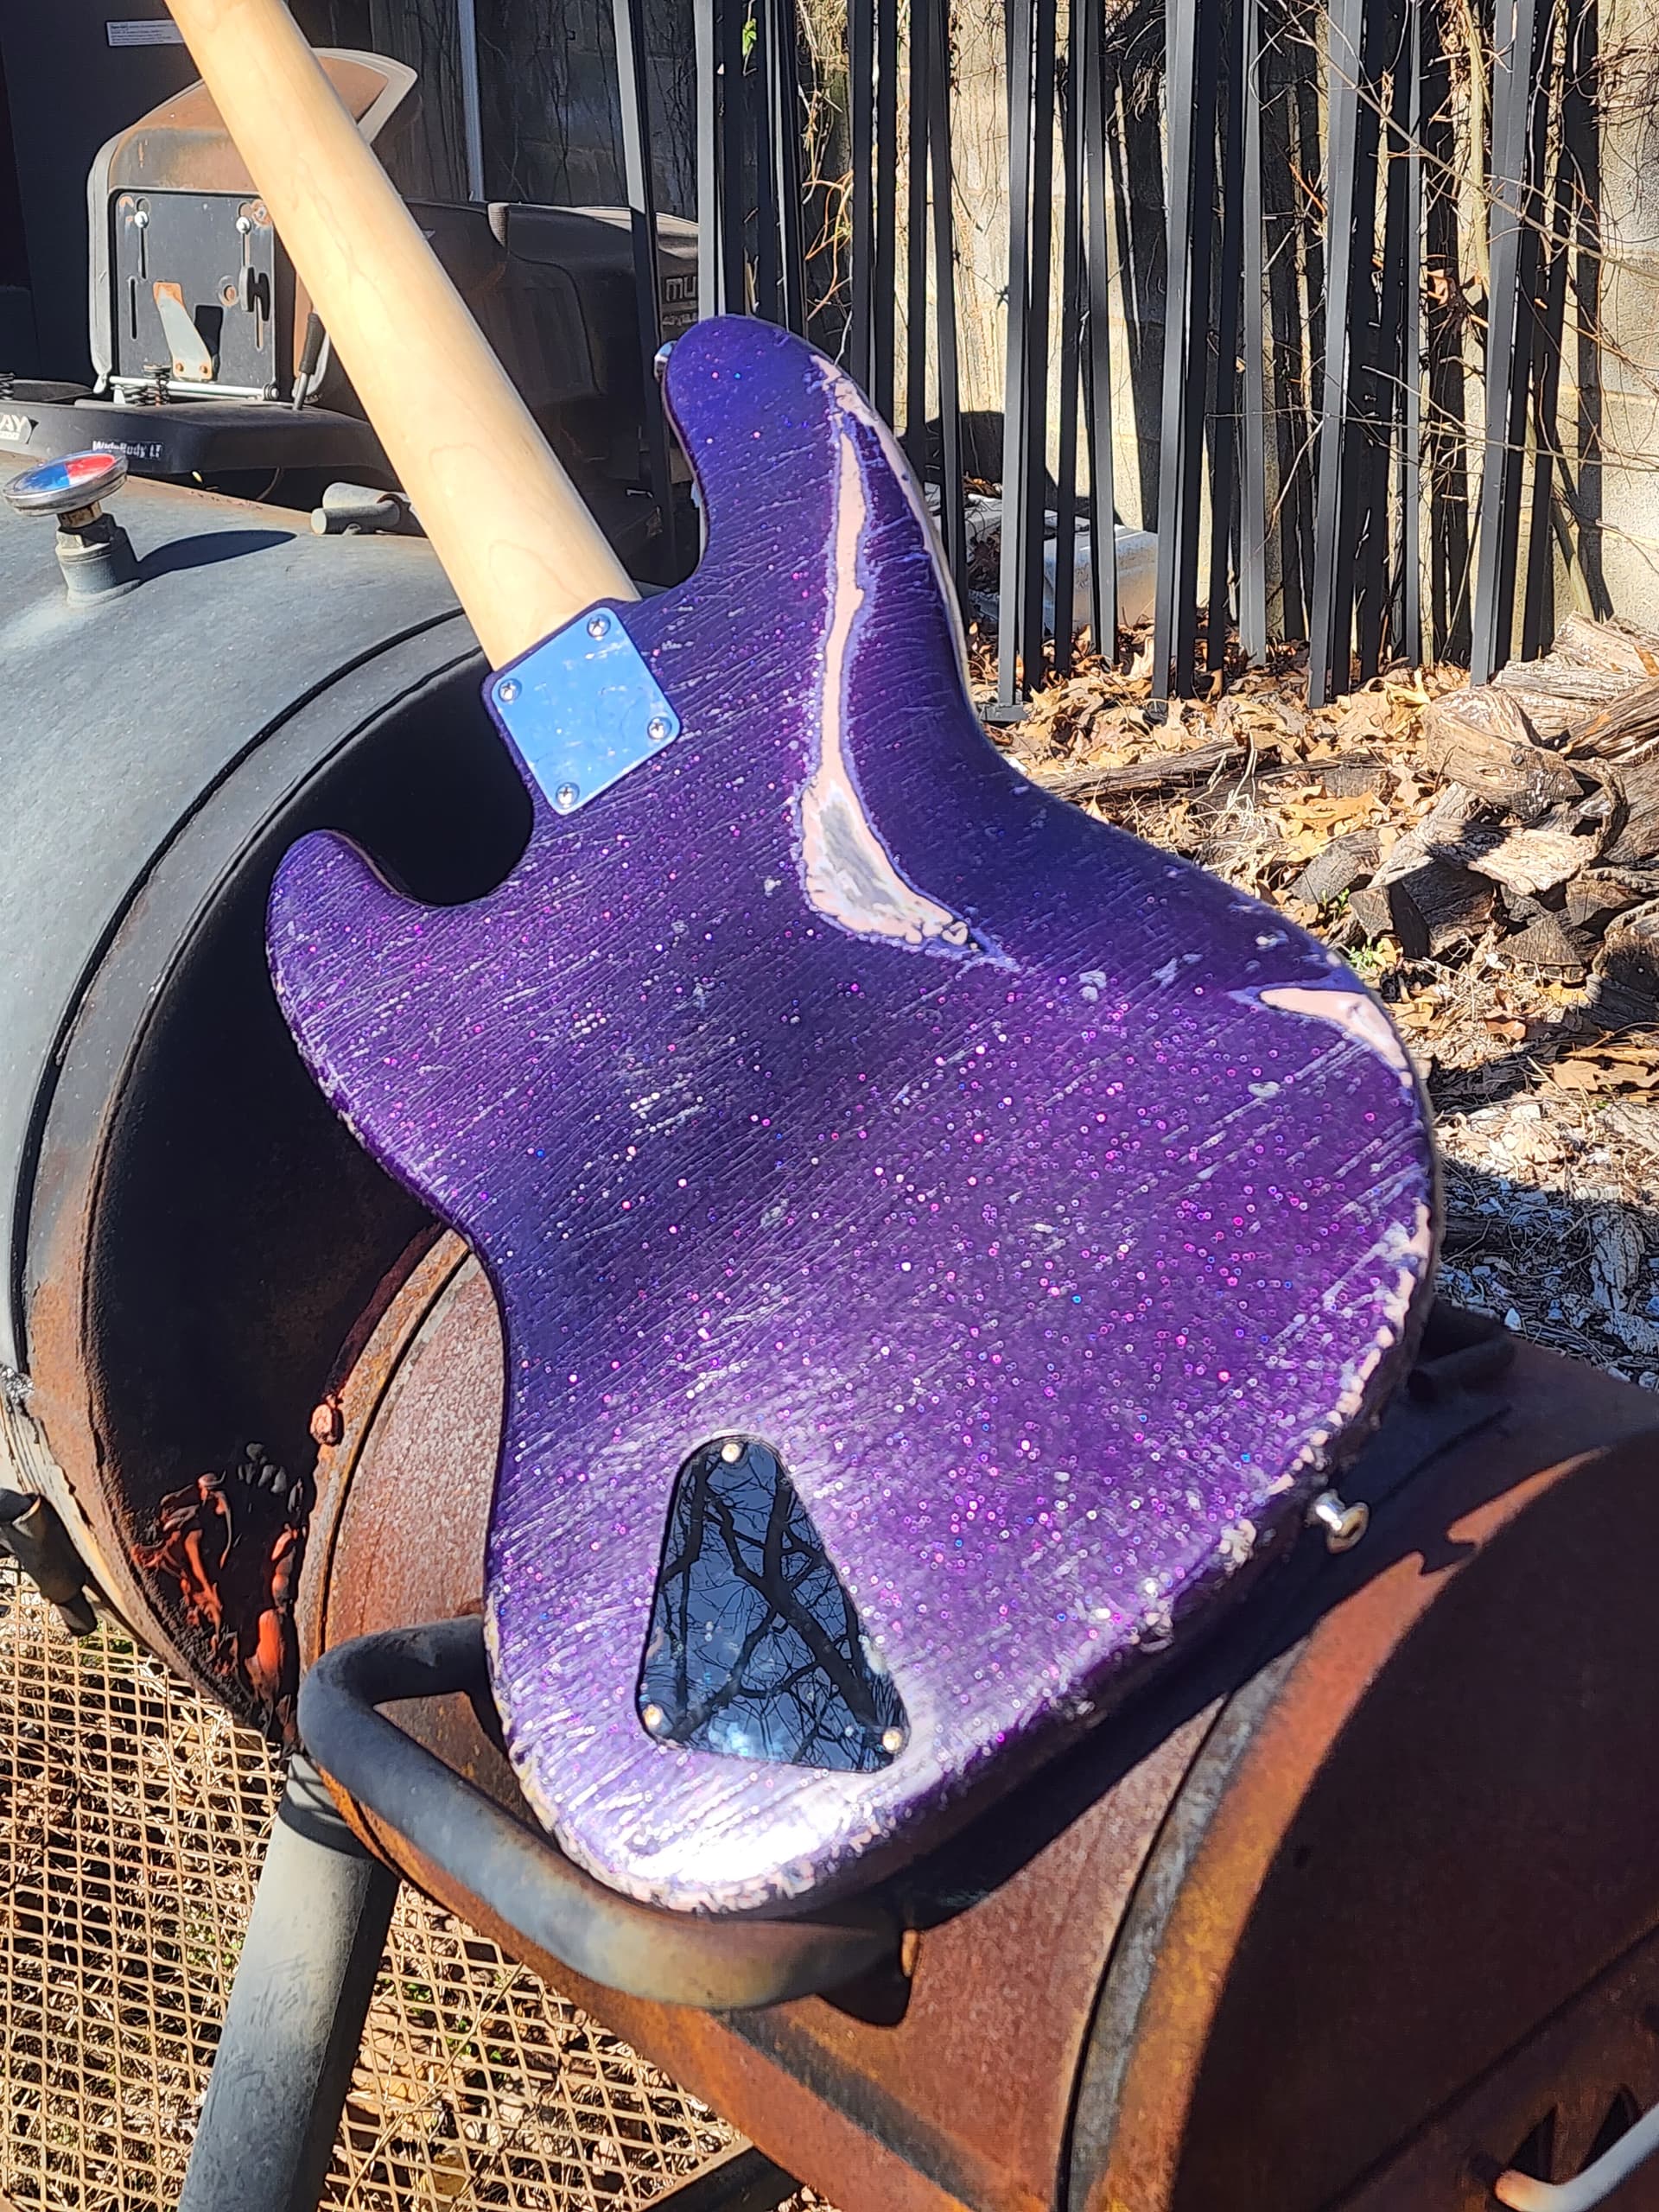
Sounds frustrating / fun. It’ll be a nice win when you beat it. The paint job on that one though… holy crow that’s rad.
Thank you.
It’s been a fun project.
I built it for me.
I just ordered a CTS 500k push-push pot, it’ll be here next week,
My replacement push-push pot is delayed, but I decided to go ahead and do a rough rewire; at some point I will add the new pot and straighten up the wiring, bit I was eager to get it going.
I removed the majority of the wiring, plus the 3 way switch and the push-push tone pot. I started with the pickups and followed the circuit, testing as I went.
I found two issues. Both were simple, but easy to miss.
The first was a grounding issue, when you plugged in the bass, there was no sound, but there was grounding buzz (for lack of a better term) whenever you touched the metal pickup covers and the bridge. That sound is obviously a ground issue but where. I traced the circuit, but found no issue. When I discovered the problem I laughed.
With Jazz basses, the metal control plate is part of the ground. I’ve often seen instruments with metal control plates where the was no ground wire on the output jack lug, no need as the metal jack is grounded to the metal control plate. I added a ground wire off the output jack lug and soldered it to the tone pot and the rest of the control plate grounding. I had also applied copper sheilding to both control cavities and connected the sheilding and the switches/controls in the rear mounted cavity. I added a piece of copper sheilding to one of the mounting holes for the metal plate.
What I didn’t think of was when I tested the bass by plugging it in, it was with the control plate removed, which did not allow the control plate and controls to make a connection with the ground that the pickups and bridge are attached to. Doh.
I attached a ground wire from the control plate to the copper shielding and Voila! Success.
The second issue was my last minute decision to add the kill switch. In my hurry to get a switch, I had ordered momentary push switches that were “momentary on”. in other words, you had to press the button down to make the circuit work. Doh x 2.
I removed the kill switch ( I will replace it with the correct one) out of the circuit and everything worked. Finally.
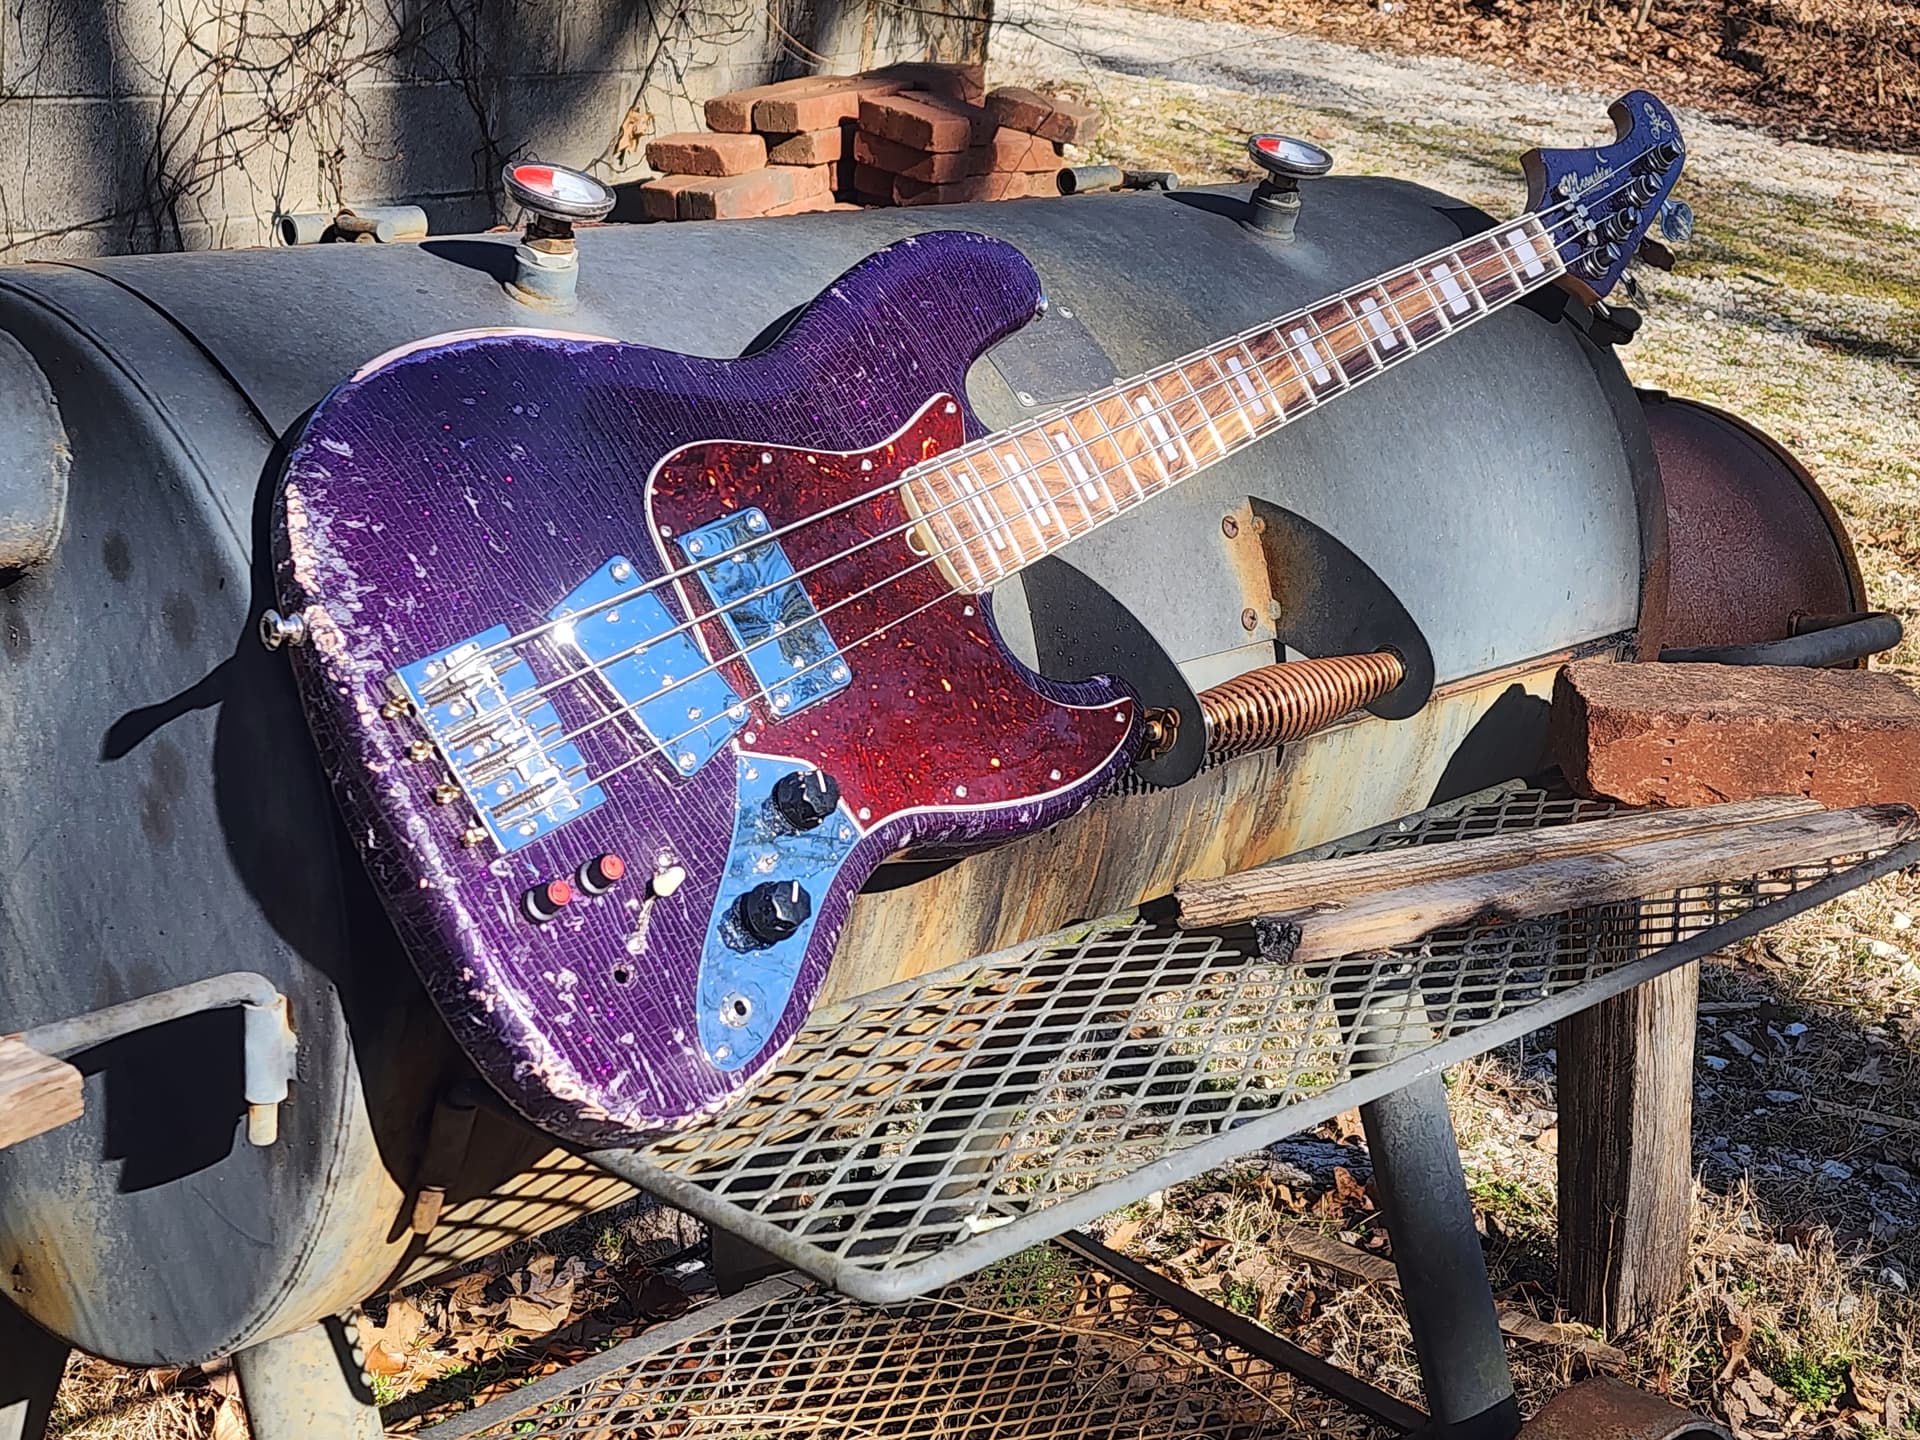
I strung it up with a new set of stainless roundwounds. I’m normally a nickel roundwound player, but I want to do anything I can to get this bass sounding as bright as possible.
I still have to properly set it up, as well as making a few changes. The badass II bridge has the string slots cut in a pretty tight string spacing, the outer strings are over 1/8" to far in on each side. I will swap it out for one with standard Fender string spacing.
I am also going to add a small spacer under the bridge position pickup to put it a little closer to the strings. Not that it really needed it. Lol.
I plugged it in. Wow. There is no denying that these are mudbuckers, these Artec pickups are hot! It will be interesting to get it set up properly, I’ll know more about how it will sound then.
I plugged it into my bench rig, a Trace Elliot ELF head with a 12" cab using a Hartke metal cone speaker. I had the volume low and I didn’t mess with the EQ. With this setup, it was a lot of overdrive. All of the controls work, and you can control the tone by utilizing them. I could get different sounds/tones. Once again, I’ll know more when I get it set up properly. If needed, I do have a way to cut the output of the pickups.
I will post pics. I have to get back to work in the shop, so I’m going to let it settle. Then I will work on it as time allows. So far, I couldn’t be happier with the outcome.
A few pics…
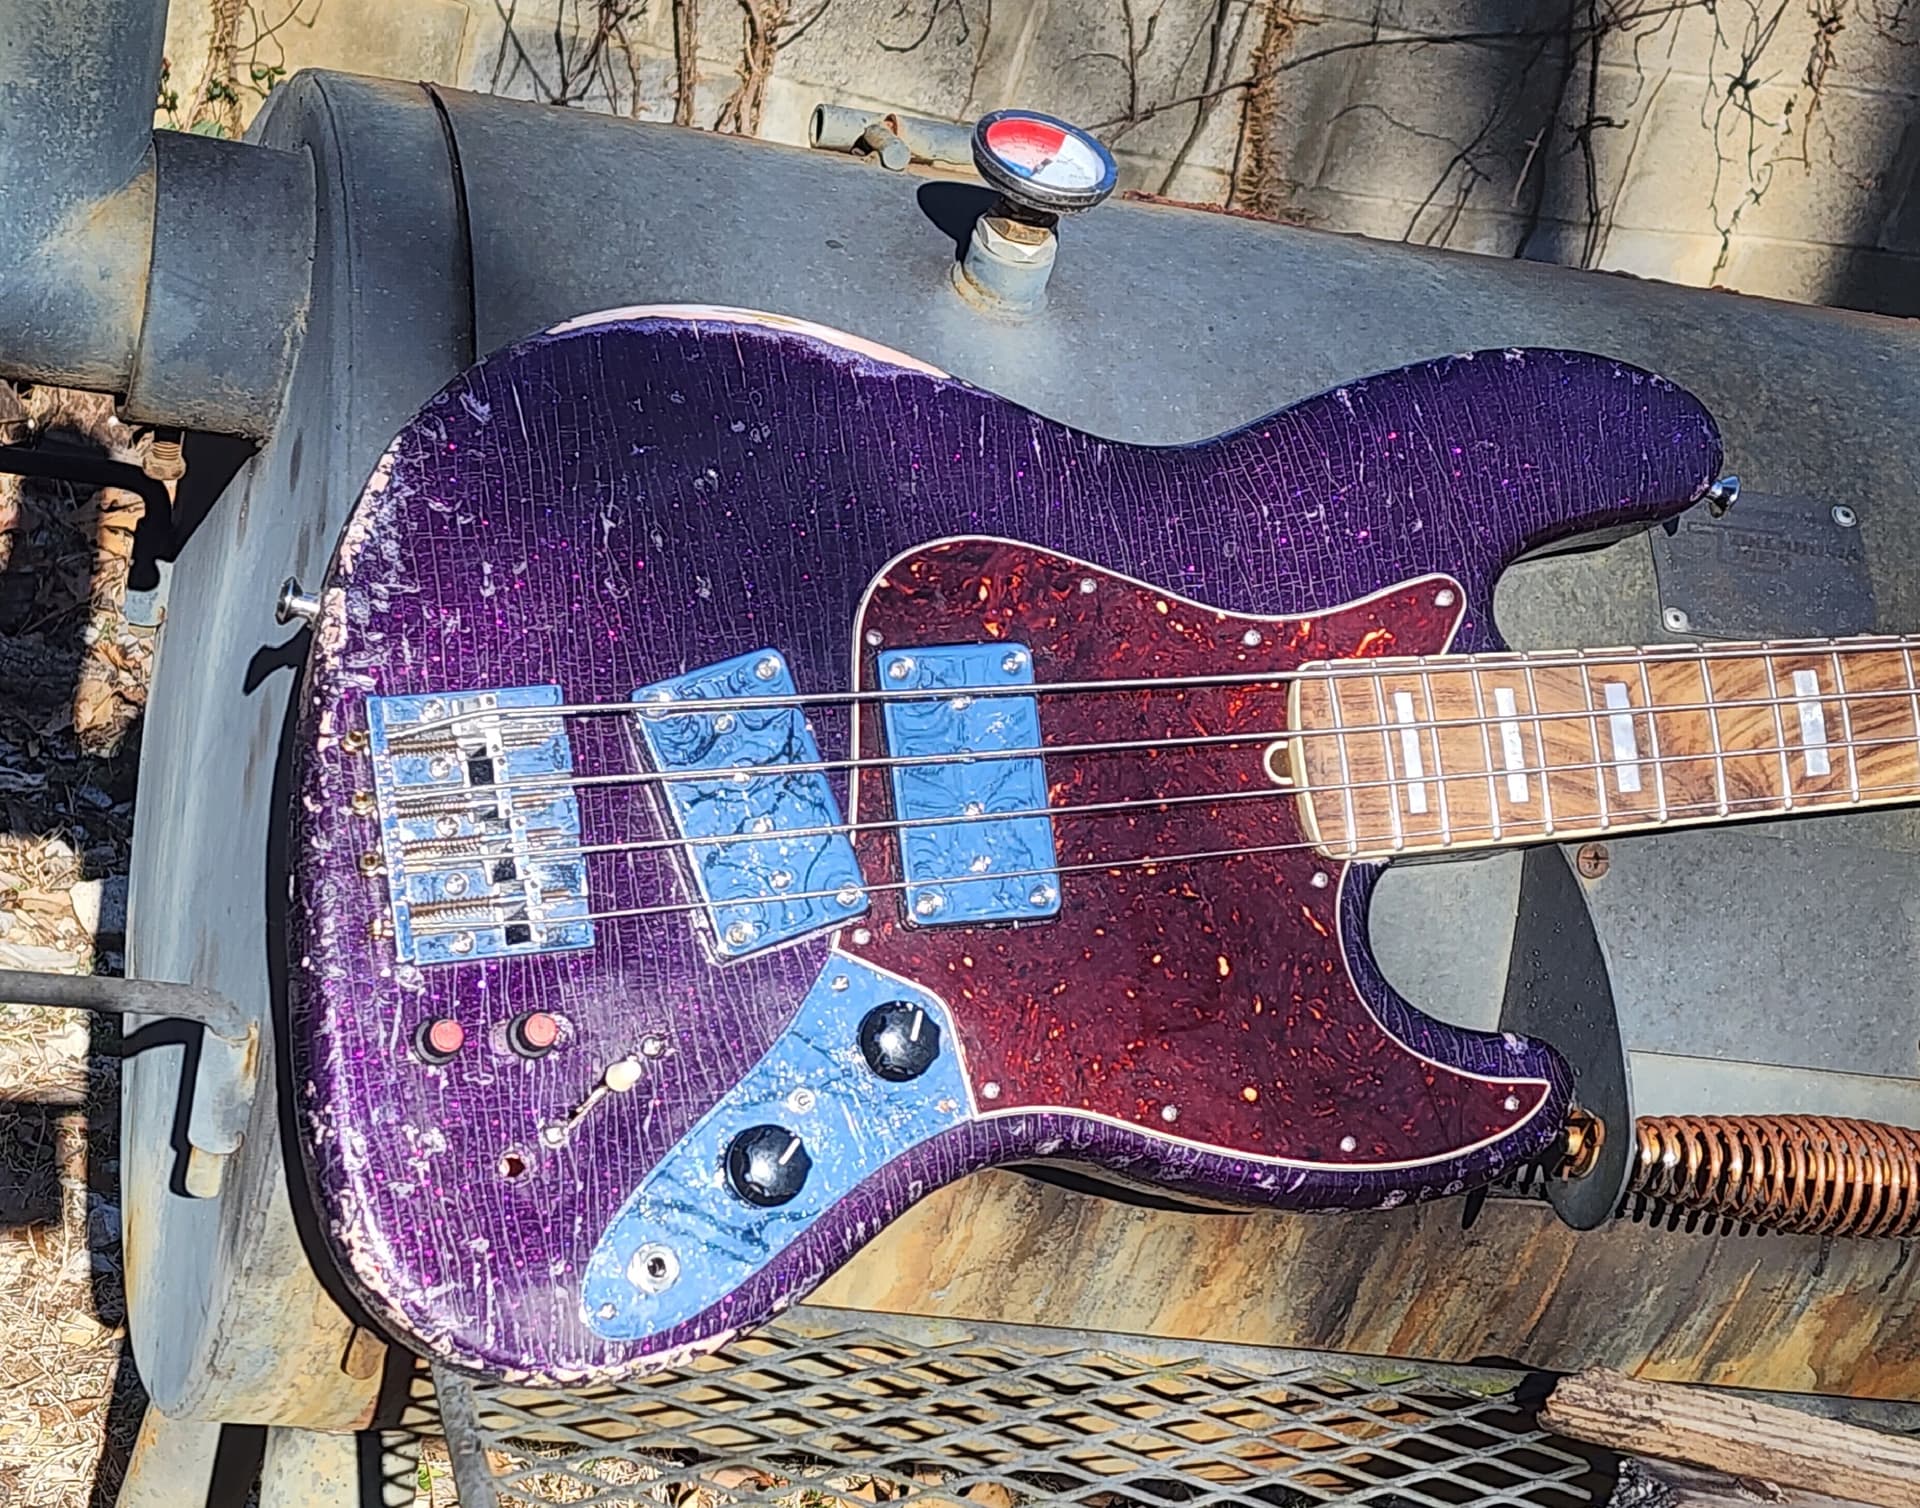
I corrected the string spacing issue. I also did a set up on the bass, I was able to adjust the neck and lower the action. It’s playing really nice, and I’m loving the sound.
I feel like if that bass could speak and suddenly said, “So this one time at a club in Shanghai…” we would stop and listen to whatever barely believable tale would follow.
I’ve spent a few days with this now. The neck is settling in (finally. Lol), and after tapping/gluing down several high frets, I’ve been able to get the string height pretty low. It plays so easy. And as a plus, there’s no need for a spacer under the bridge pickup.
I did lower the A/D string pole pieces and raised the E/G pole pieces, it really helped to balance the string volume.
Overall, the bass sounds aggressive (big surprise). It definitely has the Mudbucker tone, but it does get some really cool top end “twang” as well. The controls works as expected, the boost/cut switch for when the two pickups are together, is subtle, but useful. As is the two pickup coil blend knobs; the difference isn’t huge, but it subtly works.
When you hit the control bypass by hitting the puch-push tone control, all hell breaks loose! I hadn’t realized just how much output is suppressed by going through different pots/caps/resistors/etc… Wow. It makes a hell of a boost!
You can tame it by rolling off the tone, I have the better quality tone pot. I will be replacing the one I have now with it. The one I have now has almost no friction to the sweep; it moves when you just barely touch it.
I have a new kill switch; this one is momentarily open, which is the circuit I need.
I actually think I’m done with this one. Nice to complete on for a change.
I’ve been playing around with video, I hope to do a video on how this bass sounds soon.