Build Kit Documentation (Harley-Benton P-Bass)

Outside of the door? :thinking:

2 Likes

On my way back now. I was worried that more customers would be there since it’s Friday noon/afternoon already but the clerk to customer ratio was about 2:1 so when I asked about my build project someone took time for me. I got the clerk who already helped someone else with instrument builds as he claims.

When I asked what to do with the body he told me he would just oil it. He explained the possibilities of fake veneer but since I said from the start that I don’t have experience he said he would keep to sanding with 240 grain and oiling. The other instrument building guy supposedly used an oil for kitchen worktops because it creates a more resistant finish than most. He also mentioned that I could lick the bass when it’s finished as it is food safe.

I… I did not want to ask him about paint because he’s a wood guy and was all like “nah. I would not do anything to that” and since I tended to a clear finish anyway I did not want to break his heart a little.

So now that I have the tools needed the next step would be the headstock shape. But inspiration hasn’t struck. I am thinking of just some standard manufacturer shape to copy but then again why not an individual touch?

3 Likes

Okay… sounds like the wood guy liked the wood. :blush:
But… where were your keys?

3 Likes

Are you planning to upgrade any of the components or sticking to the kit? I’m looking forward to this thread as the idea of putting a bass together has always appealed to me and I’ve looked at the kits a few times instead of getting all the parts together

2 Likes

I edited in right around the time you and Krescht answered to that post so it probably didn’t give you a notification.

Right now my idea is just to get some experience under my belt regarding builds. I don’t want to skip essential steps but only do as much as is necessary to get it to a good looking instrument that hopefully plays nicely so I’m sticking to the kit.

I think equipment changes would still be possible after the fact like different pickups or stuff like that.

2 Likes

So since it seems to me my caped bassist premiere was generally well received I had this idea:

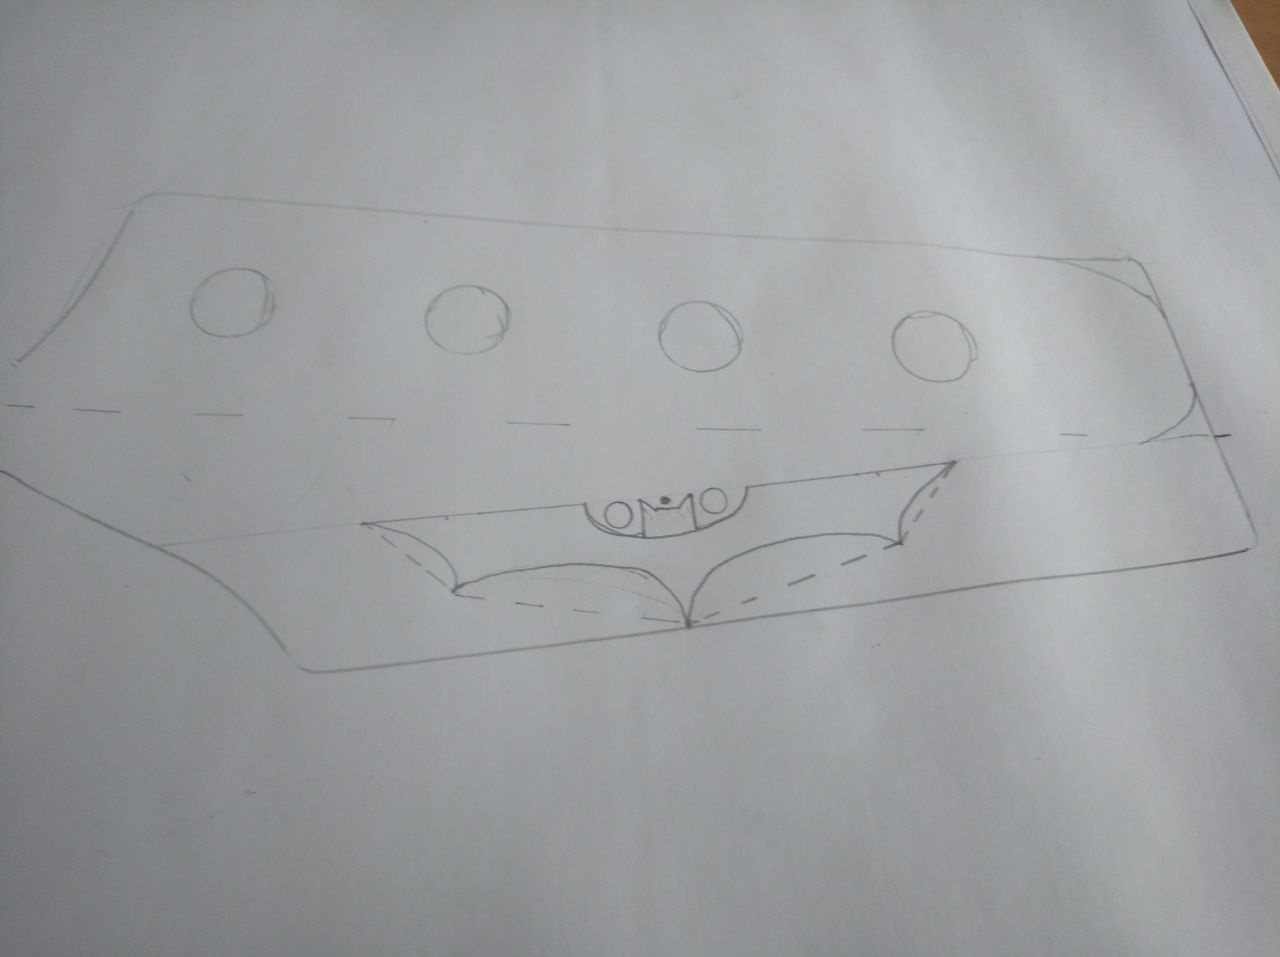
I tried it without the head of the logo but that just doesn’t look right. I think I’ll try my best and still have a failsave of just removing the batman logo alltogether and just have a headstock with a rounded end.

4 Likes

I feel like this is spamming but if someone asks me to document something I’ll thoroughly document it:

Preparation:

Execution Part 1

Execution Part 2

Since I sand an recoat it anyway maybe I should have used something more permanent. It’s hot and I’m sweating and as soon as I touch it it gets smeared.
Well… after the 3rd shower today I’m gonna leave it at that for now as all “noisy” work is done. The rest I’m gonna do by hand with files and sandpaper and so on.

Just not sure about the head thing. I think I’ll cut out an ellipse for the head so just the wings are connected to the headstock and not the head itself. Got enough space to work with so why don’t use it.

6 Likes

always start your holes on the front side, to avoid wood wrenching on the most visible side

3 Likes

yes! I think it’s not bad because I think I will still cut the splinters out but yes. I noticed.

3 Likes

just a little advice because I was here :joy:

3 Likes

I feel a little stupid for not thinking about this while starting and it is good advice. I would have given it in the next post :wink:

2 Likes

the very good way if you use only hand tools (from what I see on your pictures) :

  • start to drill slowly a very small hole, let’s say 2mm (diameter), with a metal drill ; this won’t wrench or just very very little
  • use this hole as a pilot hole for your real-size hole : only drill half (roughly) the width from one side …
  • … then drill from the other side to the other half to make a full hole

no wrenching at all, with no heavy machine or tool :sunglasses:

6 Likes

I don’t have a hand drill. But I’ll try a small hole and drill from both ends. Seems like a good approach.

Any tips for filing/sanding the shape I want?
That I planned to do by hand anyway.

4 Likes

I would use rasp and files , then sandpaper

6 Likes

Yay! I did something right. I’m still using rasps though. Solid wood is pretty solid. I’m sweating like a pig and am not even half done with the outer shape.

5 Likes

For your game modeling, do you have a dremel tool? Dremel tool router bit might help. I’ve wanted to try that before.

4 Likes

After spending literally 2 hours (I know - I was watching netflix) and not really getting far I am thinking about another trip to the store to get some more tools like the dremel you mentioned. I think what I still need/want is:

  • dremel
  • different grains of sandpaper
  • files
  • something to help me hold the piece I’m working on in place

I think that’s my list for now.

3 Likes

Don’t forget eye protection :slight_smile:

Pro tip: the cutting side of the dremel should be rotating away from you.

I’ve never used one on wood but always wanted to try.

With the sandpaper, you’re using a sanding block and not just fingers, right? That should help.

5 Likes

Good call! Thank you very much.

In fact the wood guy said to me “Mhhh the shape (of the body) is not big enough to warrant a sanding block. It actually might become a hindrance as it is flat and with your hand you can be more precise.”

So I’m your guinea pig now? :fearful:
No In fact @Mark_UK send me a video as private message (I assume as to not derail this thread and keep it to the build) but as I see it as relevant now: http://www.pauleira.com.br/customizacao/batman-sg-custom/
That’s a dremel they use to cut out the logo shape, isn’t it?

4 Likes

Yep!

I know the Guns&Guitars guy uses one extensively too. So there’s precedent, I’ve just never done it myself. I’ve only worked on metal with mine.

5 Likes