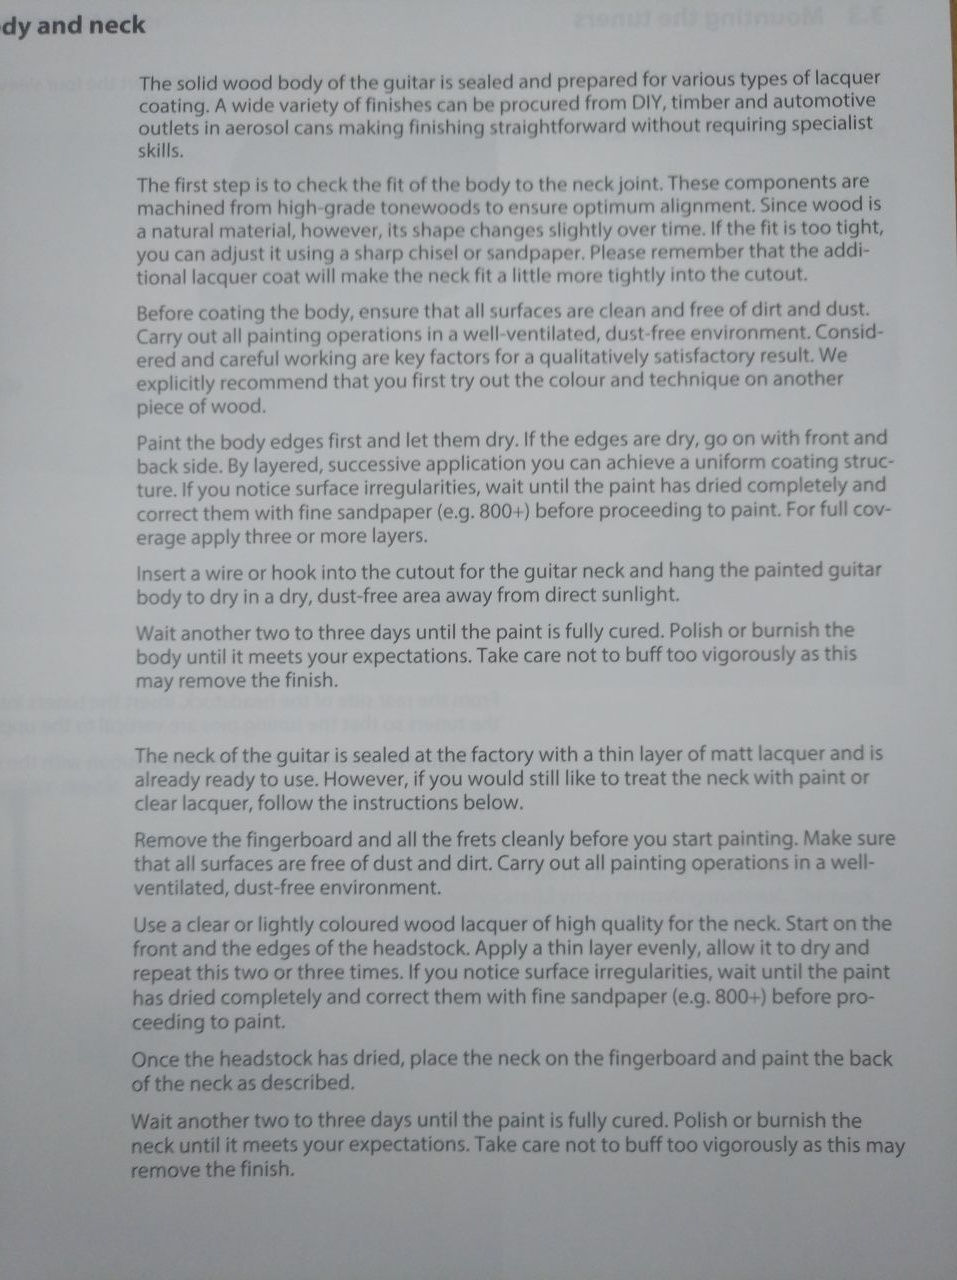
So the instructions say the body is already sealed and prepared for laquer coating but my first step is to take the body to a DIY/home improvement shop and ask what exactly I should do with it to paint it and finish.
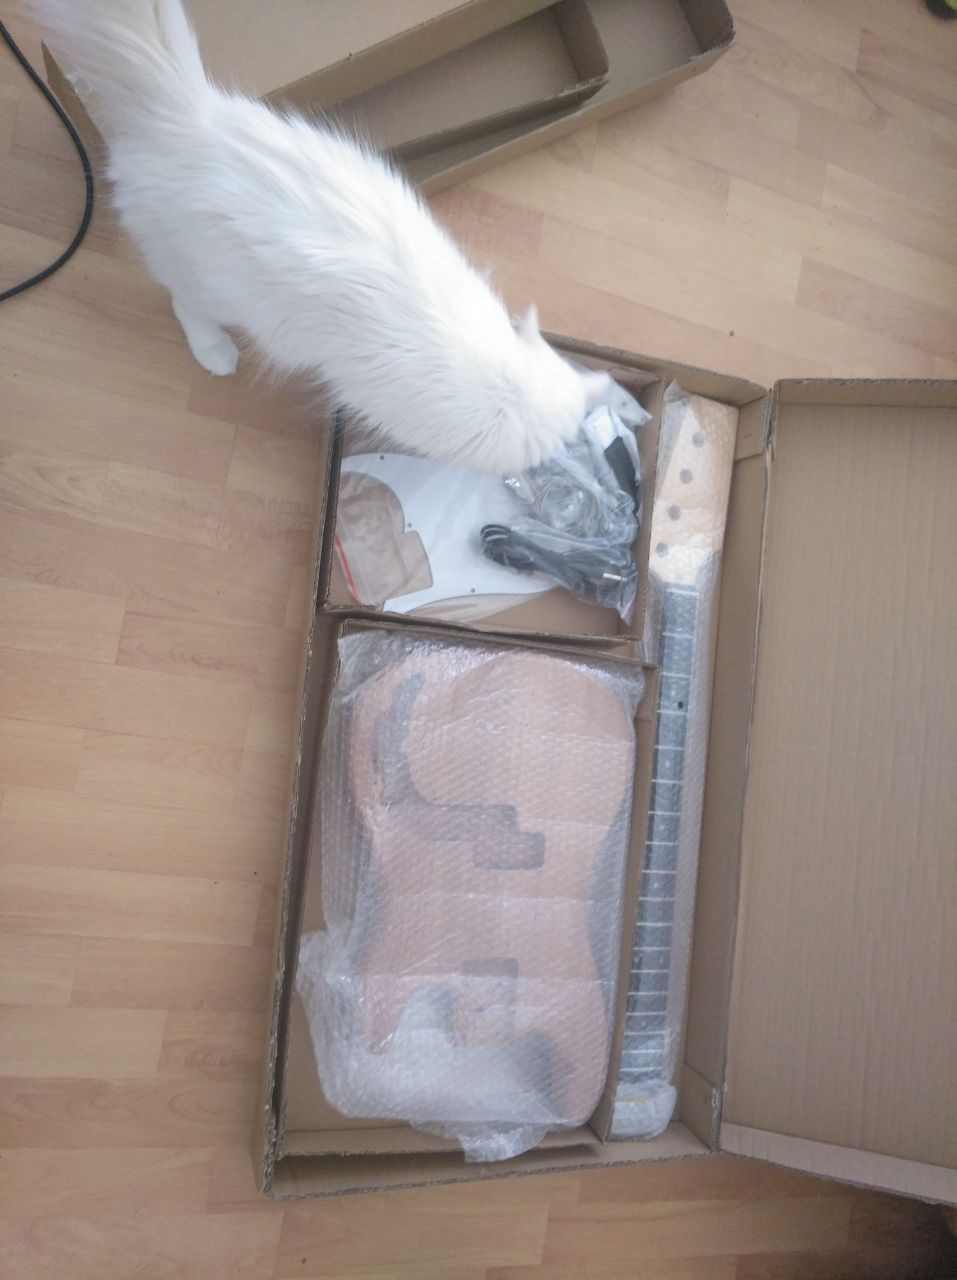
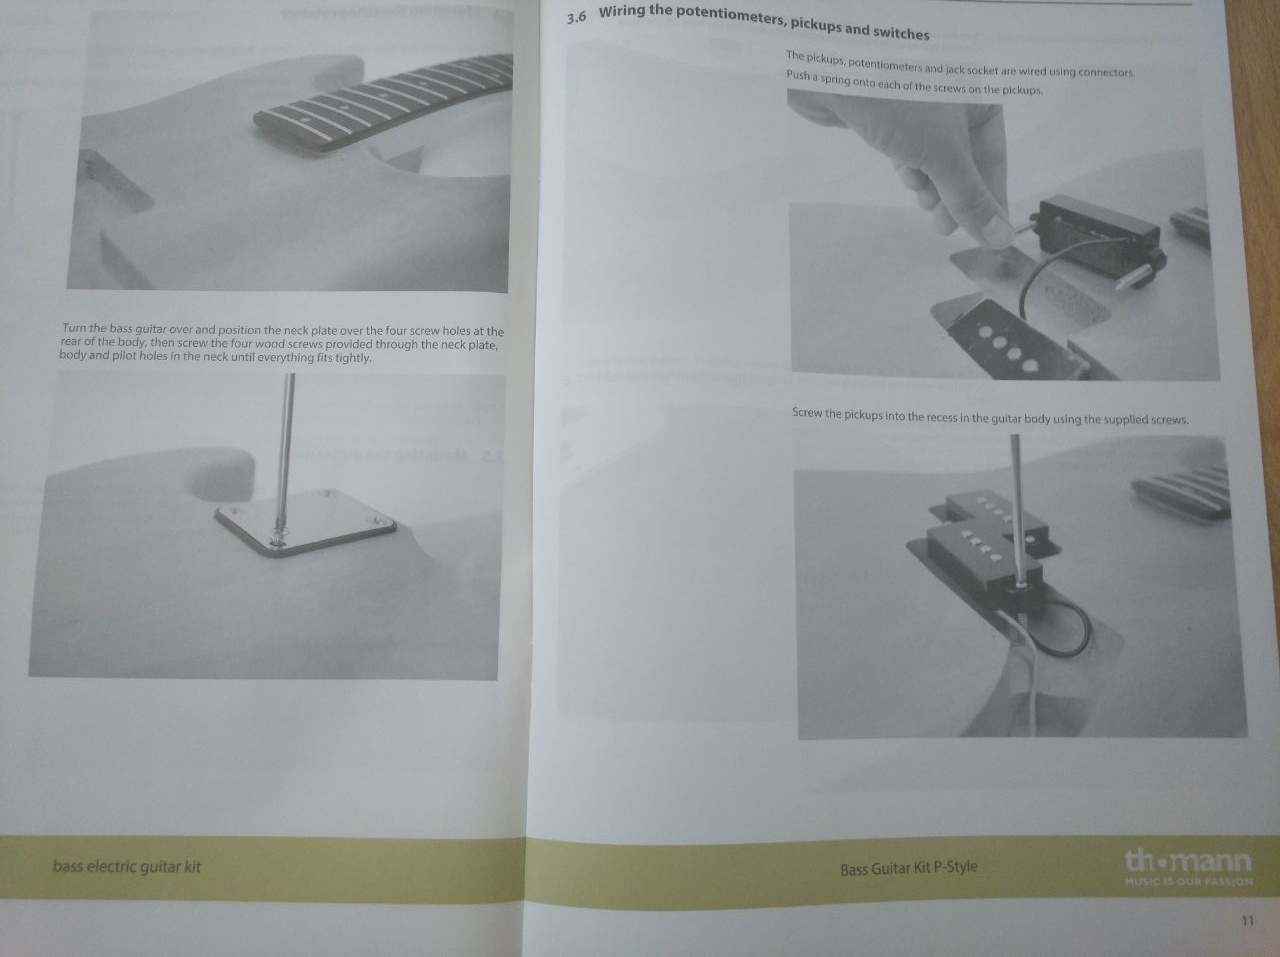
The instructions were also available in German and of course I did not make pictures of every page. Just the ToC to have an overview, the neck & body page for you guys to give feedback and just a random page with pictures to show how the detailed instructions look like.
I’m playing around with ideas but so far I tend to a clear finish.
Also… where are my $"#+"ing keys. I wanted to go an hour ago but I can’t find them I’m losing my mind right now. Probably right in front of me or in my pocket… something like that. I checked both.
I did that. Yesterday but I can’t remember what I did after accepting the package of the DAI. I took my keys, went down the stairwell and came back up with the package and put the package down on my bed no recollection of what I did with the keys. No keys on the bed and around. I also checked the empty packages I have not yet thrown away.
Got it
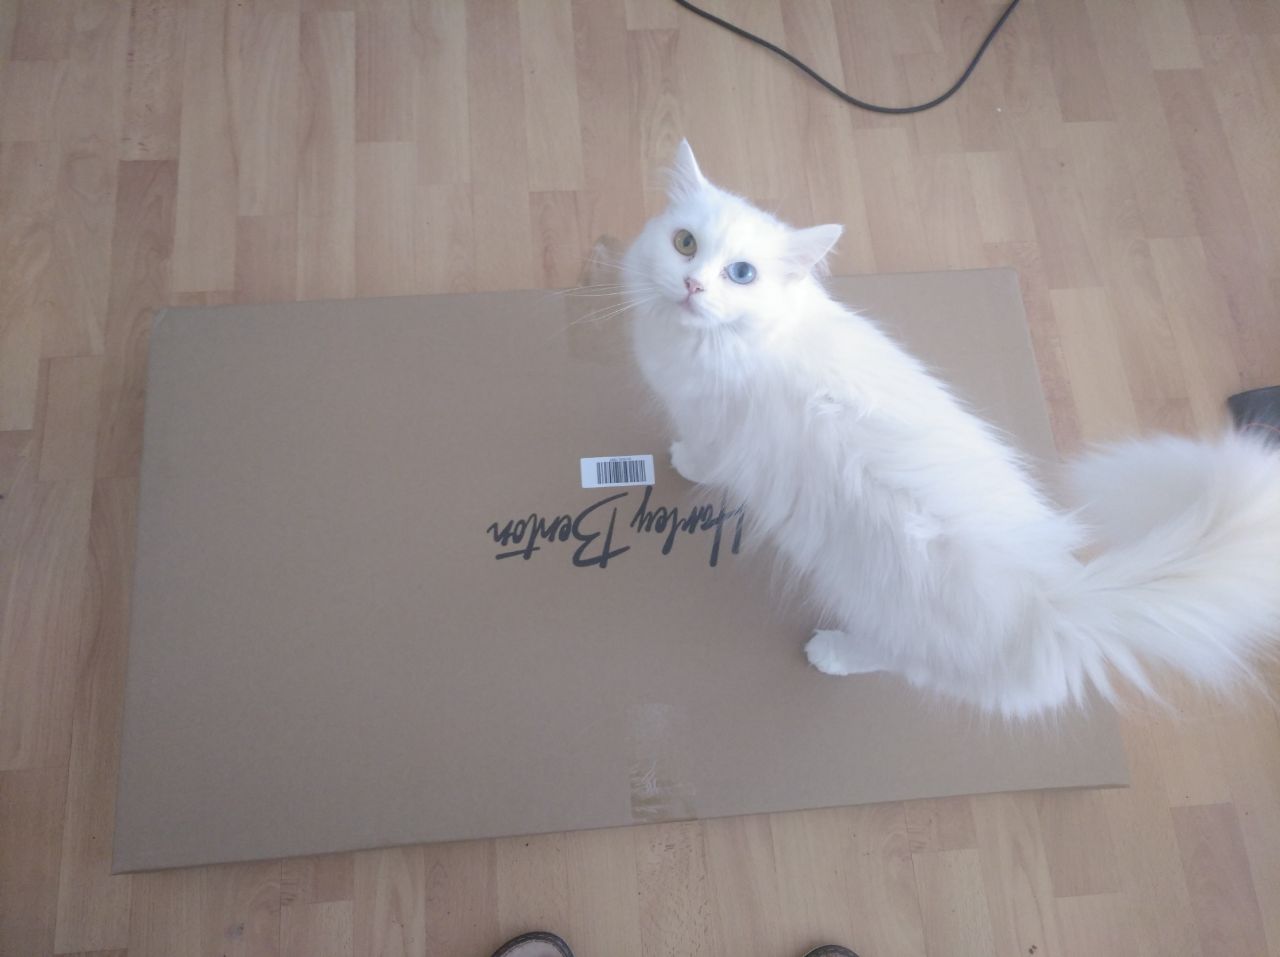
Forgot that I took the keys to accept the package of the bass build but as soon as I was ready (was still in bed when the doorbell rang) he already was up - which is unusual as I live on the 4th floor without an elevator. Usually I meet them halfway to be kind to the delivery guys and to get some movement for myself
So I opened the package and placed cardboard over my keys and I even checked behind and next to the box but didn’t notice something was under it. Thanks @peterhuppertz. Always helps to just calm down in those almost panicky “where is it?” moments.
On my way back now. I was worried that more customers would be there since it’s Friday noon/afternoon already but the clerk to customer ratio was about 2:1 so when I asked about my build project someone took time for me. I got the clerk who already helped someone else with instrument builds as he claims.
When I asked what to do with the body he told me he would just oil it. He explained the possibilities of fake veneer but since I said from the start that I don’t have experience he said he would keep to sanding with 240 grain and oiling. The other instrument building guy supposedly used an oil for kitchen worktops because it creates a more resistant finish than most. He also mentioned that I could lick the bass when it’s finished as it is food safe.
I… I did not want to ask him about paint because he’s a wood guy and was all like “nah. I would not do anything to that” and since I tended to a clear finish anyway I did not want to break his heart a little.
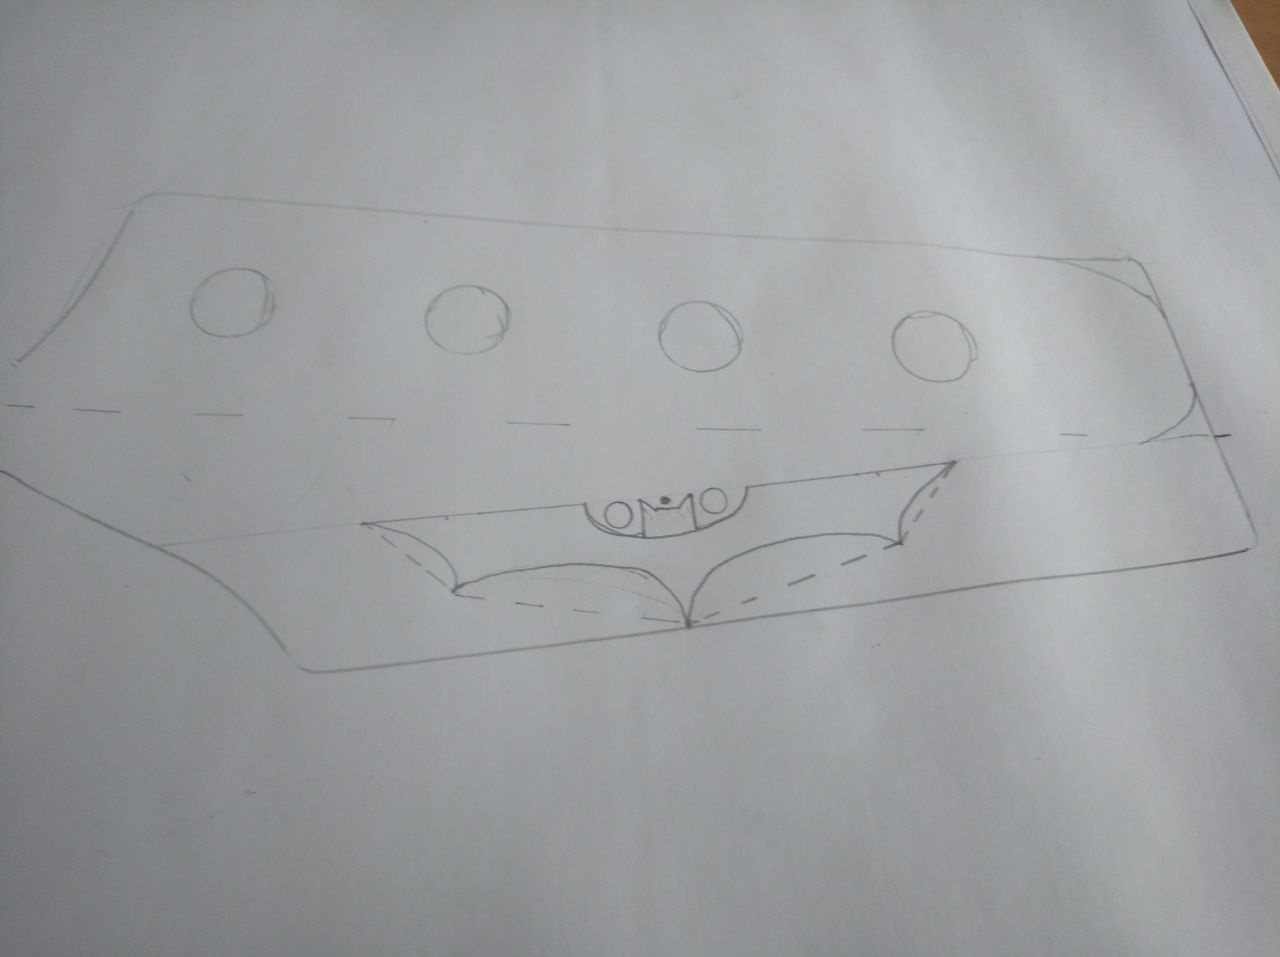
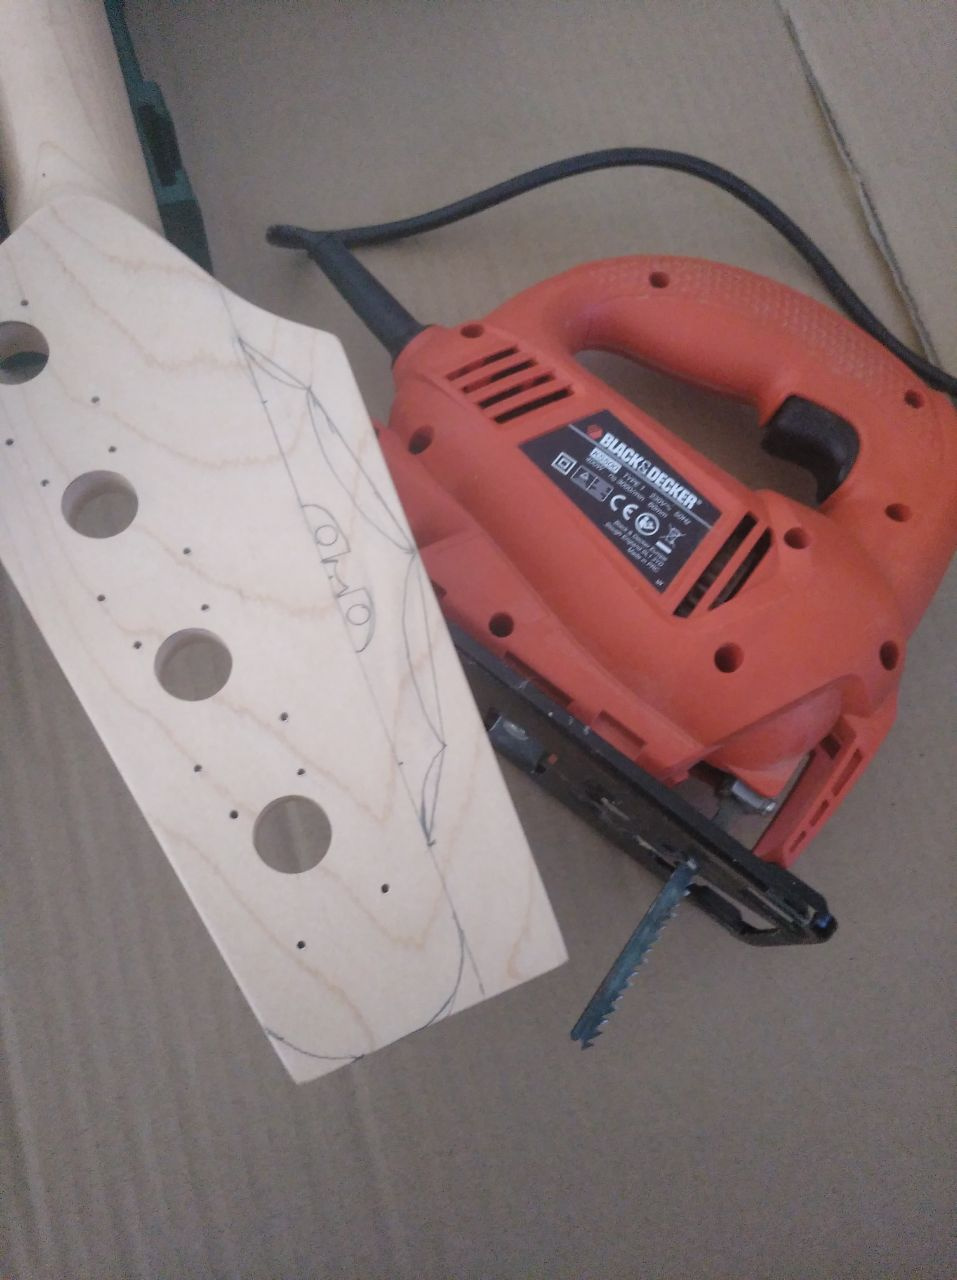
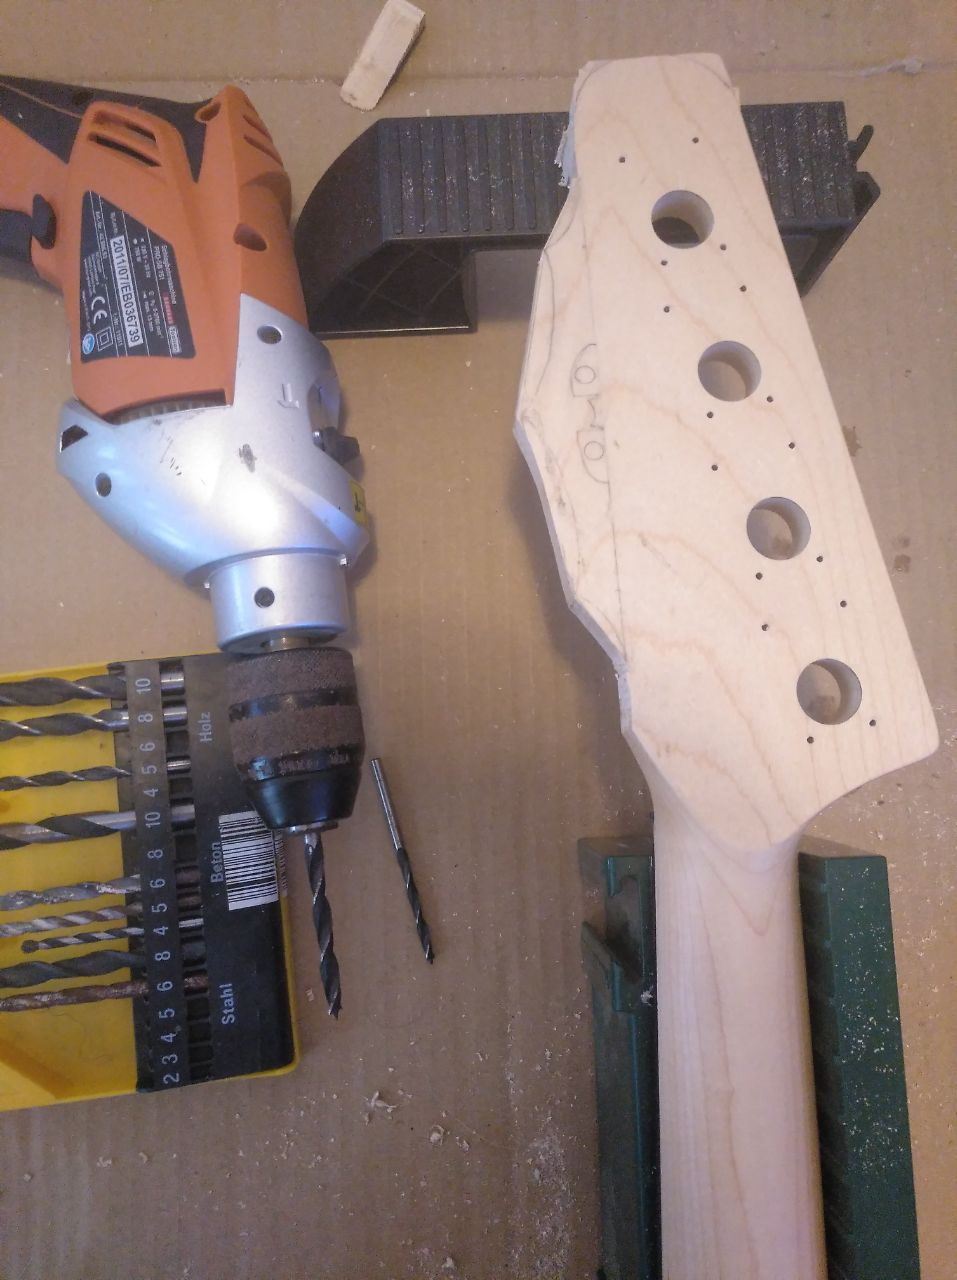
So now that I have the tools needed the next step would be the headstock shape. But inspiration hasn’t struck. I am thinking of just some standard manufacturer shape to copy but then again why not an individual touch?
Are you planning to upgrade any of the components or sticking to the kit? I’m looking forward to this thread as the idea of putting a bass together has always appealed to me and I’ve looked at the kits a few times instead of getting all the parts together
I edited in right around the time you and Krescht answered to that post so it probably didn’t give you a notification.
Right now my idea is just to get some experience under my belt regarding builds. I don’t want to skip essential steps but only do as much as is necessary to get it to a good looking instrument that hopefully plays nicely so I’m sticking to the kit.
I think equipment changes would still be possible after the fact like different pickups or stuff like that.
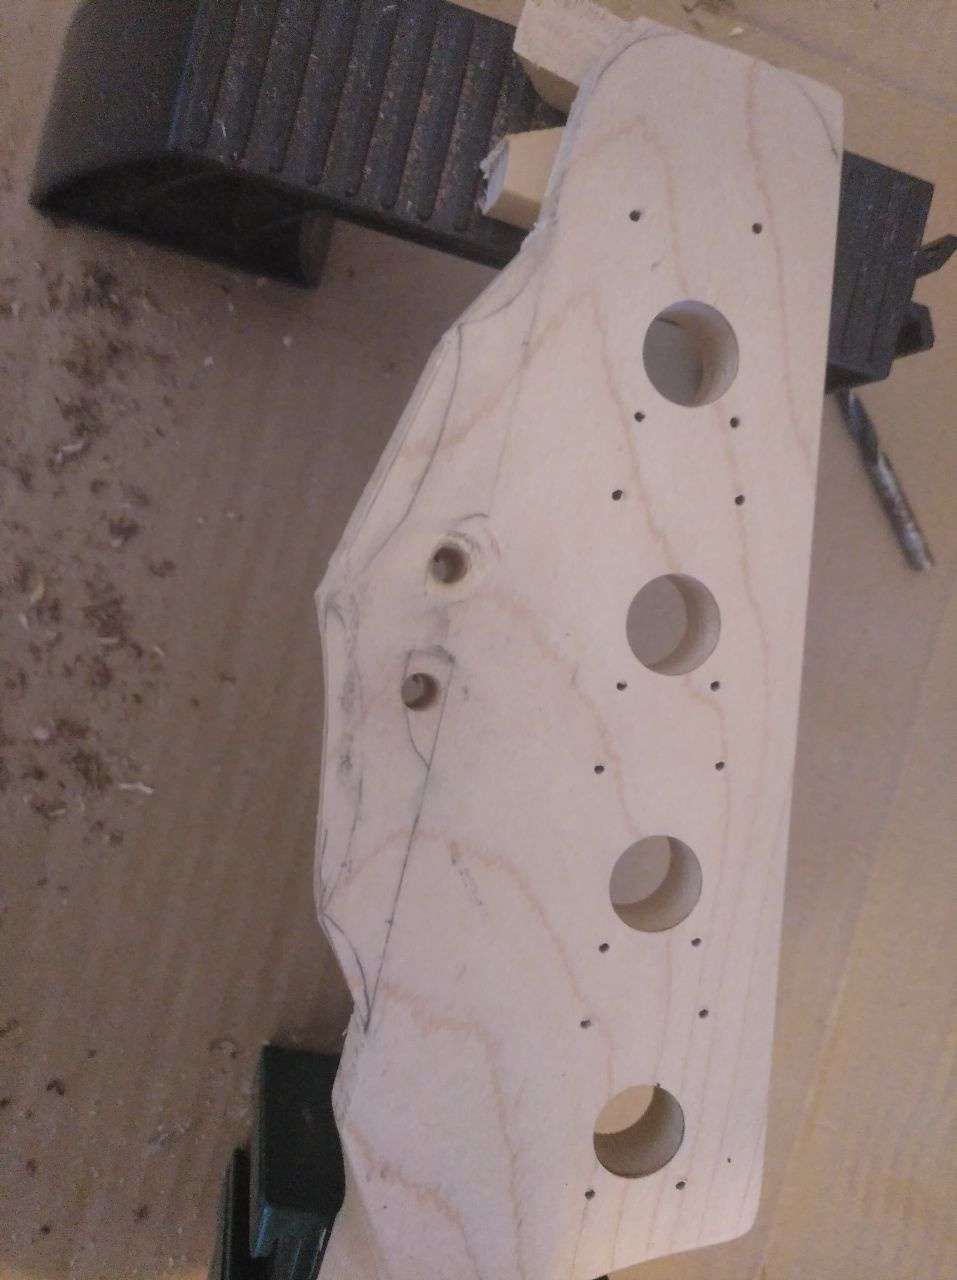
I tried it without the head of the logo but that just doesn’t look right. I think I’ll try my best and still have a failsave of just removing the batman logo alltogether and just have a headstock with a rounded end.
Since I sand an recoat it anyway maybe I should have used something more permanent. It’s hot and I’m sweating and as soon as I touch it it gets smeared.
Well… after the 3rd shower today I’m gonna leave it at that for now as all “noisy” work is done. The rest I’m gonna do by hand with files and sandpaper and so on.
Just not sure about the head thing. I think I’ll cut out an ellipse for the head so just the wings are connected to the headstock and not the head itself. Got enough space to work with so why don’t use it.