Exactly @John_E this is the bass I was going to do on my own
5 Likes
If I can recommend anything, make some sort of record of the various setup steps prior to adjusting. That way you can always go back with some accuracy if things go south.
EDIT: With my first bass, an Ibanez GSR200, I didn’t and it took me a long time to bring it back from whence I took it. Think of a bull going to the bathroom through a sewn up bum. That’s what it sounded like, and for the life of me I couldn’t undo it.
3 Likes
That was my thought too. Every time I make a change I take a picture.
1 Like
Jenny Jenny, who can I turn to?
You give me something I can hold onto
Looking good mate
4 Likes
That’s really cool. Those moments are worth heaps of gold. And he got a custom bass out of the deal.
5 Likes
@MC-Canadastan @John_E , what would be the technique to use to cut a rectangular battery compartment in the back of finished currently passive bass?
So far I’m thinking I drill 4 small pilot holes at the corners from the interior out the back side to mark the hole positions. Then I’m thinking I want to drill a larger size hole starting on the finished back side and drilling into the compartment so I don’t break out the back side finish. Then is it possible to connect the dots into a rectangle with a sabre saw without ruining the back side finish? Or do I have this completely wrong?
Any help is greatly appreciated. I know almost nothing about woodworking procedures.
2 Likes
Not an expert but I am going to guess you would use a router, not a sabre saw.
5 Likes
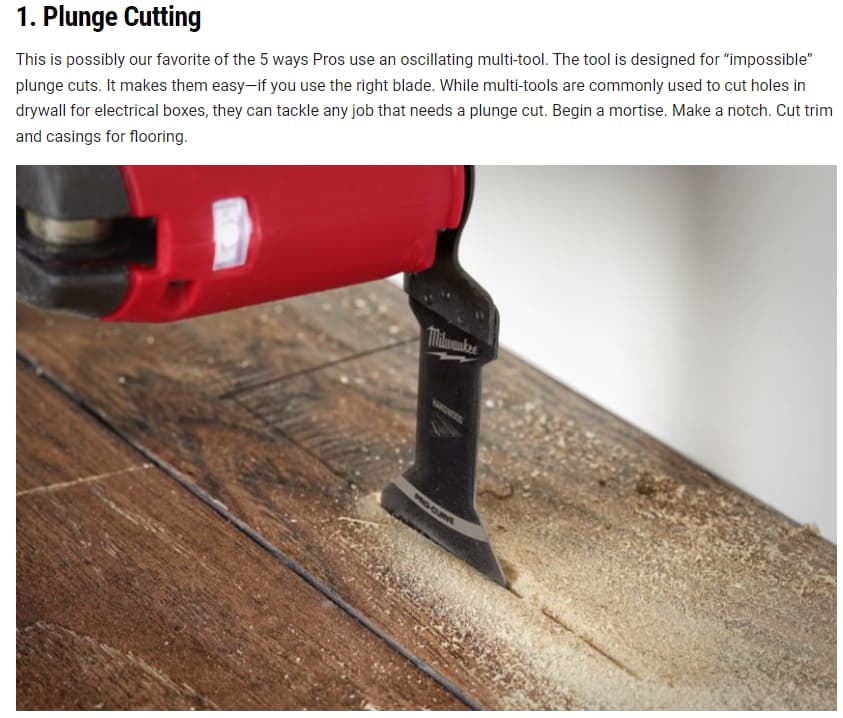
The perfect tool @DaveT is an oscillating flush cut saw. The blade oscillates back and forward making a thin straight kerf.
If you could borrow this tool then that’s the puppy.
To make sure you don’t over cut or have the saw run on you and damage the bass. You could cut out a rectangular template the size of the hole you want to cut. Then use it as a guide for your saw cut. This then sets the boundary of the compartment.
You’ll still have to hog out the meat of the wood. A nice forstener bit and a steady hand with the drill will get most of it and finish with a chisel.
I do this for a living so it’s the only thing I’m really good at. Feel free to message me about this stuff any time.
6 Likes
4 Likes
That’s exactly it. You’re using the flush cut to set the edge of your compartment. You’ll plunge to the depth you want. Then when you hog out the centre of the compartment the wood won’t chip on the main body of the bass
So you’re establishing a boundary and then digging inside that. If that makes sense?
4 Likes
Yes, that makes sense! Perfect, thank you !!
2 Likes
The other way would be a mortise bit in a drill press, no @Barney either instead or after you cut that line, but would not be necessary to make the outline. This is how I extended a channel on the front for a battery to drop into.
That said, much more specialized equipment.
I would imagne the battery box lip would cover any mess of edges with that saw, but you would still want to tape it all off and be very careful I think.
5 Likes
@John_E sure this is the gold plated solution but unlike me and you I’m sure most people won’t own a drill press with a mortise bit.
I figured it would be easier to borrow a flush cut saw.
But as you say definitely use green painters tape over the whole area. It’ll allow you to draw where your cut goes and also protect the finish should anything get accidentally dropped on it.
5 Likes
I do have the drill press but not the mortise bit (yet). I’ve used that press to widen the tuner peg holes on the P Bass (Turquoise Waters) because it has a Squier neck but I had bought the larger tuner machines for it. It’s a low speed press, which is fine, but if you’re going to mortise something you’d better make sure you have the height correct or you’ll auger through the whole body.
3 Likes

Mute it. You don’t want to listen to nearly 7 minutes of dissonant distorted guitar chord wankery. Or maybe you do ![]()
4 Likes
Sure you’ll need the adapter to use the bit. They usually include the bits with most adapter kits. Here’s a simple explanation of it if anyone is interested in how it works.
Also if you don’t have a press you can widen peg holes with a hand reamer.

5 Likes
Wow, that is tremendously useful! Thank you. All kinds of ideas in there I wouldn’t have thought of. It’s good for starting to get used to how to think about this.
2 Likes
Musiclilly sells all kinds of templates, too, and cheaper than Stewmac, forgot to mention that. I’m thinking about buying some pickup templates… because reasons 
3 Likes
So, I’m going to build another bass, but this time I’m going to design the body myself and I’d like some ideas for parts. The basic design is going to look like this: $ since my first name begins with an S and the line would represent where the strings, neck and bridge would go. I plan to put the control knobs and the output jack in the lower part of the S (the right side bend sort of like where a P Bass would be) and I’m going to create my own pickguard as well. What I want from everyone is what kind of pickups should I use? I’d like to make it a J Bass. What about the neck and tuners? Any particular bridge?
3 Likes
I like my Seymour Duncan Apollo’s. They’ve got a nice tone, and are humbuckers so there’s no hum. All in a single coil.
3 Likes