I don’t know ! I got this bass as a cadaver, with a lot of pieces really worn up. but yeah it looks like it comes from a sunken pirate ship 
7 Likes
Saw this thread elsewhere. Where people replaced the boring grille on their Fender Amps with cloth. Not that I need a project but currently looking on Etsy as 70’s patterned cloth at we speak 
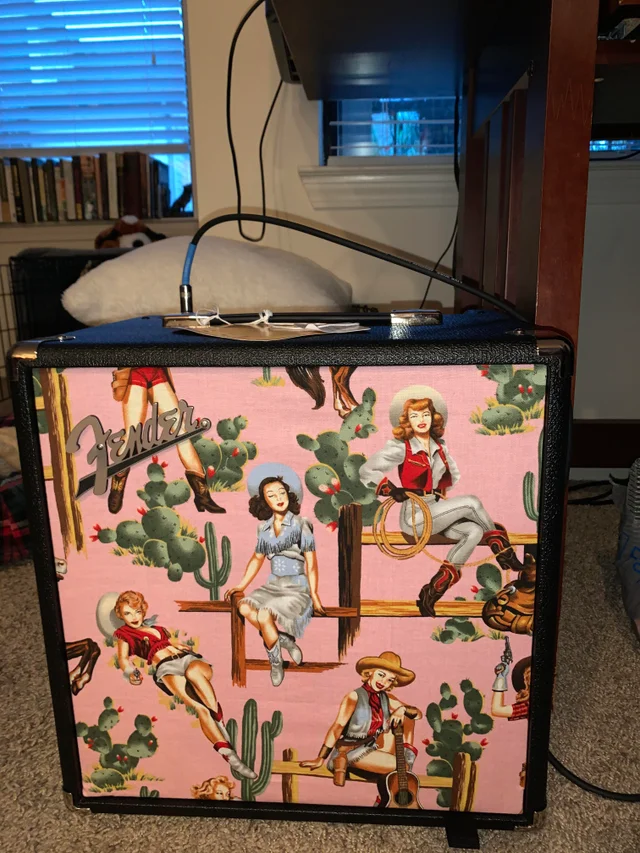
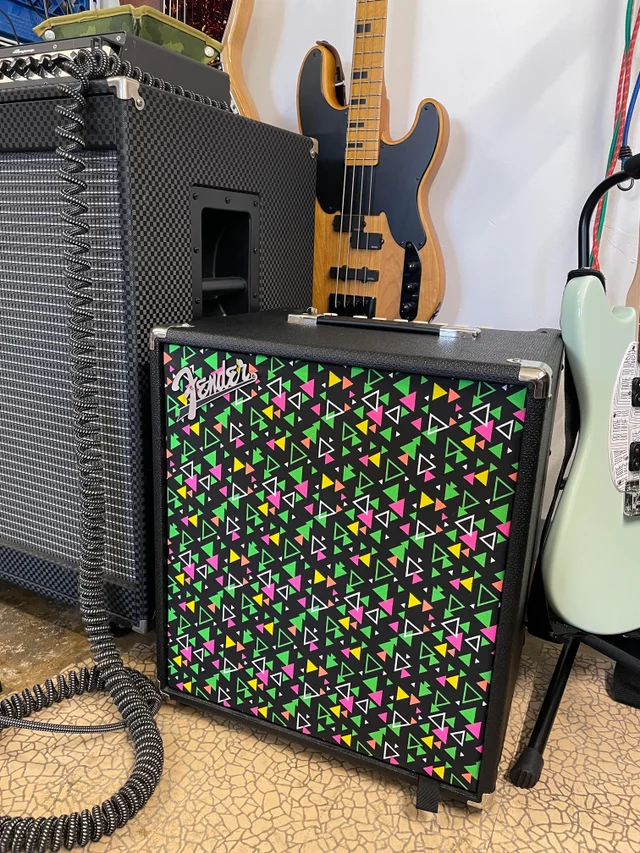
12 Likes
So… the saga continues. We (my GF and I) got past our need for immediate cash with the selling of 2 basses (a Carvin B5 and an Ibanez SR700). Which left me with active listings for my Carvin B4 (the “bent-neck bass” and the Warmoth neck I bought before I realized how much modification would have to happen to mount it on the B4.
I was just looking… a Warmoth body to match the neck would run about $500. And we’re rounding the corner into Christmas season.
So! I’ve de-listed the B4 and the Warmoth neck; I’m going to get a Warmoth body (probably the G4, it’s the most Carvin-like shape), mount the Warmoth neck I have, and move over all the components (pickups, electronics, tuners, bridge) from the B4 to the Warmoth. I will have created… THE WARVIN! Er… THE CARMOTH! Um… something like that.
But it should turn out pretty cool, and I’ve got a project now.
4 Likes
Welcome Mr. Warvin Carmoth! The bass that had a first and last name before it was even built.
Sounds like a good ending for all that. 

4 Likes
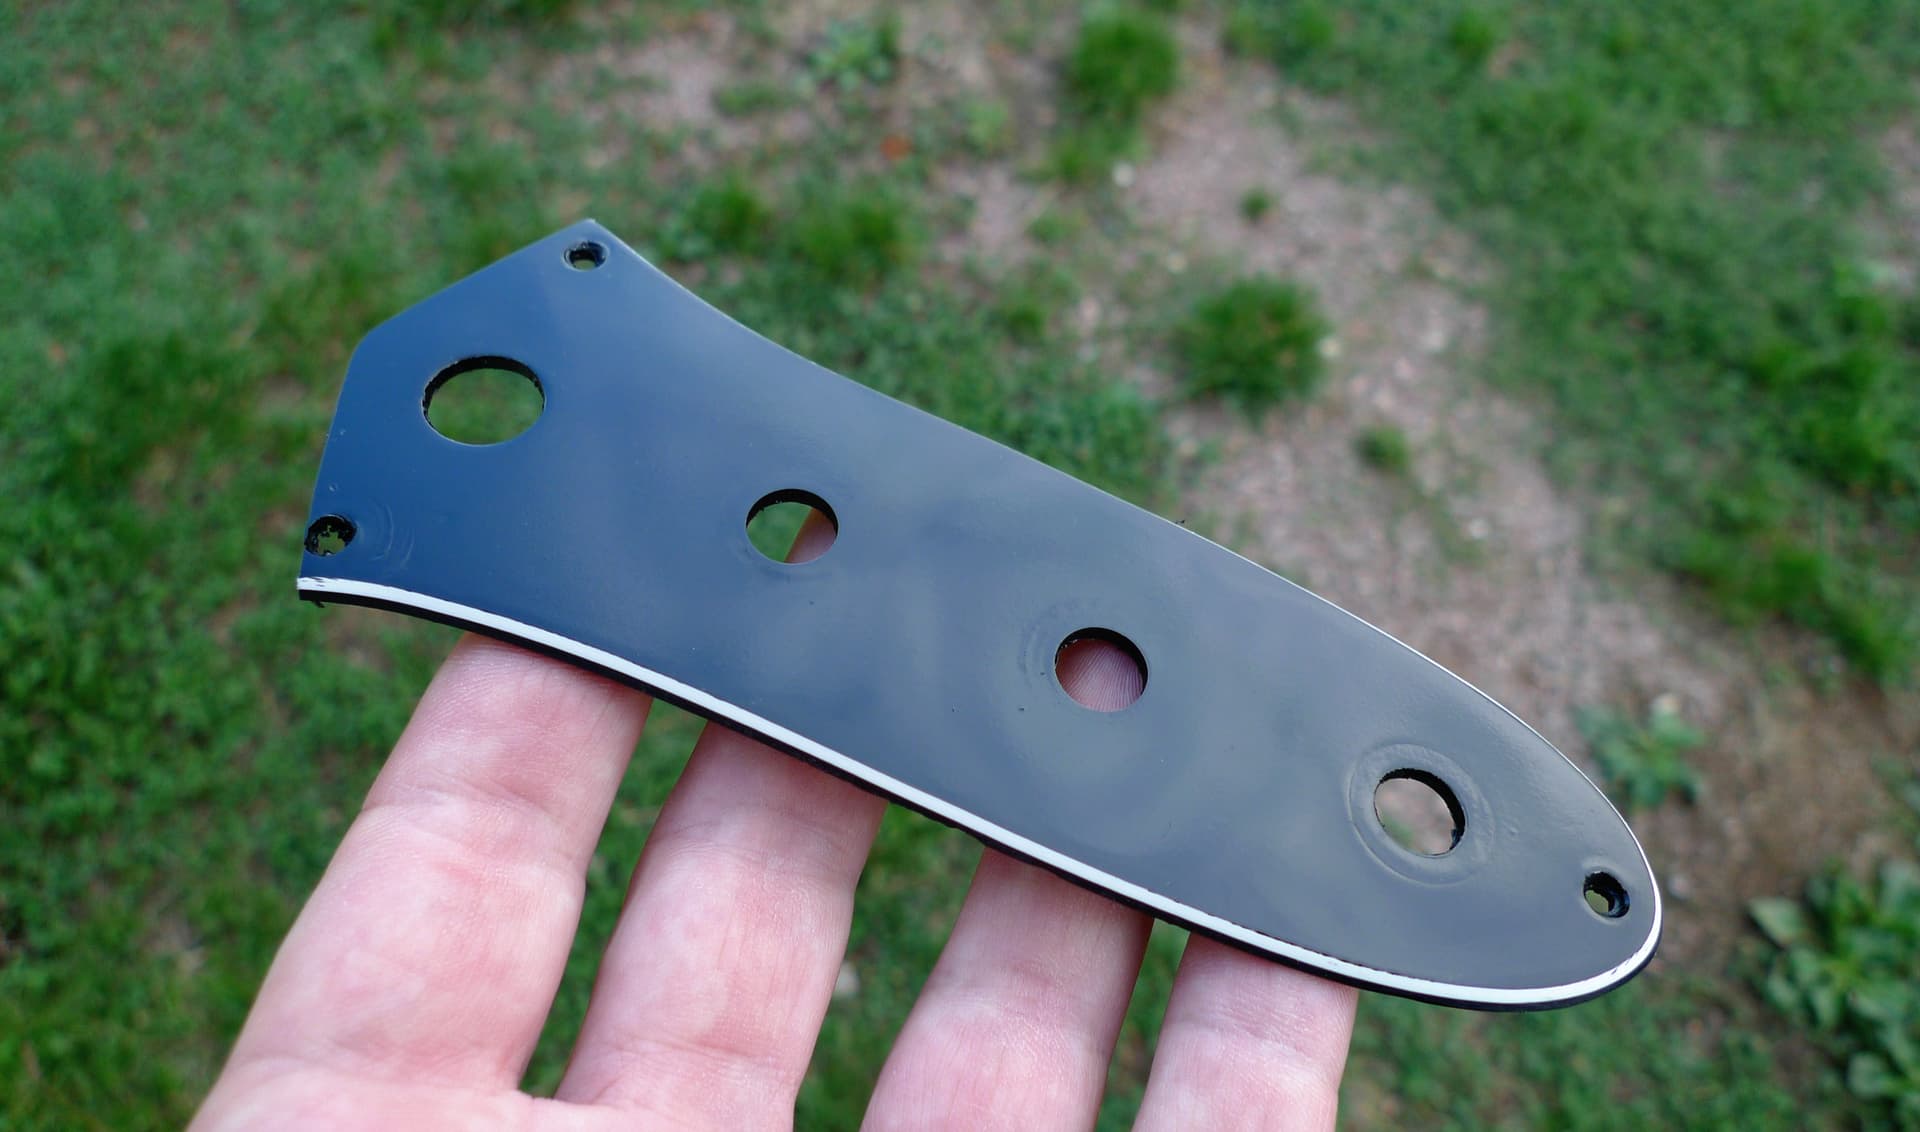
previously I used to wrap a black vinyle sticker over the white control plate, but I was not really pleased with the result. so I decided to go with paint instead, it’s not perfect but I find it looks better.
9 Likes
This is amazing! I just may have to look into this.
2 Likes
I’ve painted pickguards so have given thought to painting the control plate on my Mustang. I really don’t like the chrome one on there now. It’s like a magnet for greasy fingerprints.
Have you ever painted one like that? And if so what was your degree of success?
3 Likes
That is pretty cool!
3 Likes
I never painted a pickguard before. but the control plate is not much exposed to picks and other mechanical agressions so I’m quite confident.
If you want to paint your chrome control plate, I think you must de-polish it first so that the paint can stick to it.
5 Likes
Yes, I imagined I would have to sand it more than I did the plain/plastic ones. The only reason I haven’t tried it yet is that it would be really hard to match the white to the guard.
3 Likes
yeah it’s easier with black parts, for sure !
4 Likes
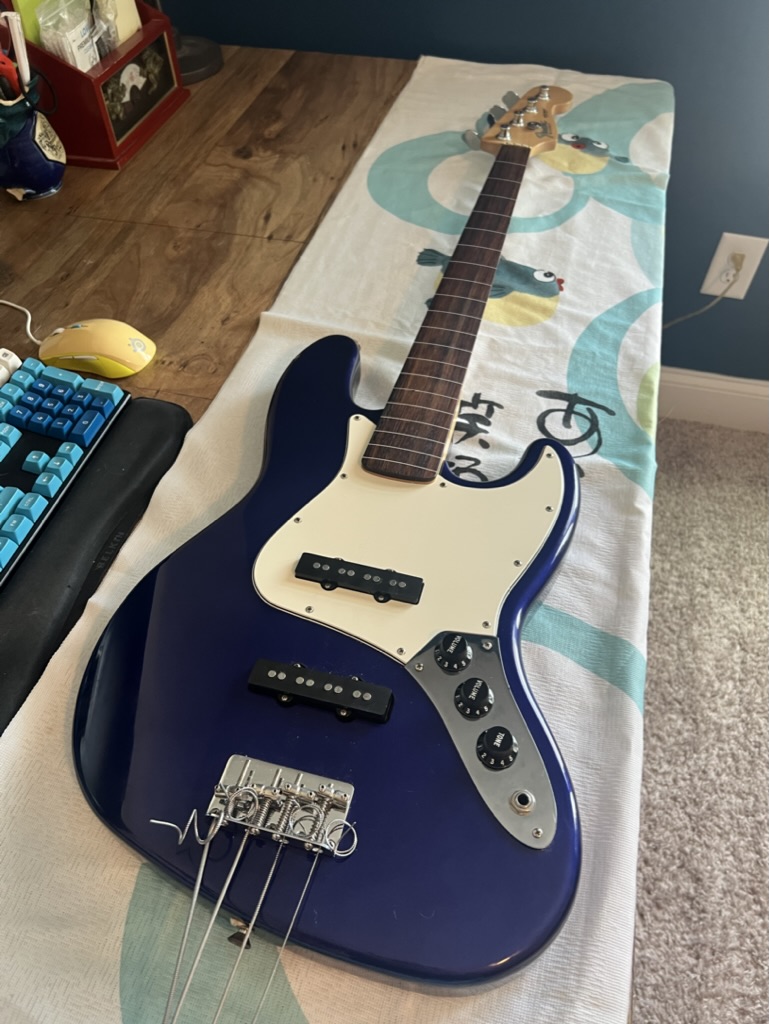
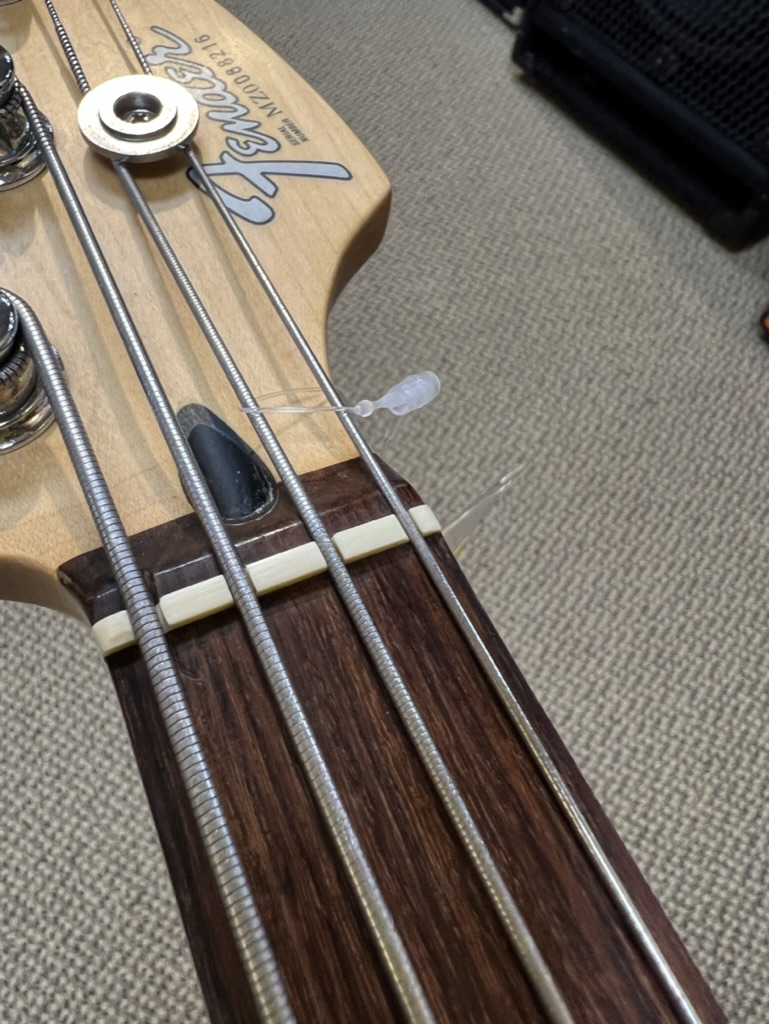
So this 2000 fretless Jazz Bass is now a project bass. My plans are to replace the very worn nut and hopefully do a setup myself. I’ve got parts and tools on order.
Once I got the strings off, I noticed marks on the fret board that show that this bass has round wounds on it at one point in time. Also some deep grooving above the nut and a tiny bit below the nut.

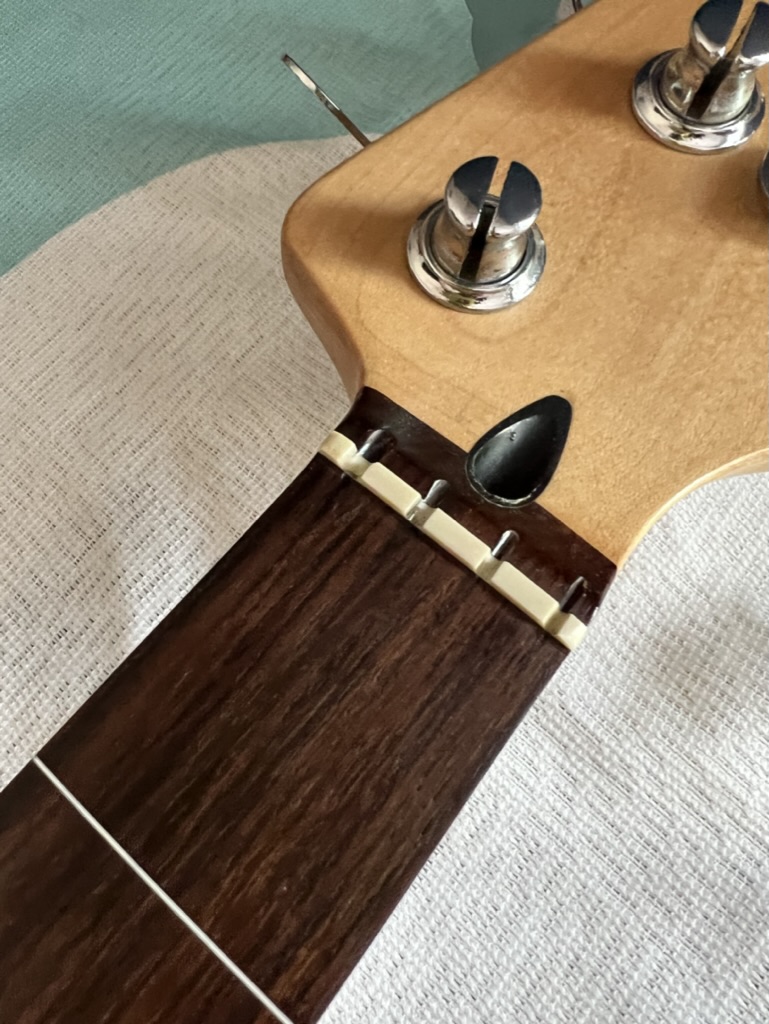
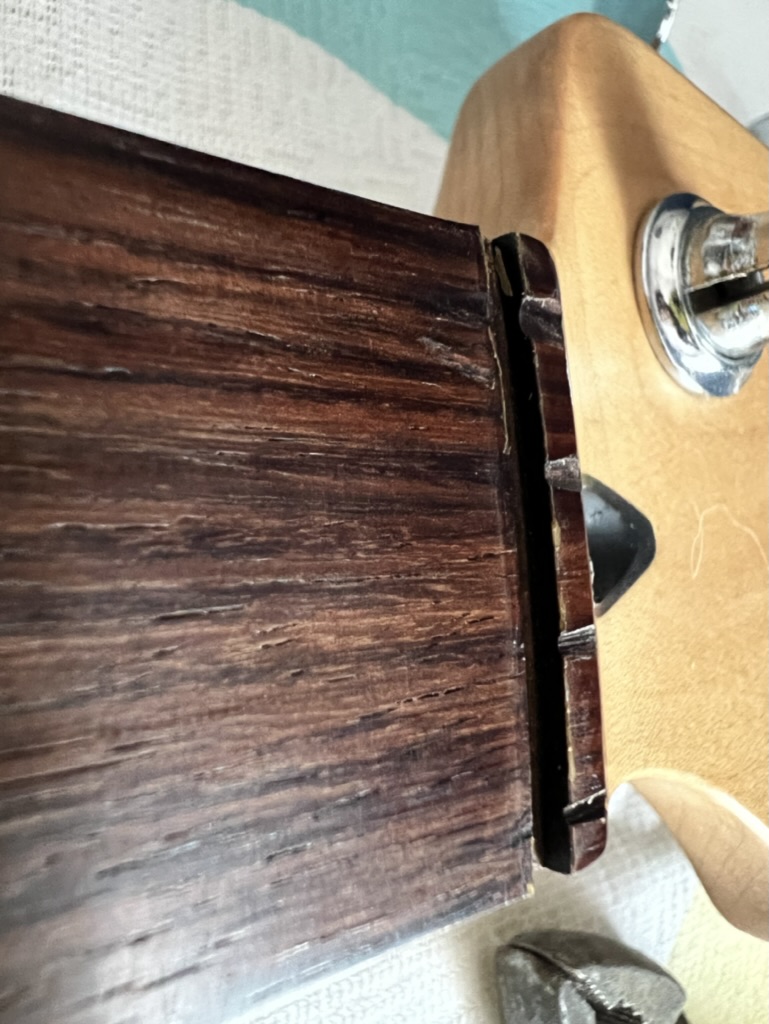
It didn’t take much effort to remove the old nut, just a quick scoring around the nut and then I was able to pull it out with my fingers. Here is the neck after removal:
Do I need to be worried about the wear below the nut? If I get the action set right with the new nut and the saddles - I’m thinking that will be okay? Any input from the forum?
Thanks in advance
5 Likes
@cheeze_pizza I have two fretless basses, one mahogany and one iroko fretboard, neither wood is hard enough to resist indentation. So, they have a superglue coating, wet sanded to a gloss finish.
It will change the tone of the guitar:
https://www.youtube.com/watch?v=ppZCmLKdoS8
4 Likes
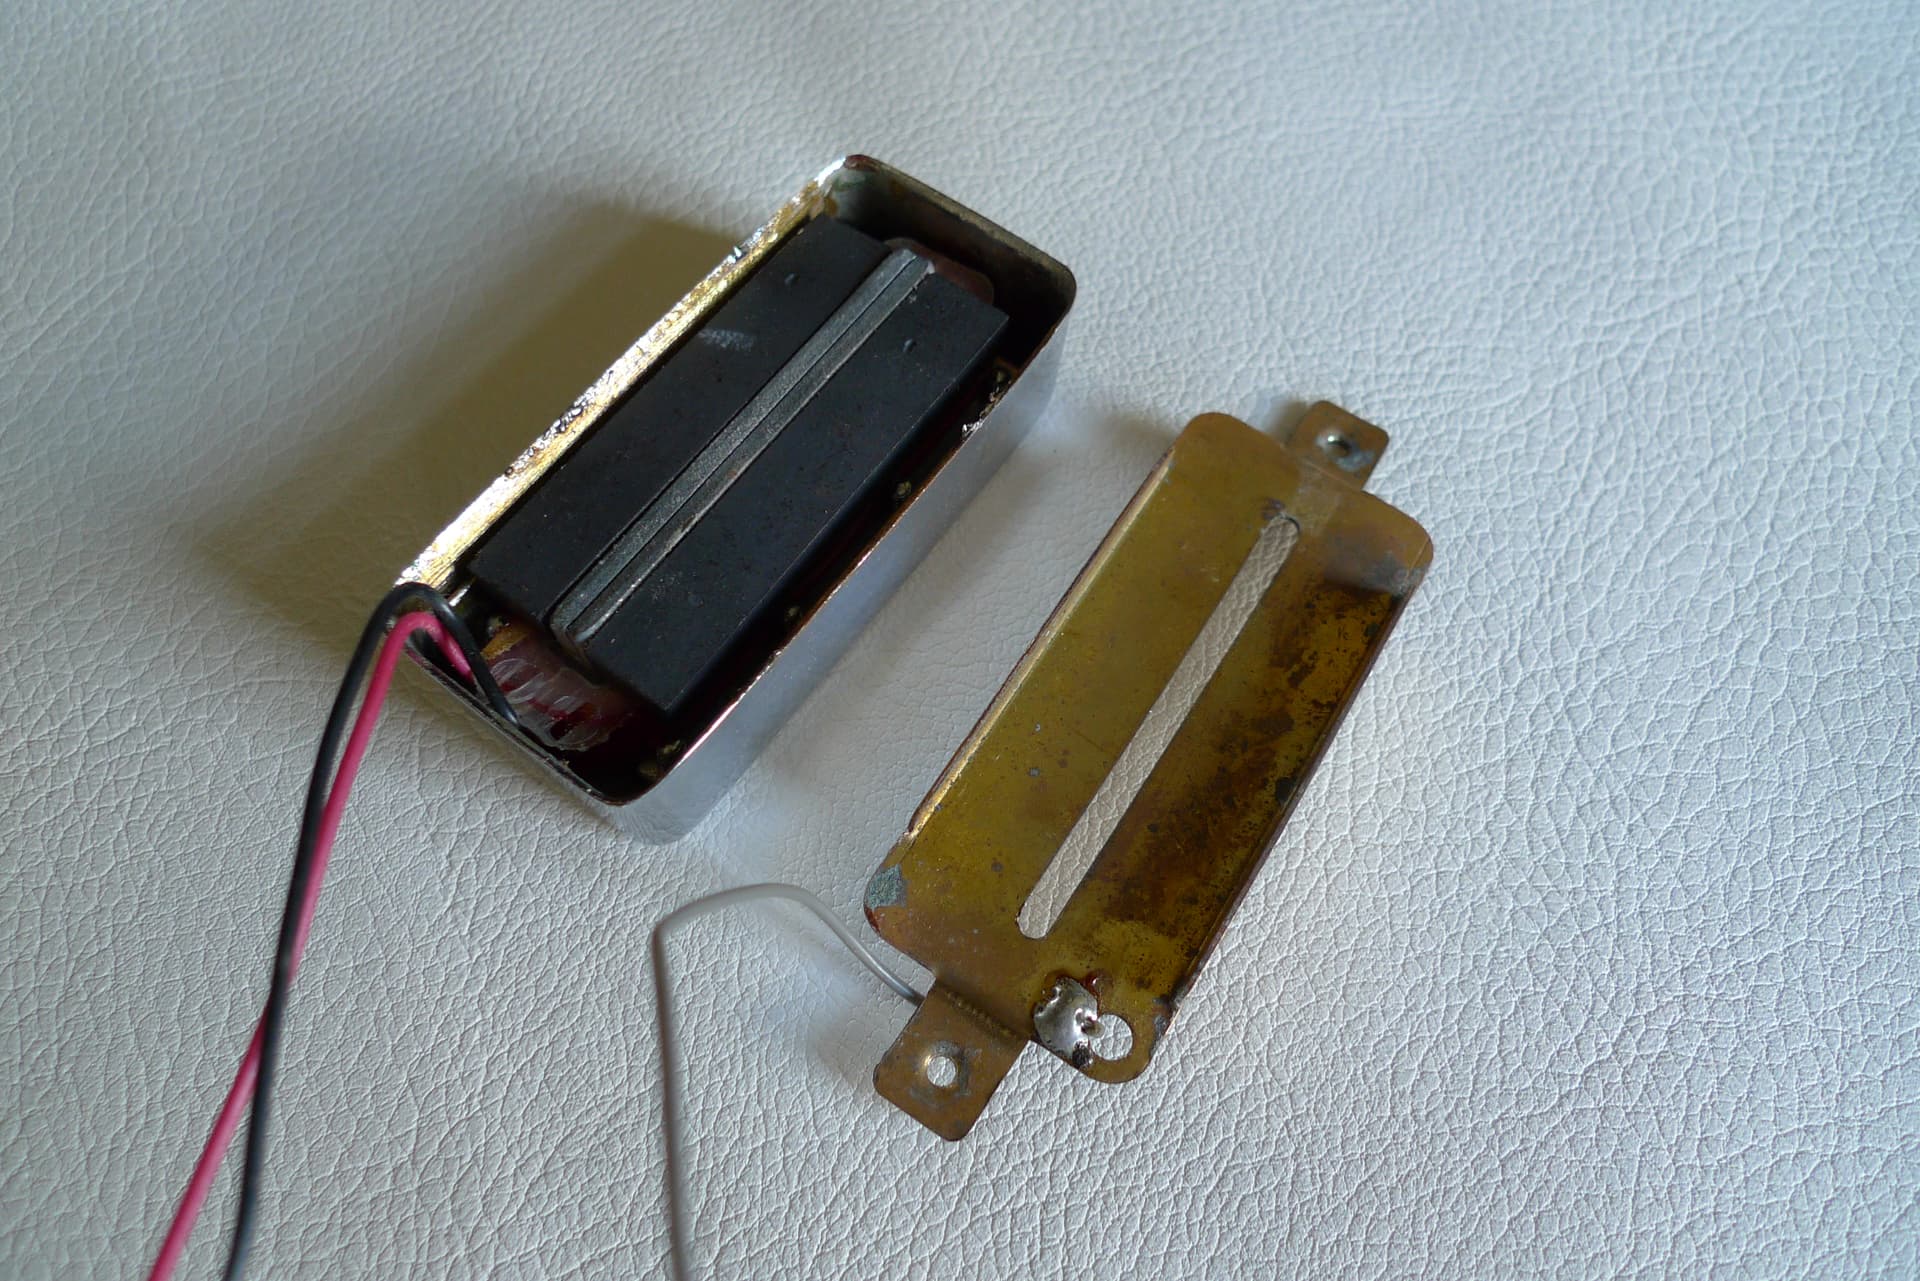
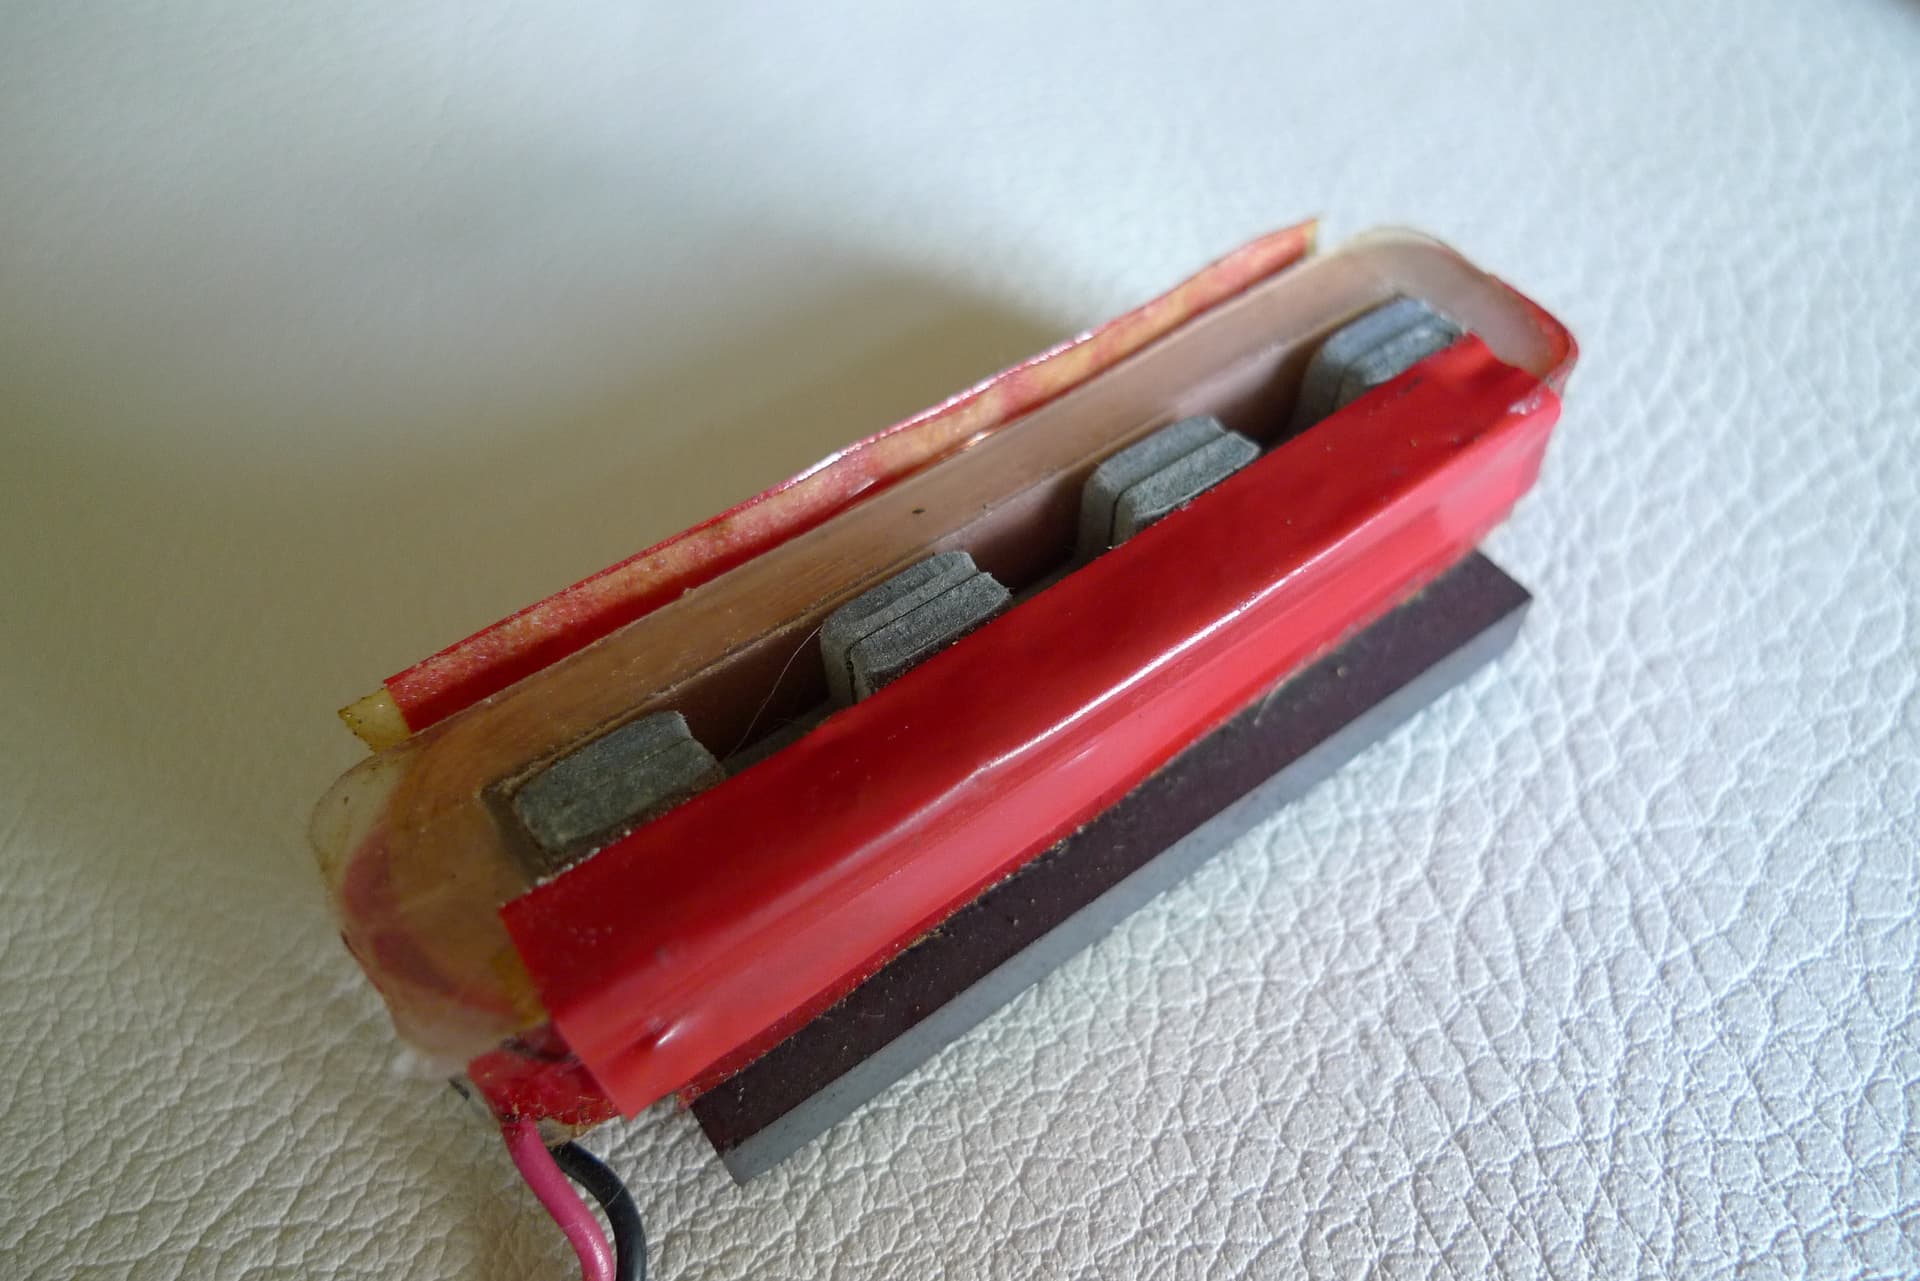
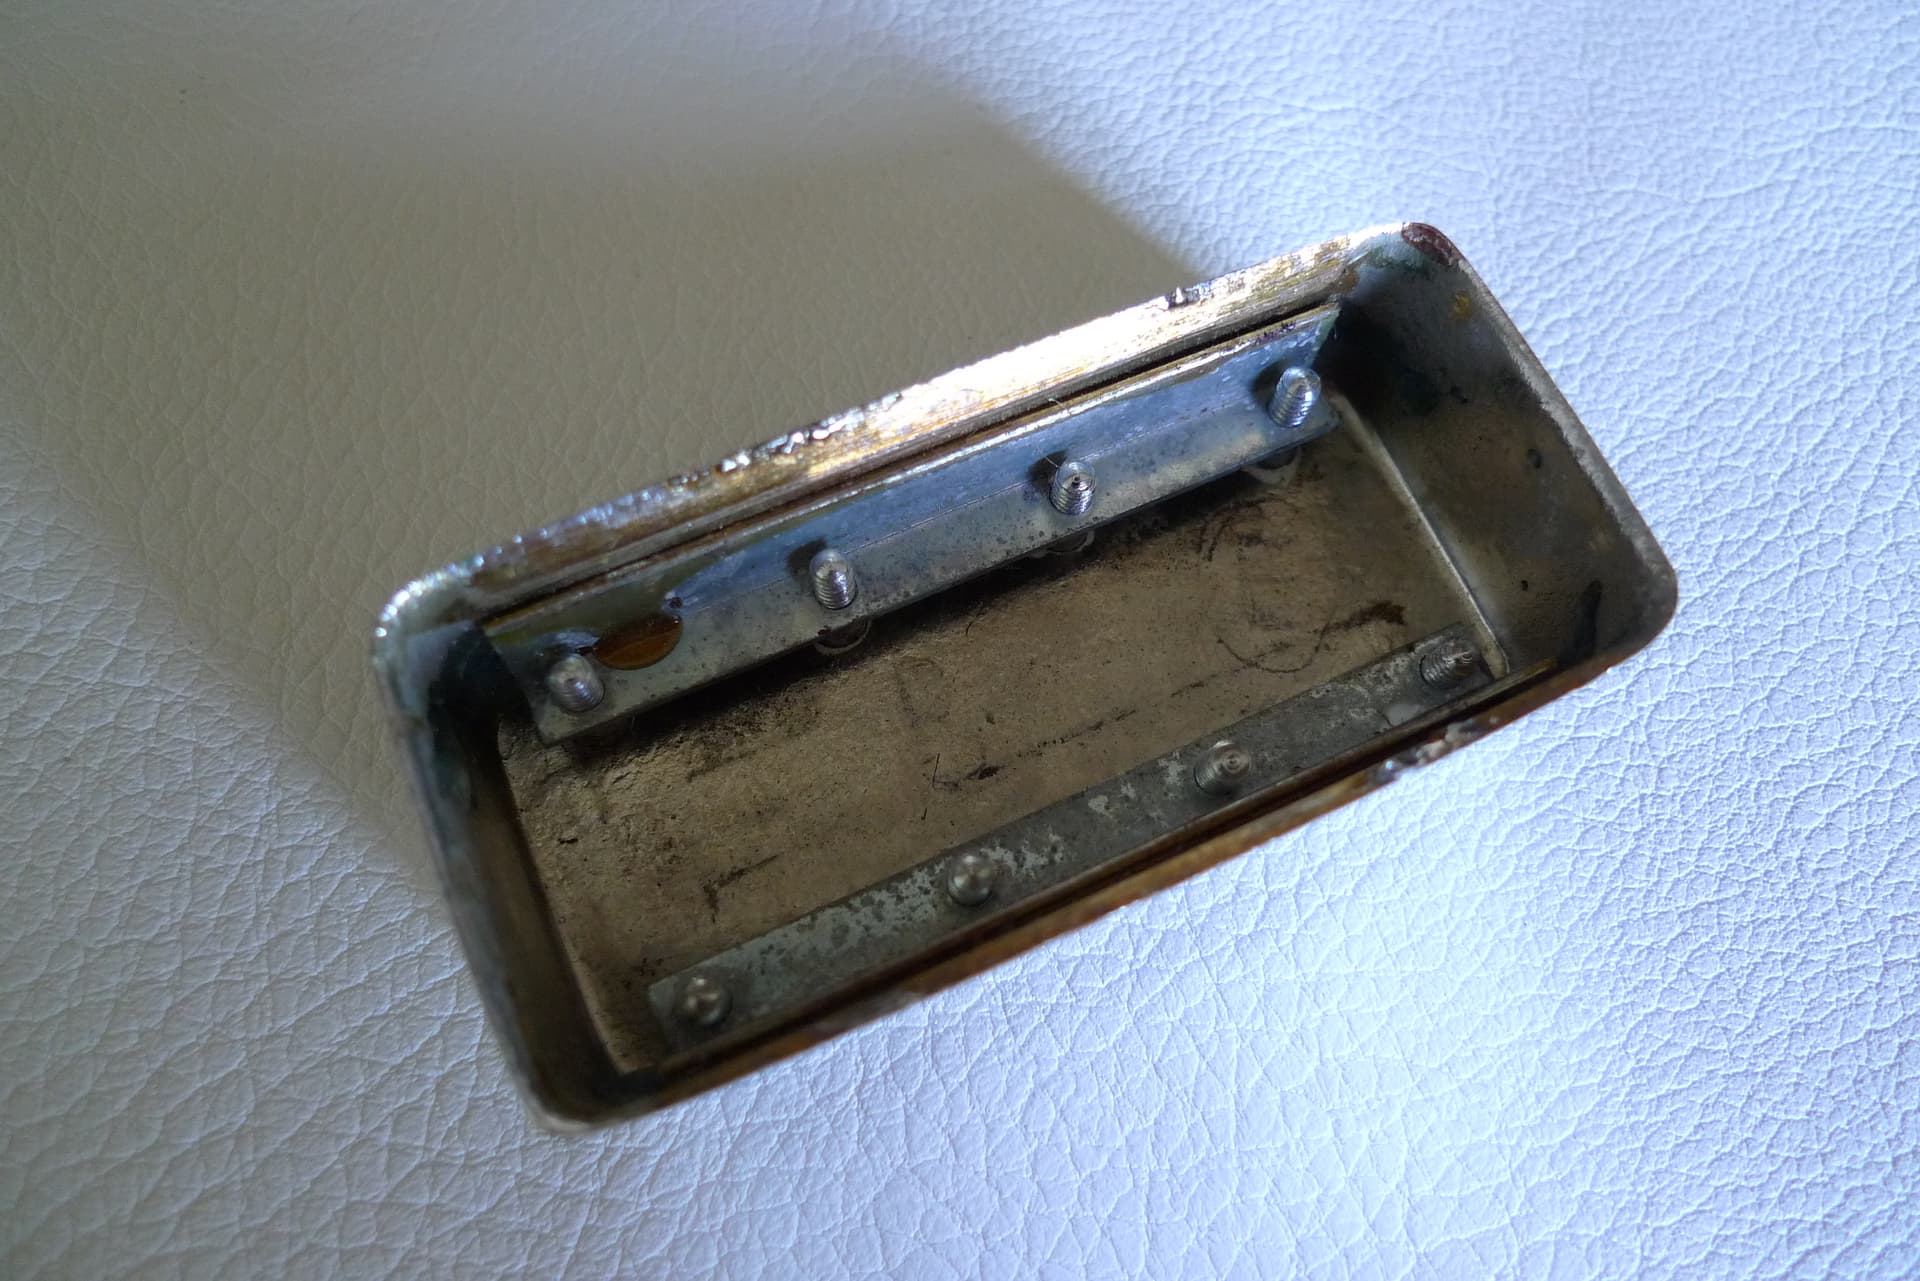
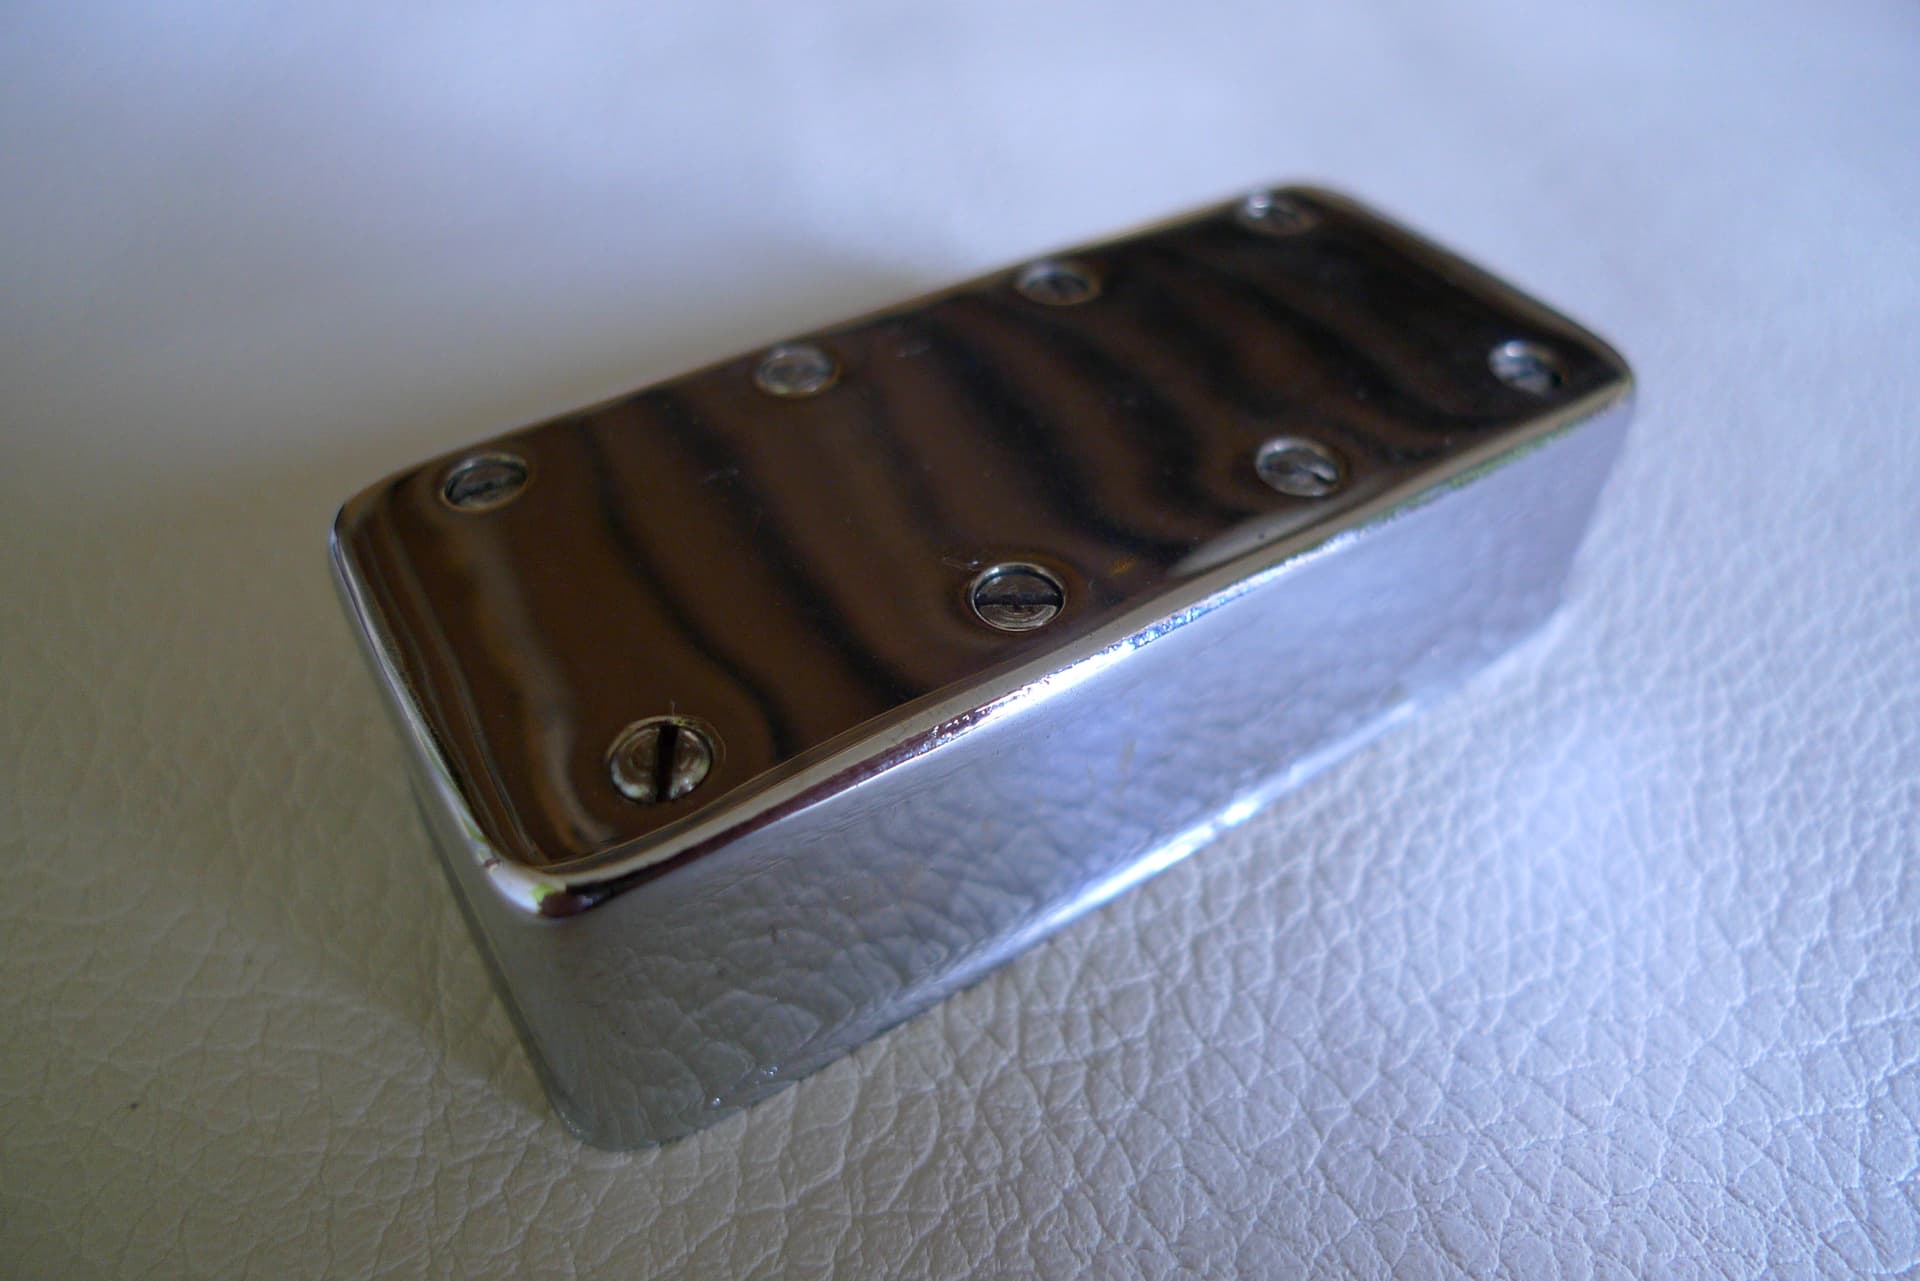
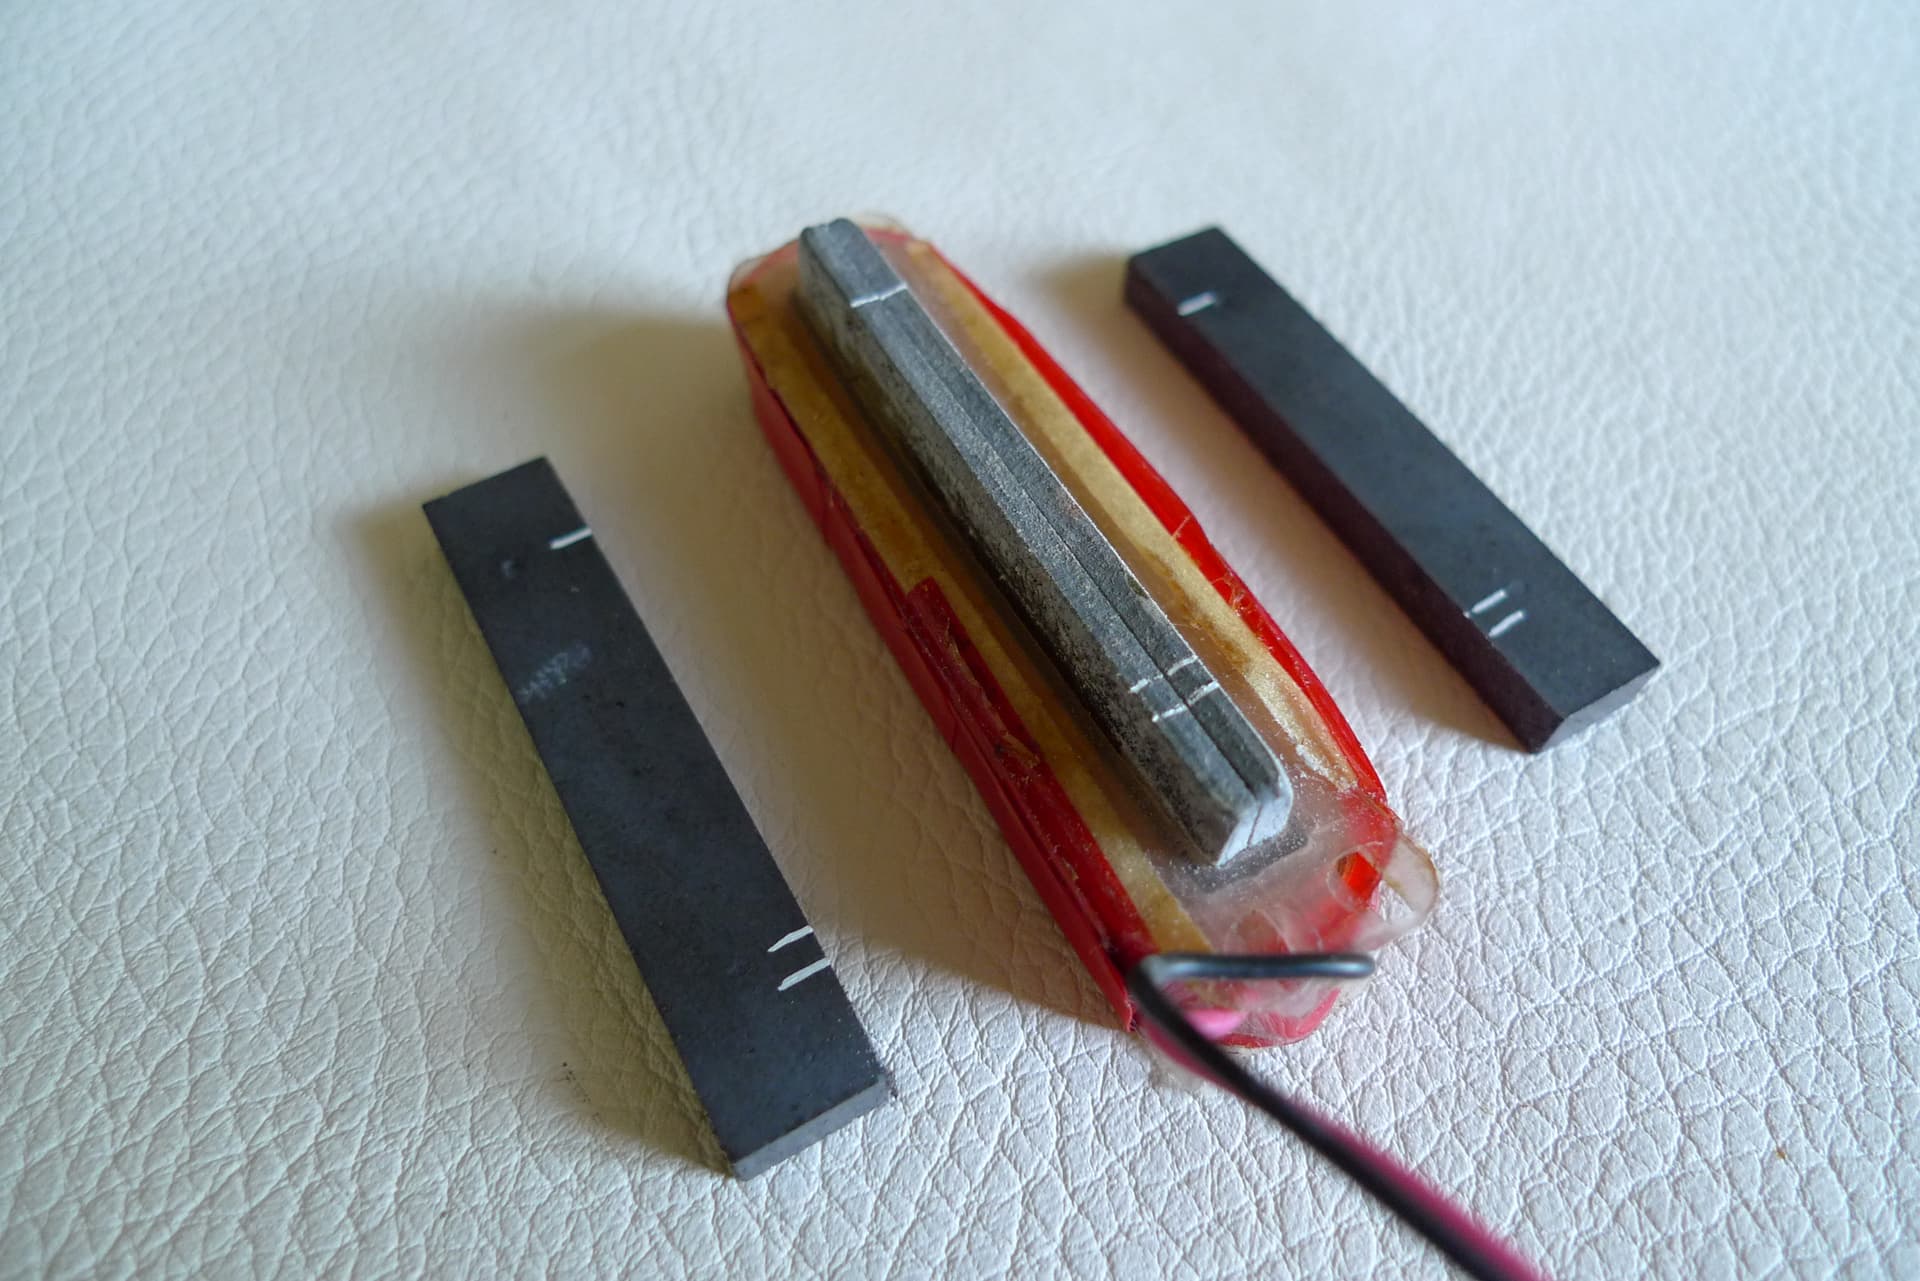
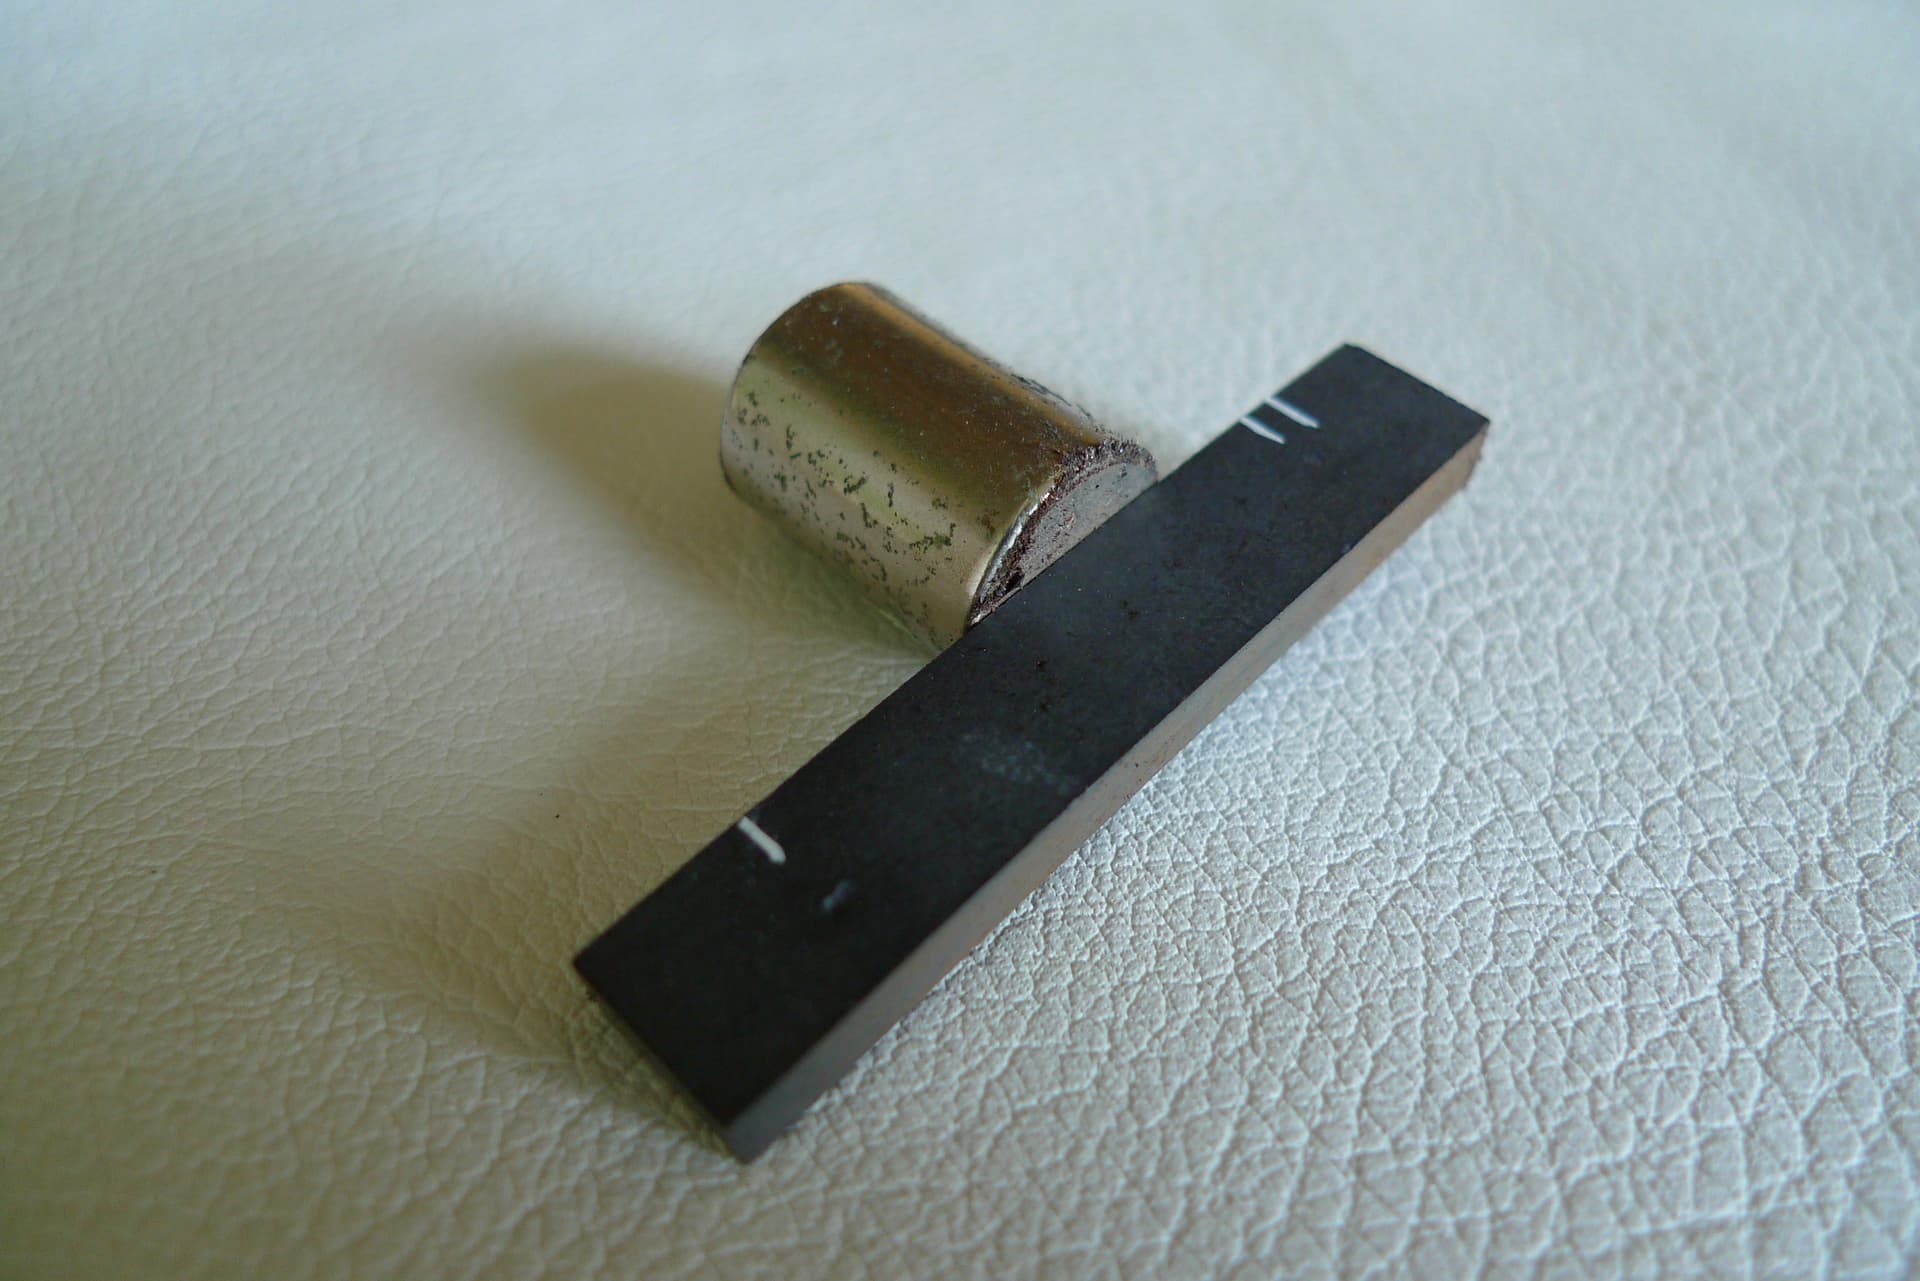
the pickups on my 70’s Duke JB have a very low magnetism, so I decided to disassemble the pickups to access the magnets bars and to try to re-magnetize them. I use a very very strong neodymium magnet to archieve that. not sure about the result, that’s the first time I do that.
At least this has been a good opportunity to take some pictures of these famous japanese Fakebuckers (made by Maxon, I believe).

8 Likes
Very cool project! Hope it works out!
3 Likes
@cheeze_pizza I know fretless basses use a lower nut but that nut is… something. I’ve never seen anything like that. Does it look like it was played so much it was worn down? The rest of the bass doesn’t appear that way.
Regardless, you should be able to replace the nut without any problem from the surrounding wood.
2 Likes
You don’t need to replace the nut, there’s another way if your interested.
Your other option is to build the slot back up a bit and do some filing.
They’ve got a simple video on how to do it.
I’ve done several like this and works like a charm. Just be sure to use their or other super thin super glue.
3 Likes
Shimming underneath it is easy too and might be a better option if the whole thing is too low.
3 Likes
@eric.kiser It seemed like they did just that. the action was low and the E string slot was much wider than it should have been leading to some buzz with aggressive picking. Not so much with finger-style though.
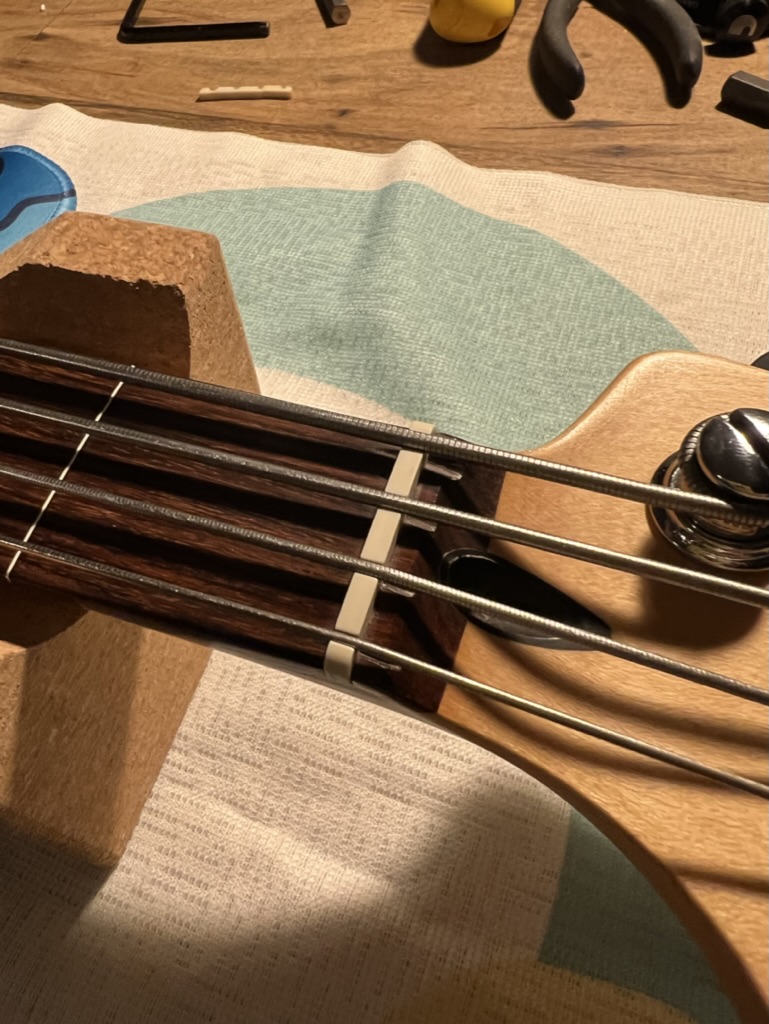
@John_E @howard The nut cracked during the removal and I didn’t really want to work with that nut in the first place since the E string groove was too wide. Thanks for sharing the video. I’ll keep this in mind for the future. This is what it looked like with the old nut.
I went for a TUSQ XL nut (model 1215 iirc) and it fit like a glove. no sanding needed and I just tapped it into the slot quite easily. I might have to sand one side a little bit but the protrusion is so slight that it might not be necessary. Of course now the action is too high so I plan to add a bit of neck relief and may end up doing some filing on the nut grooves after all.
Here it is with the old strings pulled back and strung. I have some LaBella Low Tension flats on the way that I plan to setup the bass with once they arrive.
Thanks for the input!
4 Likes
If all the slots are high, I recommend sanding the bottom of the nut to reduce the height, not each individual groove. It’s much easier and will yield better results.
9 Likes