So true.
The only thing worse than the Saab to fix but amazing to drive was the Range Rover I had. How they let those cars be sold is a mystery. When I sold it finally, I did the math, it was in the shop 18% of the days I owned it. I didn’t know that’s what they meant by “off-road”! 
3 Likes
Howlin:
Looks out the window at the Saab in his driveway.
(* Shrugs *).
Goes back to bass practice. 
4 Likes
This was like mine…
Love that car, except for the nights at the bar when I left the top down and it rained.
Total buzz kill.

4 Likes
I really liked my brother’s 900. Cool car.
the turbo models are really nice 
3 Likes
I went from the SAAB, which was rated as the #2 most unreliable car at the time, to the Range Rover, which was the #1 unreliable car at the time. When I was over the Range Rover, I bought the brand new Jeep Commander, which, in it’s first year, took its rank spot prominently in between the other two. I do not have luck with cars or wives, so I bought a Honda Pilot and married someone from high school who came with a lot of references.
6 Likes
Parts, parts everywhere nor a bass to play!
Well, that’s not strictly speaking true, since I have my P-clone. However I am, as they say, a delighted tent-dweller because the final piece of my chunks and roberts for my bass has arrived: the neck. Yay! I can now work on the alignment.
So, the graceful appendage is as follows:
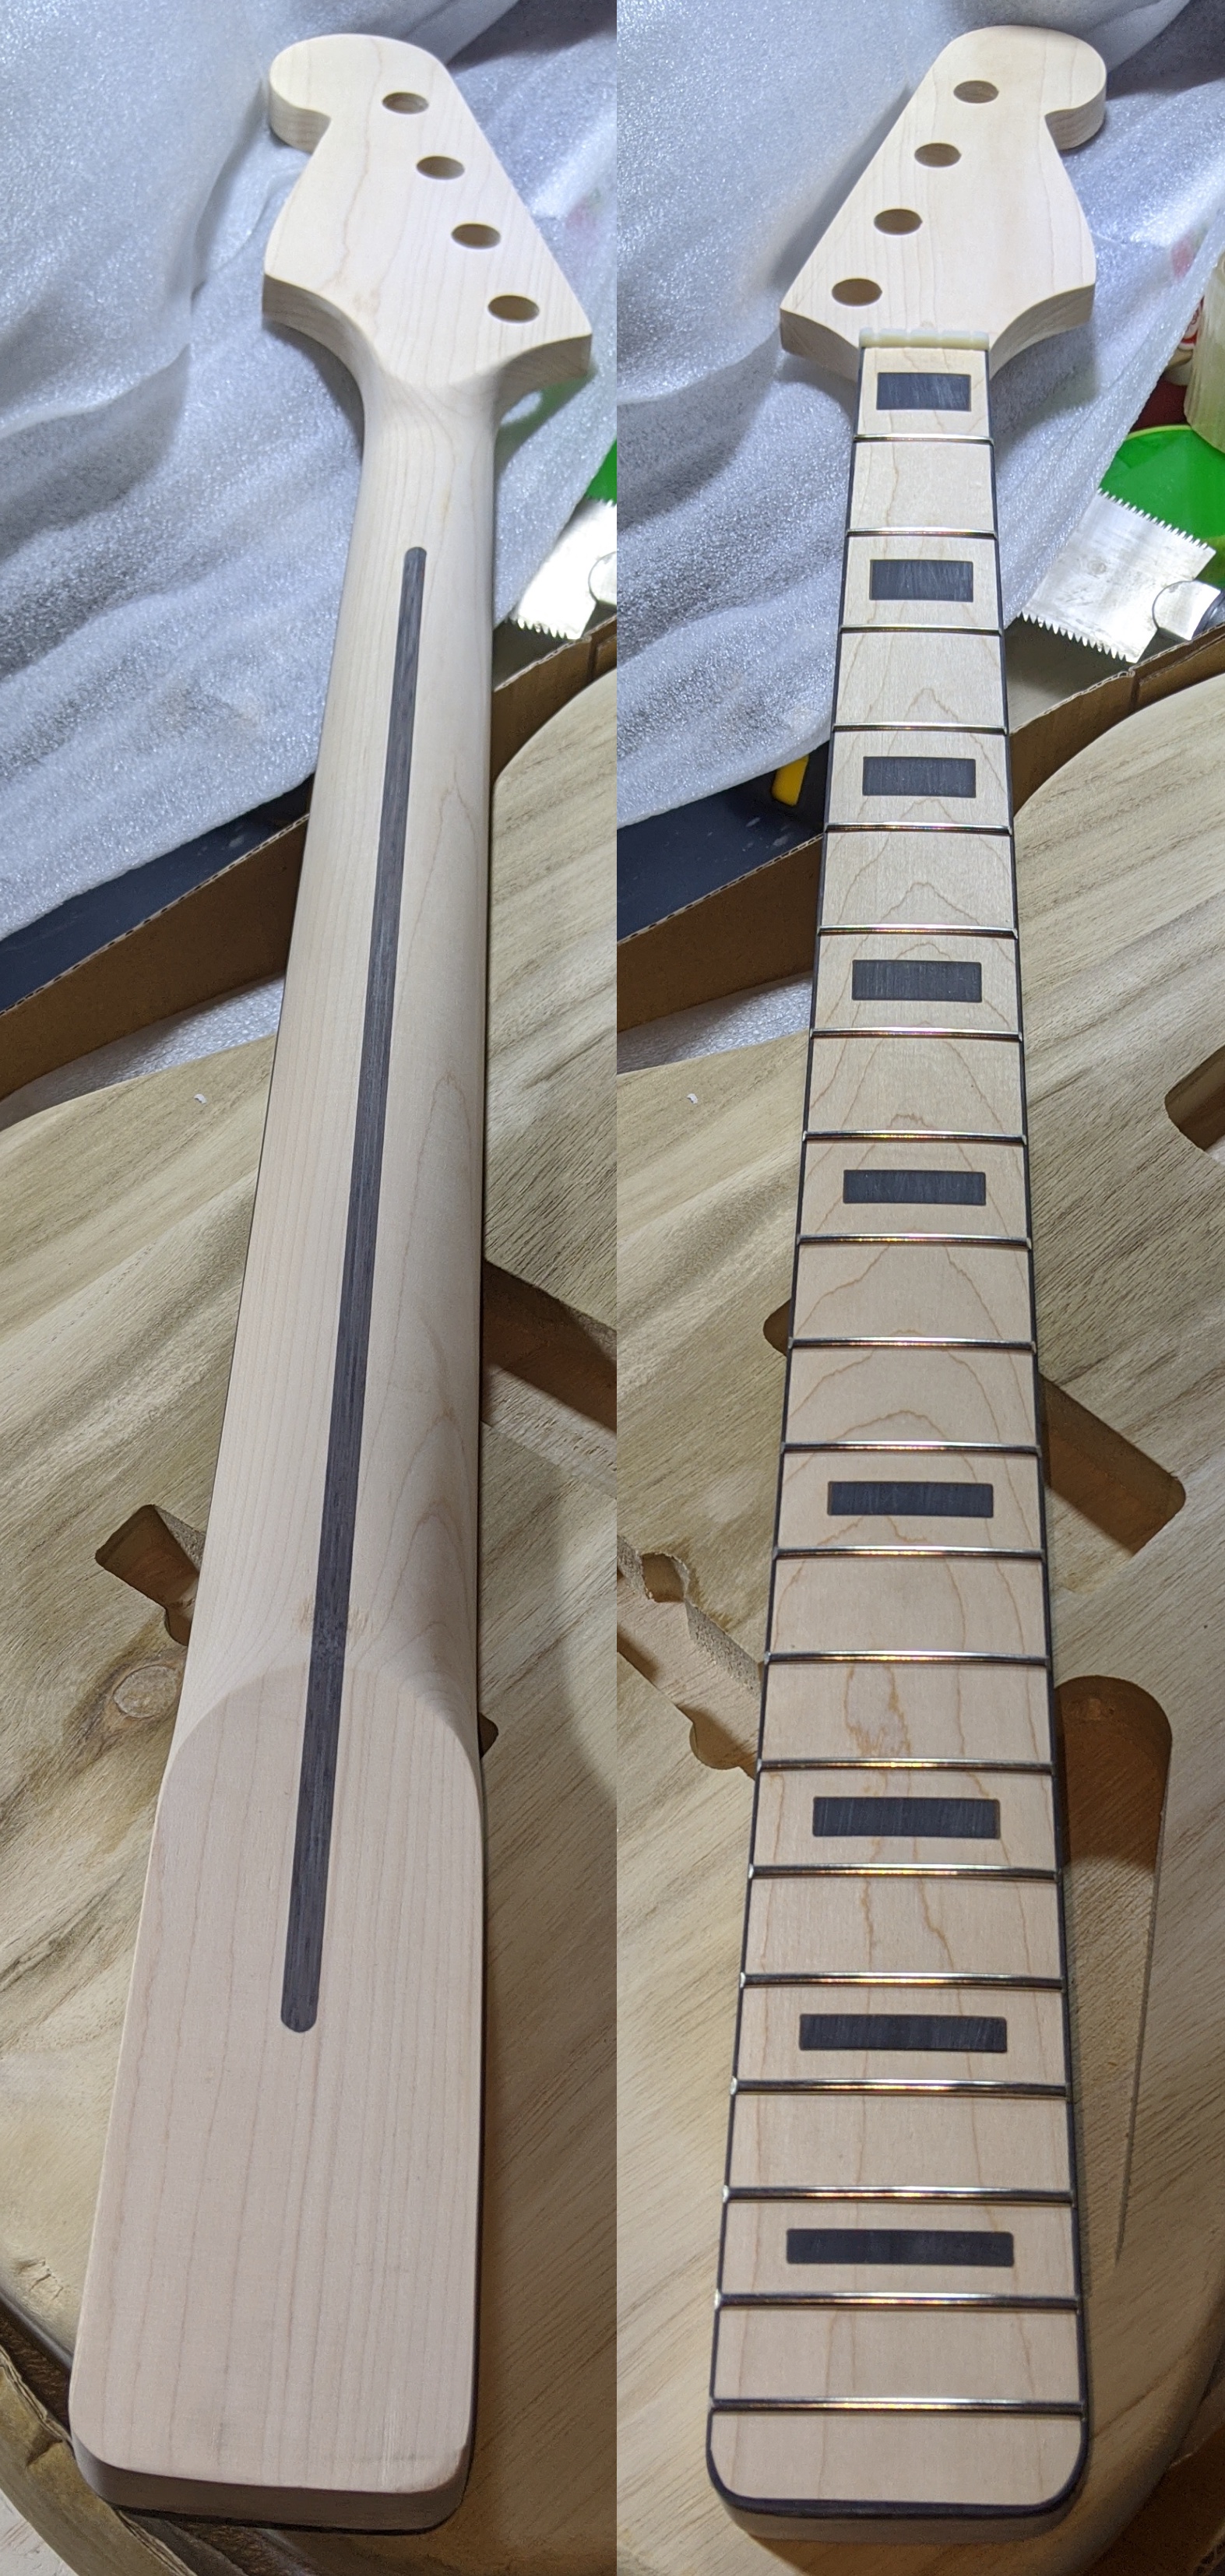

It’s a maple neck with a maple fretboard and rosewood inlays. It’s completely barebones and unvarnished, which is what I wanted. The finished bass will sport a matching headstock. The wood is in flawless condition and seems to be glued together quite well. I looked along the binding on the sides and the skunk-stripe, and there are no delaminations anywhere.
A couple of questions to you DIY luthiers out there. I’m a fairly dab hand at being a simulated beaver (i.e. “chewing” my way through various bits of dead tree carcass, that is to say wood), but haven’t worked on guitars before.
I want to do the back of the neck in a satin finish, what would you guys recommend? Also, prior to varnishing, I’d like to give the fretboard a burnished/roasted look. I assume that friction burnishing is out, but flame burnishing would definitely work. Or am I way off base here and am in fact applying a cistern’s worth of lipstick on a pig? Also, for the varnish, I intend to use real shellac, followed by a hard poly or nitro topcoat.
Last question, the heel of the neck is slightly broader than the neck pocket in the body. Keeping in mind that the neck is of somewhat better quality than the body, would you recommend shaping the neck or the body to achieve fit and alignment?
5 Likes
I have not answers to you. I am a glorified machinist, with last name Wood, but don’t do any type of woodwork, mostly metal and composites.
But
I do look forward to seeing it come together.
1 Like
both/either would work
2 Likes
I really don’t have much time left now, but still, some news about the lawsuit japanese early 70’s Jazz Bass. Glueing back the inlays :
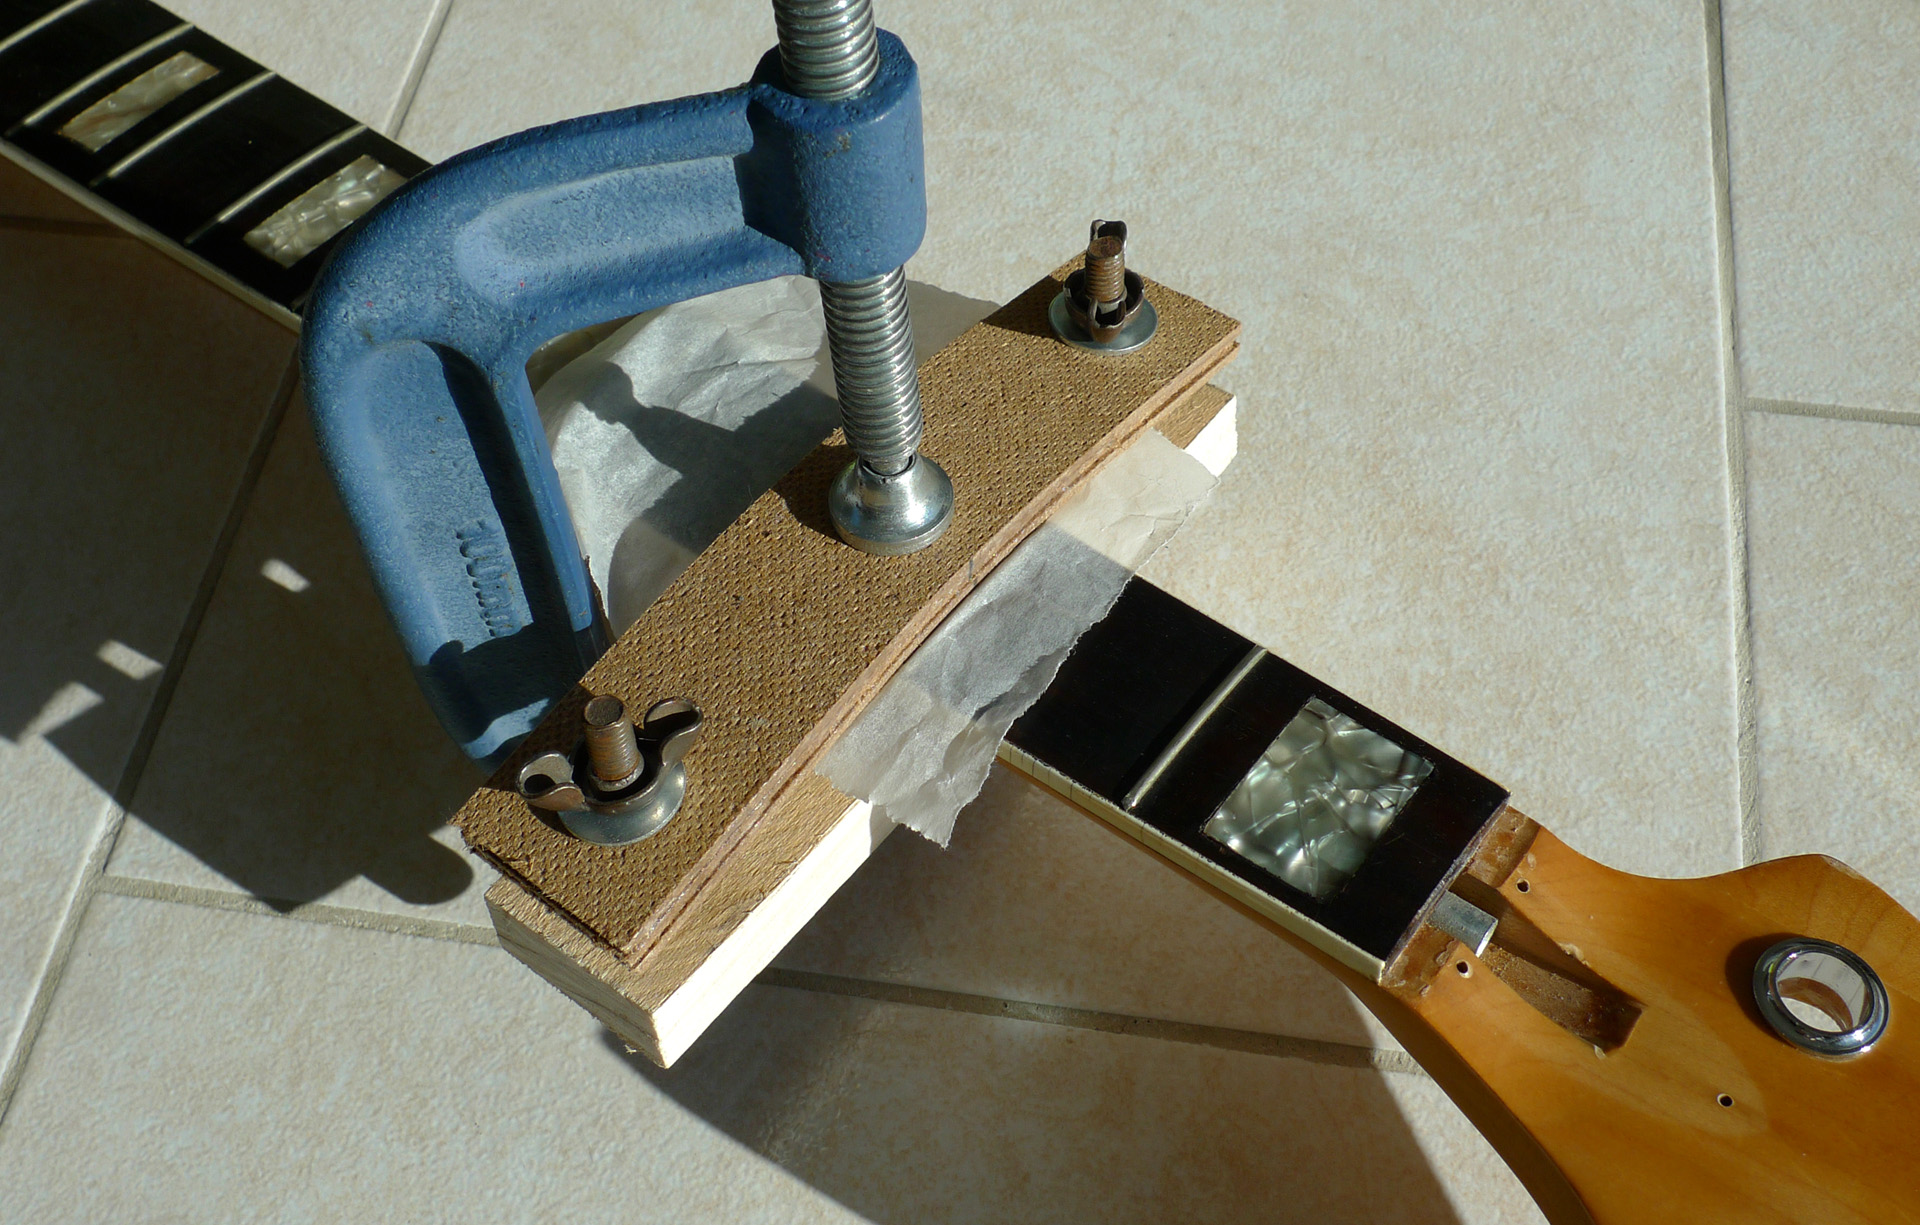
14 Likes
That inlay press is amazingly effective and deceptively simple. Well done!
5 Likes
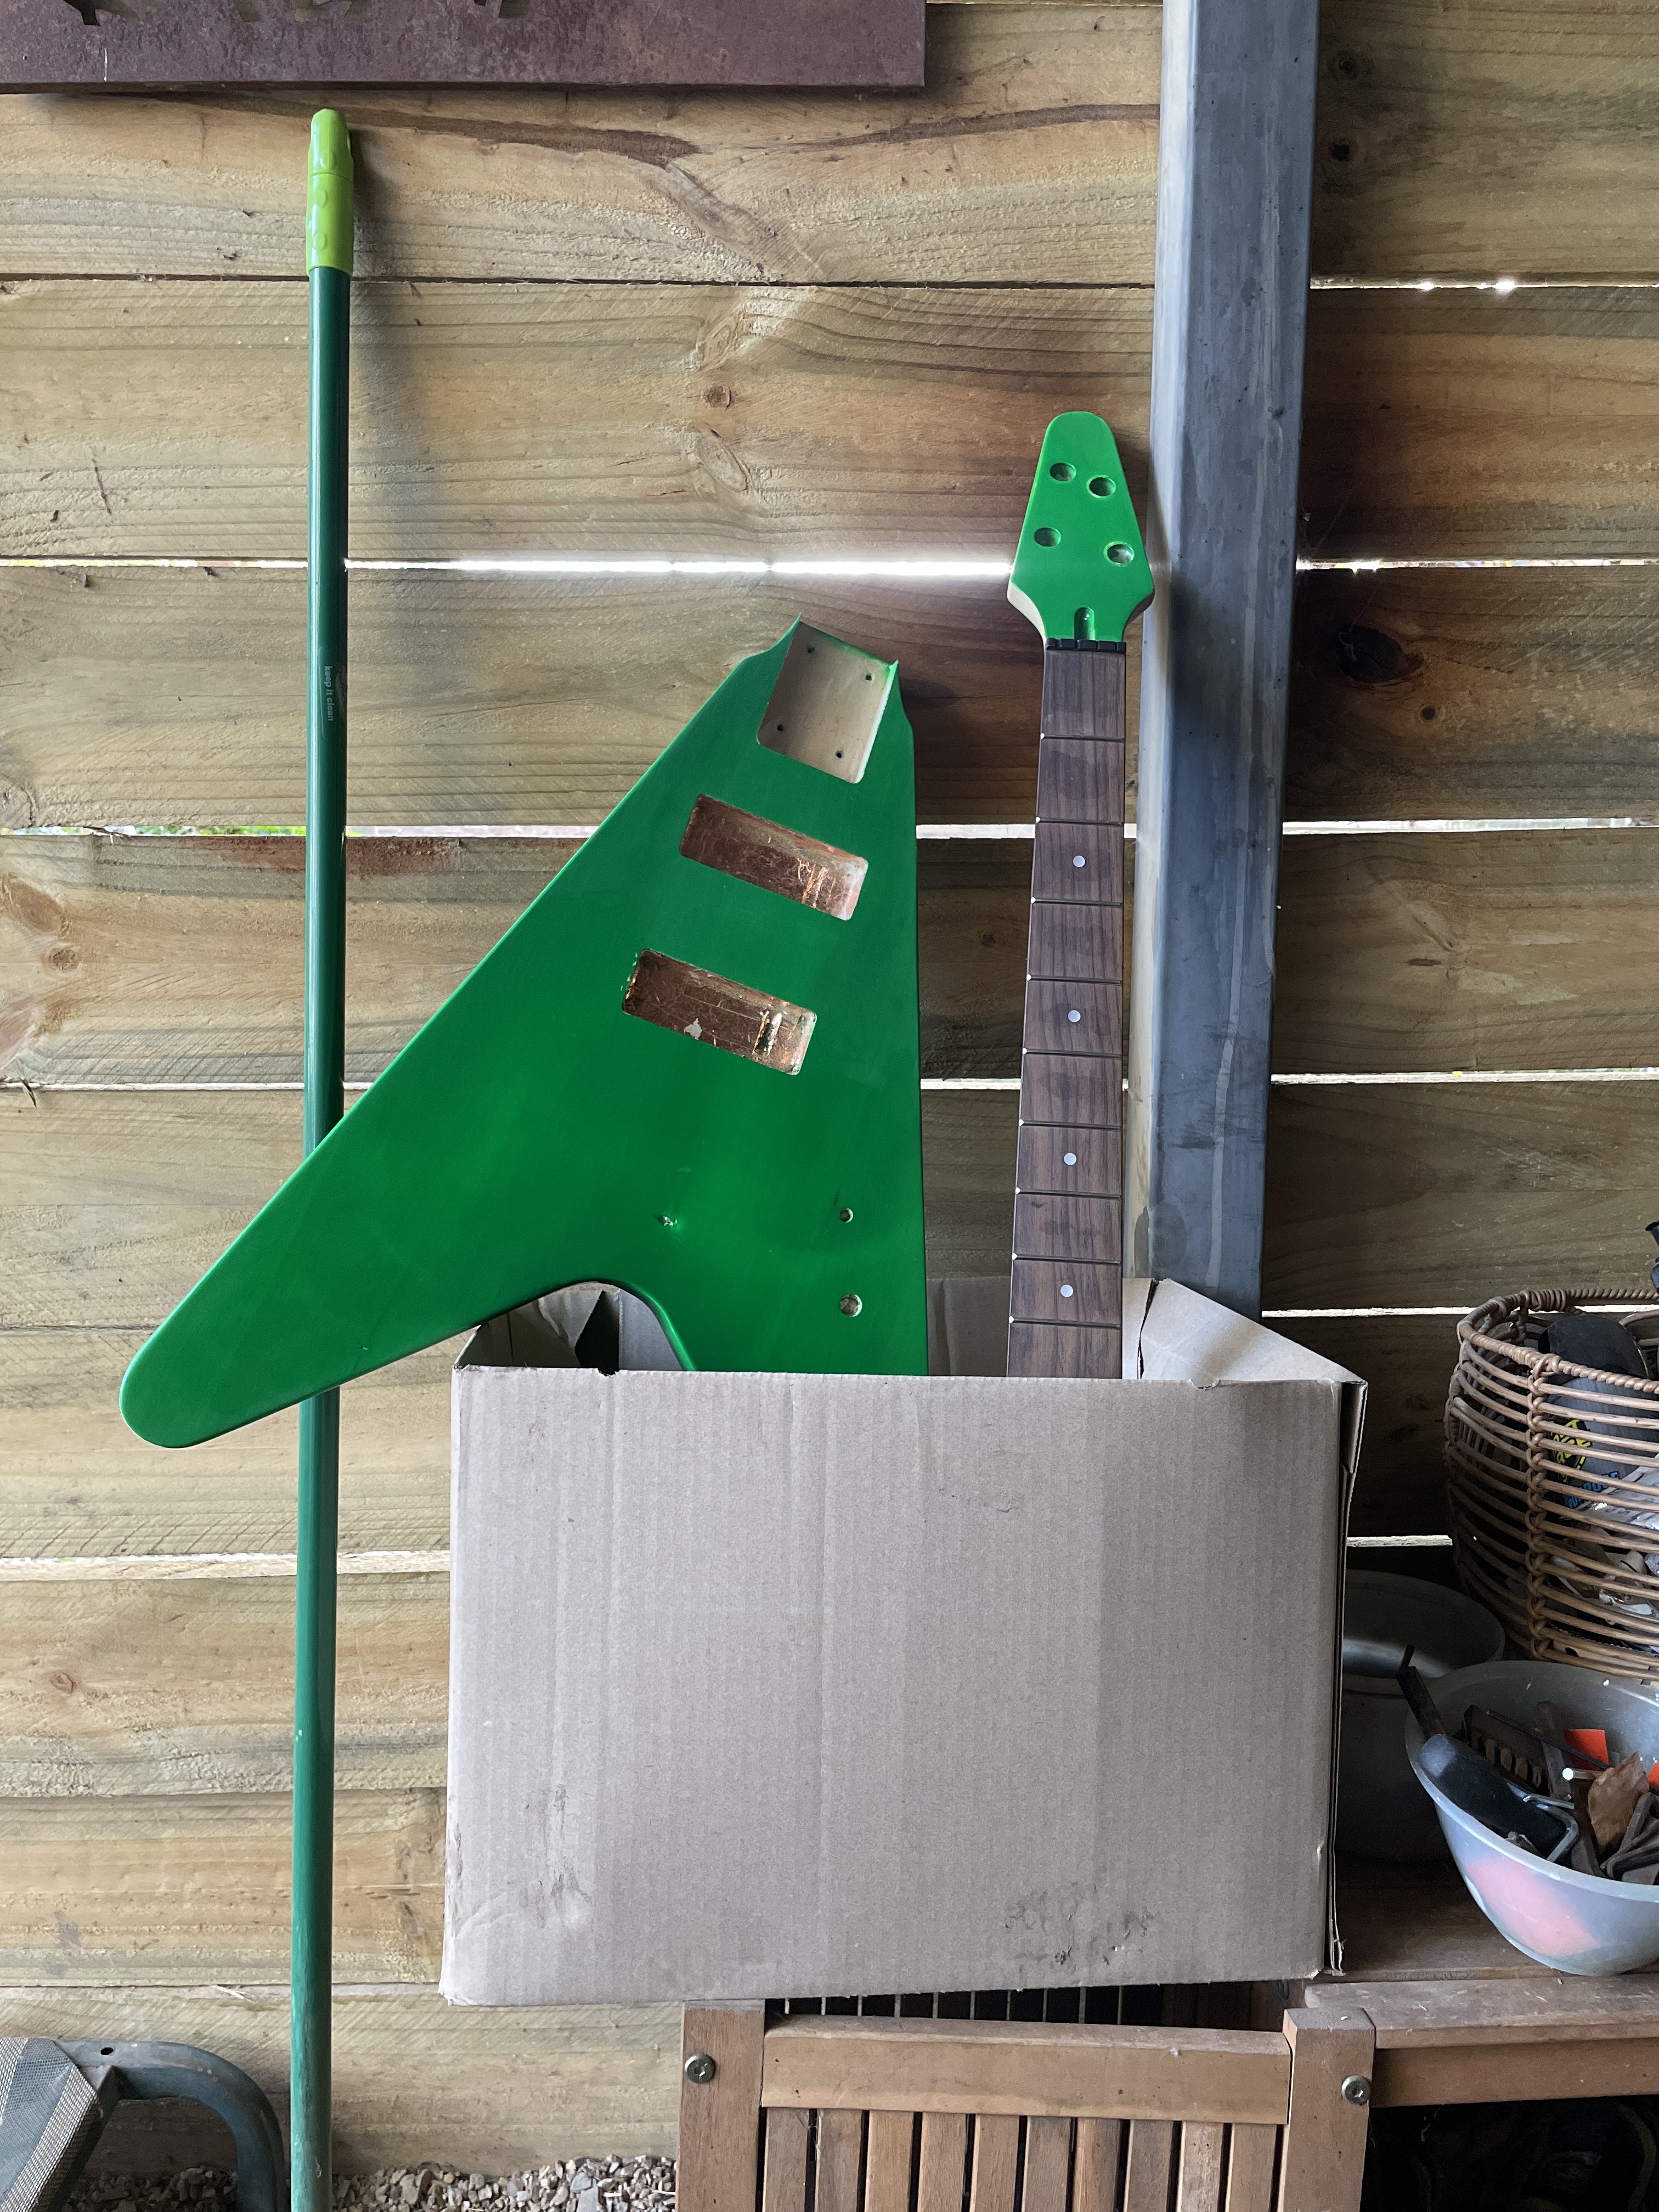
looks like the Broom fits the color scheme as well.
6 Likes

3 Likes
Quick pickup question:
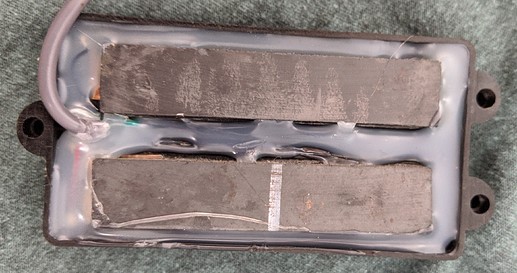
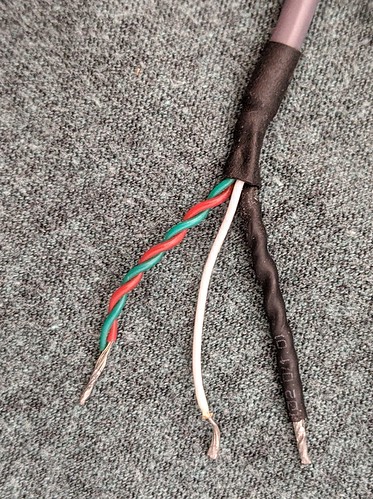
The red is contiguous with the white (6.64 kOhm resistance)
The green is contiguous with the black (6.71 kOhm resistance)
Because the black was twisted together with the bare wire (black heatshrink in the photo) I assume this was the chassis ground and the white was the hot lead.
I assume that in this config, the coils are wired in series, correct?
Anyways, any ideas on how I could wire this to do a parallel-series-single coil split?
Is that a Ray4 stock pick up? Not a replacement, but the stock one?
I am not certain, and I don’t know about these things, but it was my understanding, to be able to make the Ray4 pick up be able to be wired in parallel, you would need to rip it apart (the potting).
In the Ray24 pick up, it is also wired in series out of the box, but it is not potted the same, and gives access to the wires where you need access.
I do know that different MM style humbuckers have different wiring options, some you can do many types of configurations and others are limited, unless you tear them apart.
Again, I don’t know electrical engineering, and could hardly follow a wiring diagram (although, I could solder well enough to do a quick pick up swap, if it was just wire for wire swap, nothing crazy tho), so other then knowing a little about the options , or limitations rather, of some of the SBMM Ray pickups, I know very little else.
I bet somebody that knows much more will speak up on the subject eventually.
4 Likes
No, it’s a Chinesium knockoff sold on Amazon as an active one. Unfortunately there is absolutely no wiring info. I think I’m going to breadboard the setup before I solder it in, but I’m really crappy with electronics, so I was hoping to get some feedback here.
Alternatively, I have some Korean (says so on them) Se* Du* active soapbar clones, but they don’t have the coil splitting possibilities that these MM-style ones potentially have.
3 Likes
I’m scratching my head on this one. Way too many wires even for a split parallel pickup set up. Maybe it’s wired both?
White for series.
Green/red for parallel?
Try googling music man stingray wiring diagrams or replacement pickups and see if there is something similar.
2 Likes
So, here is a nordstrand schematic, that seems likely…ish.
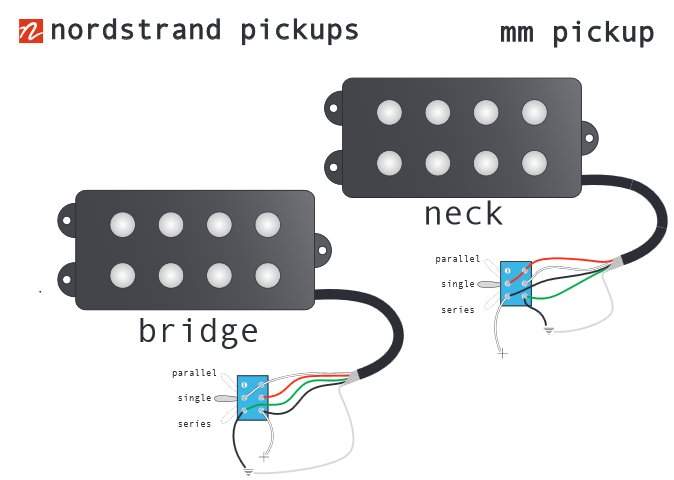
This is pretty much what I want to do, just trying to see whether I have my wires fingered out correctly.
4 Likes
That makes sense!
3 Likes