Stop the flailing and buzzing with these bass finger exercises - what level can you make it to?
If you’re doing the Beginner to Badass course, this lesson would fit during Module 6 when we start to work your fretting technique more. And all these bass finger exercises will complement what you do in the rest of the course, big time.
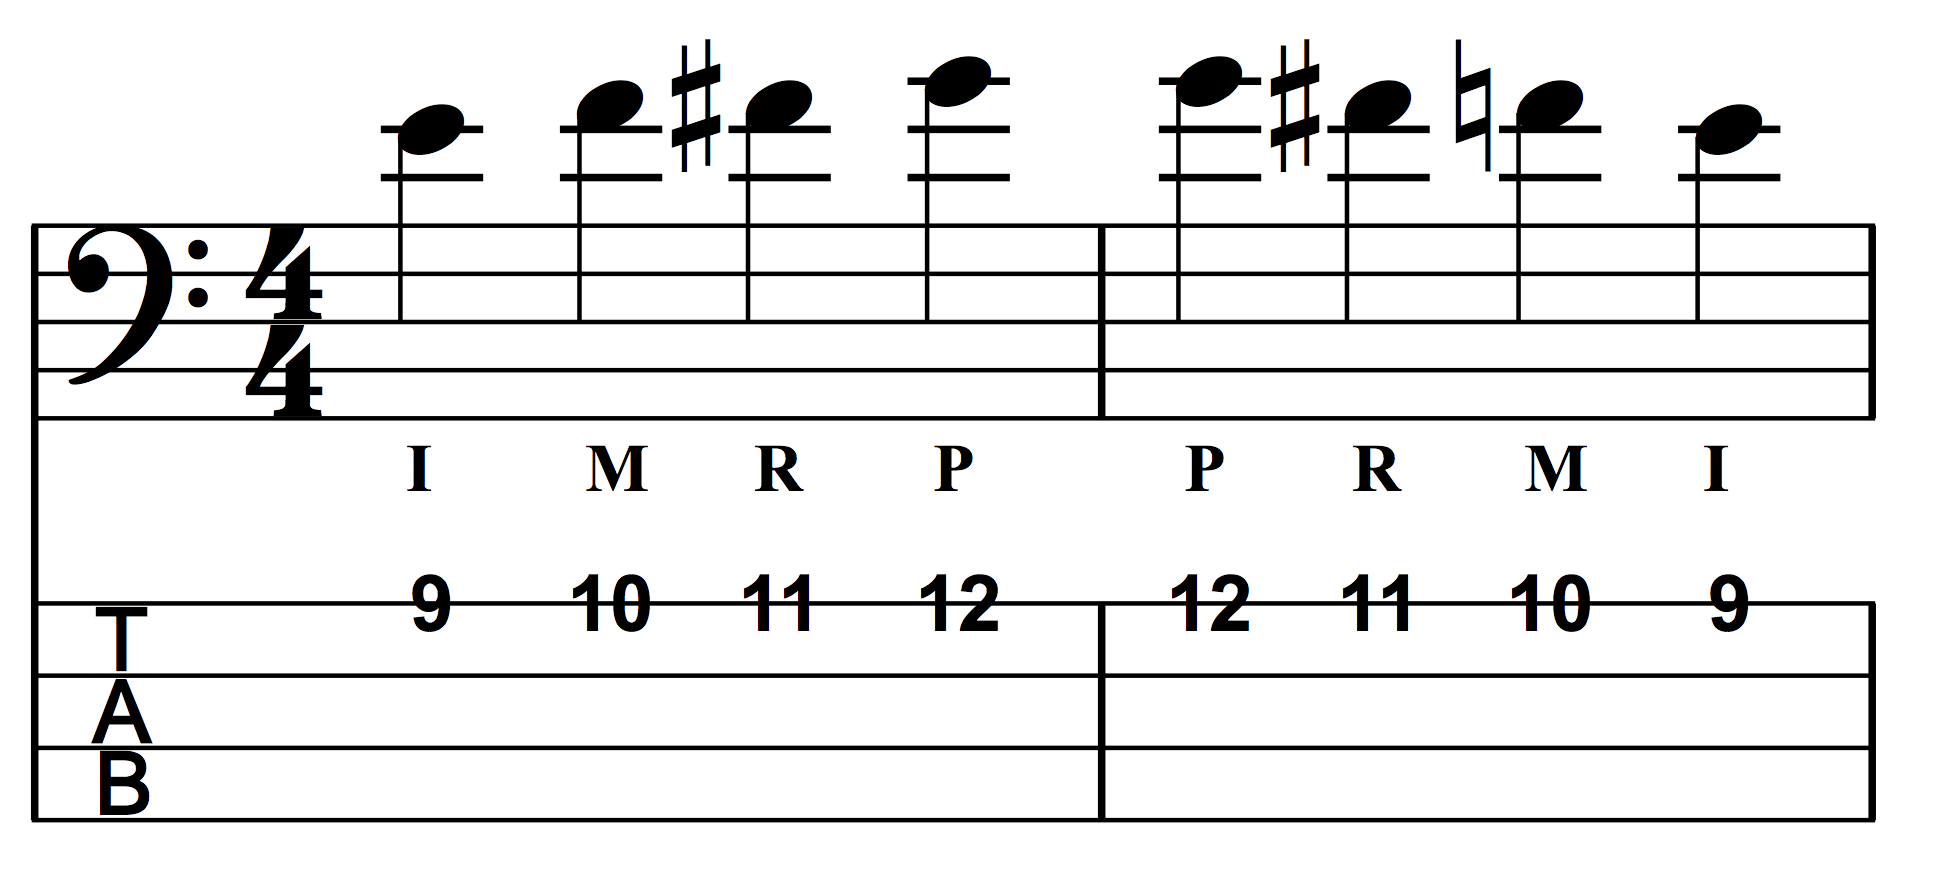
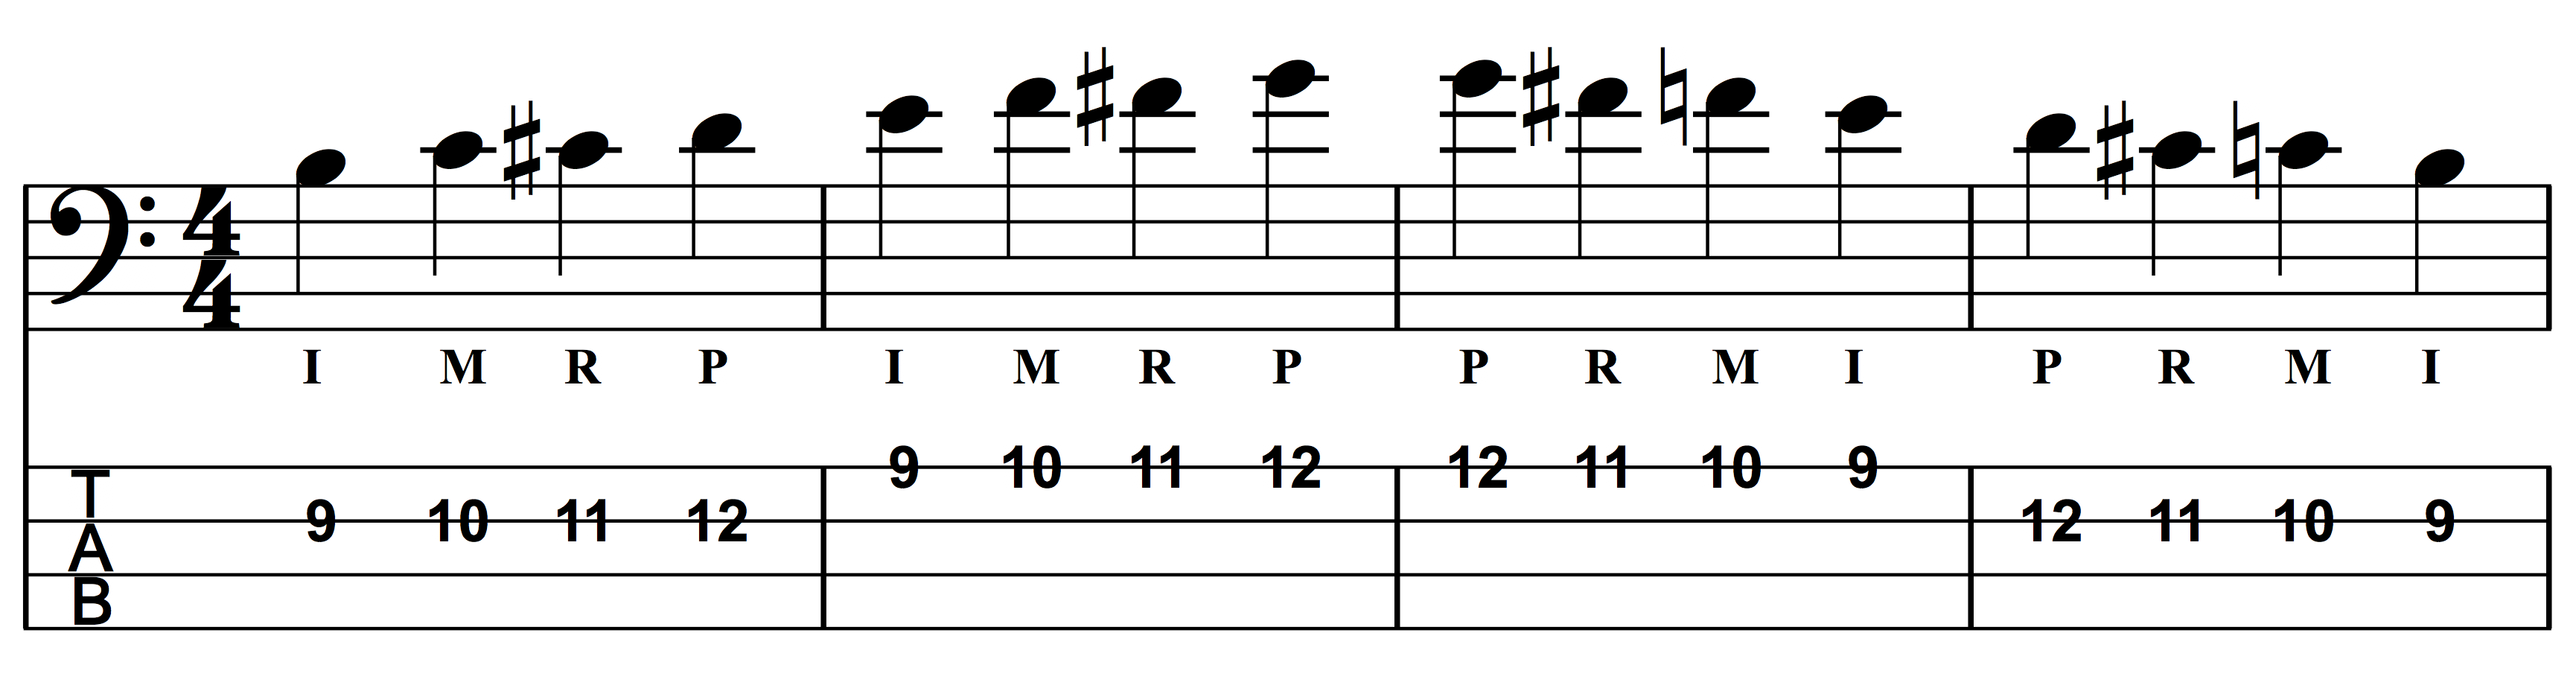
5 Levels Recap
Here are all five levels written out as sheet music + tab, with fingerings:
Which “Level Goal” did you find the trickiest? I’m still working on Level 5, which is to use as little pressure as possible with the fretting hand. I get too excited sometimes!
@JoshFossgreen , what is the drum loops app you mentioned for the Android? I couldn’t make out what you said, even after rewinding and replaying several times. Thanks
Thanks for “grounding” me again, Master @JoshFossgreen! See you in a year or so…
Even for the area from the 9th to the 12th fret, I do microshifts, which seems to trigger more finger movement/flying than strictly necessary, or at least more than what you show here. That is going to bite me in the rear in the long run, isn’t it??!!
I think the trickiest for me is that part in Level 4 where you’re descending, and when the pinky hits the 12th fret on the D string, the other 3 fingers simultaneously come down in ready position on their respective frets at the same time! (around 13:30 in the video) Man, that seems far off, and this video is going to make me re-assess my fingers for sure.
Realistically, I’m around level 3, with removing fingers without too much flailing to work on first. And level 2 needs a bunch of refinement first! This is a new way to look at things for me, instead of my “one note at a time” approach so far - thanks for the push Josh - I can’t say this will be my favorite thing to practice, but I’ll throw it into the mix
Good video, Josh . . . great ideas for practice, too.
I’m definitely at level 2 and hadn’t thought much about leaving fingers on the frets in between fretting until now. I’ll start including these drills as part of my practice sessions.
I am currently on Module 1 Lesson 4 and doing Level 1 on this as this is where I got stuck if you can say so. The most problems I have is going from middle to ring finger actually, pinky is surprisingly less of a problem (as of now).
A general question is with what part of the finger I should hit the string/fretboard? I feel like I am very inconsistent - sometimes I hit it with the tip, liked angled, sometimes more flat with the tip, that’s why I get unclean sound sadly. Also it’s hard for me not hitting other strings accidentally I guess that will mess up the sound later on? I don’t want to learn bad habits.
Another thing I noticed is that I press the neck with my thumb a bit too hard and it’s really hard to not do that or else I am not getting enough pressure on the strings
First, I think it’s great that you are aware of all these issues! First step towards rectifying them!!
Ideally, your fingers should be a bit “claw-like”, such that you only touch the string you want to touch. You should use the fingertips, more specifically almost the most-forward part. What you need to avoid is to overextend your first joint inwards; in more technical terms, your fingers should be convex at all parts, rather than concave
You can train to fret without the thumb pressing on the neck by pulling a little more backwards with your “fretting” shoulder (the left shoulder for most people). It is just an exercise to gradually play with less force/pressure from the thumb - the goal should be not to choke the neck!
I might venture to say that the ‘unclean’ sound ‘might’ be a result of “where” on the fretboard you are pressing the string instead of “how” you are pressing the string??..??.. I tend to press strings close to the fret wire (vs mid fret) which for me results in a crisp clean sound with very little pressure placed on my fretting finger.
As for how I use my fretting fingers, I typically use the pads of my fingers while using the rest of the fretting finger as an additional ‘mute’ for any of the strings below. I know it all might sound a bit confusing and all, but I suppose I tend to play my bass ‘somewhat’ the same way I play my guitars where ‘bar chords’ were used quite frequently.
As for the heavy push against the back of the neck with your thumb, too much pressure will not only tire your fingers and hand out, it will also keep you from moving freely and easily up and down the neck. Very little pressure at all is needed there, and if you find that you have to use too much pressure, one of two things could be happening. 1) You’re not relaxed and are trying to hard to play, or, 2) Your action is a bit too high and may need adjustment.
We all tend to play a bit different even though most all of us have taken the same B2B course. Like climbing a mountain, there are many trails that you can take that get you to the top. As for playing bass, over time, and with plenty of practice, you’ll find a way that best suits ‘you’ and your style of playing.
BTW, there are a few things that @JoshFossgreen reminds everyone to do throughout his course: BREATH; Take a drink of water; Take a break and shake your hands… and, HAVE FUN!!
Much good advice above. A very important idea to understand right from the start is that it all takes practice. Do some extra simple practice routines in between lessons and you’ll be amazed at how quickly these little problems will be resolved. They’re nothing unusual for a beginner.
My one-to-one teacher told me to do all the basic/early exercises slowly & deliberately. Start painfully slowly to make sure you get it right, then speed up. If speeding up means you lose the good form then slow down again.
Thank you all for the encouragement and advice, I will keep it in my mind and work it into my practice! As with the “claw” hand… when I see Josh playing he has such straight, perfect fretting fingers and it all looks so easy and effortless. Then I look at my hand and it looks so cramped and painful (it is )
Yes, you are right - Josh’s hand certainly doesn’t look like a claw That’s why I wrote it in quotation marks. Still, it can’t be totally flat because then you’d touch all strings at once - so, there is a little claw even for Josh, albeit an elegant one
That makes sense, you’re just starting! If I were you, I’d go a little further in the course before worrying about these exercises, maybe Module 3 or 4.
It depends on what you’re playing… for just starting out, it doesn’t matter too much, as long as
And as for this:
That makes sense with how early you are in the course! It’ll get better naturally as you keep noticing what’s happening and adjusting your technique.
")


 )
)