Also, didn’t see it in your opening post.
Do you have a link to this kit?
2 Likes
There’s a couple of very similar kits on eBay
2 Likes
Yeah, they seem to not be as good, last I looked.
I wish that one company still made the Rick kits. Must have gotten orders To stop based on copy write infringement.
Their kits look good, but are growing in price, and shipping.
Seems like a year ago you could get under $100, shipped free. Now, last I checked, was upwards of $200 for a kit shipped.
I must admit, although, last I really looked on amazon or EBay was in the height of Covid phase 1 Lockdown, where shipping and inventory was wacky as all hell.
But really, if it stays that high price, I might just buy 3-4 of the super, cheapest Basses on Offer Up and Let Go that I can find, and Frankenstein Fu€ the $h!- out of them.
Not EXACTLY the sMe, but will gain similar knowledge of bass building, and the ins and outs of set up and build. Like the next step, beyond doing basic set ups.
2 Likes
I edited it in the initial post. But here you go: Harley Benton Bass Guitar Kit P-Style – Thomann UK
Also available as J-bass kit.
I am still blown away by the price. I am currently trying to find solid wood to buy and if I find something it’s often as expensive as the whole frigging kit.
3 Likes
I think it’s this one:
2 Likes
What kind of wood did the body end up being? “Solid wood body” is not super-descriptive. Though it does now make me curious about what kind of tone you’d get out of a balsa bass.
4 Likes
As I’m not a wood expert and it’s also not in the instructions I don’t know.
How would I tell? If you can’t tell by the grain in the pictures I don’t know either except you can tell me a foolproof method to tell the type of wood.
But when trying to buy wood I am talking really about any wood. Anything I found was at least almost as expensive as that kit.
2 Likes
most probably basswood, poplar or something similar. those cheap woods sounds pretty close to alder.
7 Likes
Yeah. Warwick uses Carolina Pine as the tonewood in the Rockbass line (and calls it “Carolena”  ), and is it very light and bright sounding, like Alder. It doesn’t sound as deep
and rich like the Teambuilt and Masterbuilts with their exotic woods, but it still sounds quite good.
3 Likes
I wanted the Rick kit too @T_dub but they were threatened with legal action as you suggested.
3 Likes
As thought the sculpting was way too ambitious especially in that scale. Logo gets removed, just a rounded (slim) headstock and no need for paint anymore!
While I am glad that I tried I am not too disappointed that it didn’t work. It was just too much detail. Maybe I should forget my miniatures when I work on wood 
2 Likes
So after working with what was left I chose this shape:
P.S: I know that once the tuning pegs are on there it won’t be good to grip anymore but I like a shape like this better than just straight.
6 Likes
Who knew there would be a tree specifically designed for making a bass! ![]()
7 Likes
I was sure someone would make this joke 
6 Likes
It’s for making fish, really.
4 Likes
Low hanging fruit I guess. I could string together more bad jokes, but I decided to just pick one. Feel free to tune me out. I don’t want to stomp on the build thread.
5 Likes
It’s all right. I should be the last one to complain about derailing threads ![]() Although I try to be better.
Although I try to be better.
Also after the thing got so stretched out I plan on making a summary in the end with all the useful information for potential new builders and link that in the first post so one doesn’t have to go through the whole thread anyway. But that has still to wait as I am at the first coat of oil for the headstock.
7 Likes
The thread has no character without misinformation, TMI and bad jokes. Leave it as for future readers. Helps em feel like they were here following along in real time.
2 Likes
I can’t believe no one picked up on your puns there yet
2 Likes
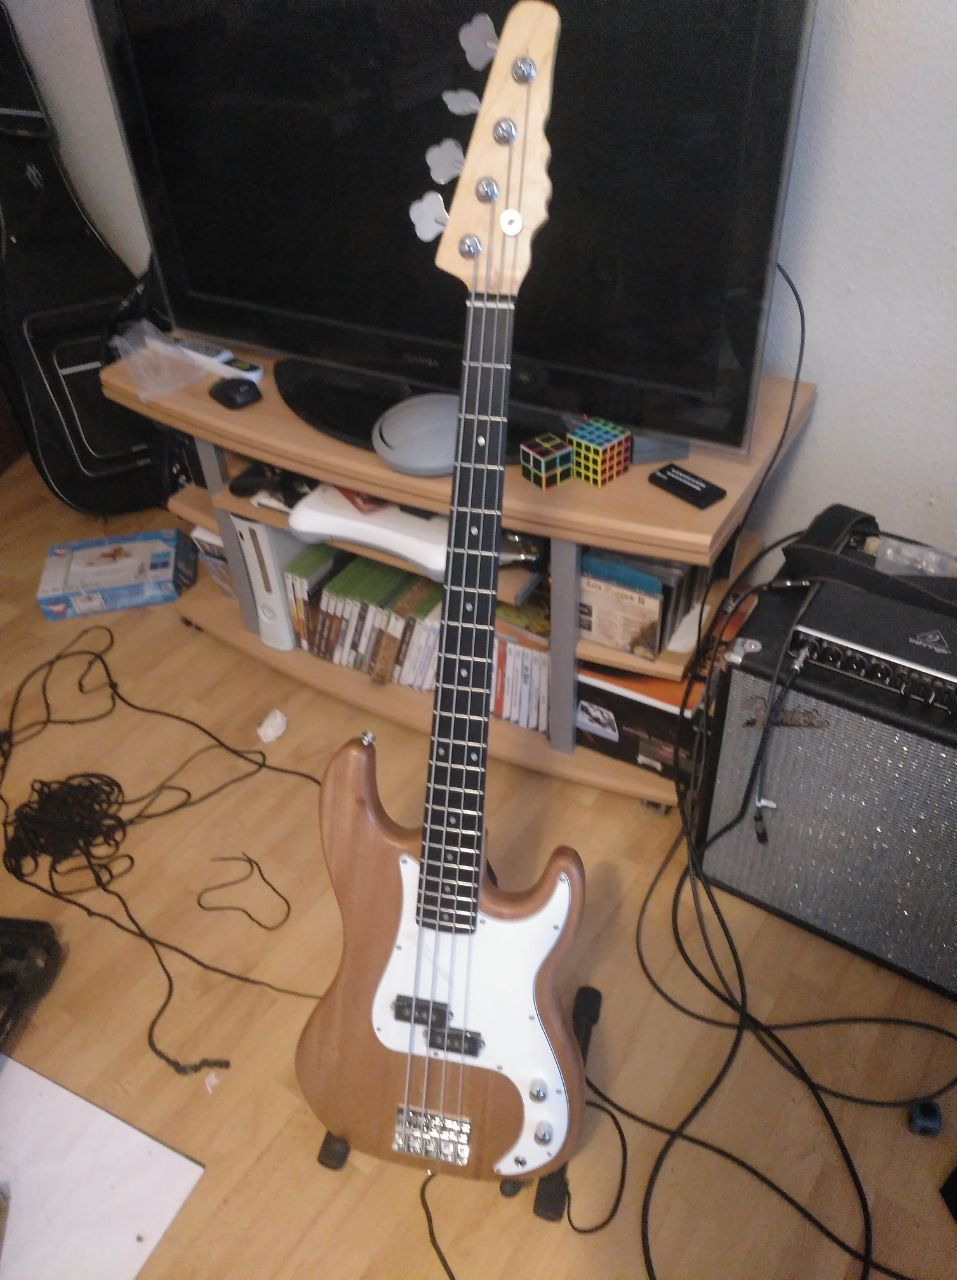
It’s done!
I am sooo happy with the result.
Summary for new builders
What do you need?`
- sanding paper 120 and higher up to at least 300
- oil to seal the wood
- finish for the wood (optional although recommended by most here)
- Tools everyone should own (Screwdriver and stuff like that, normal tools)
Do you want to shape your headstock? Better have tools that are good to cut/shape solid wood. There are numerous options and it’s probably best if you use the tool you are most comfortable with. People might disagree but as someone who isn’t used to woodworking and a new builder that’s my judgement on that.
You can leave the headstock as it is. But it’s not very aesthetic as it is just a rectangle with rounded corners and way bigger than it needs to be.
That’s it. Everything else comes with the Kit!
The instructions say the first step is to sand and oil the body but I disagree because they ignore shaping the headstock and the needed follow-up.
Step 0: Check if the neck fits into the body - if not carefully adjust body with files/sandpaper (for me it fit perfectly as delivered - but it’s wood so they can’t guarantee it)
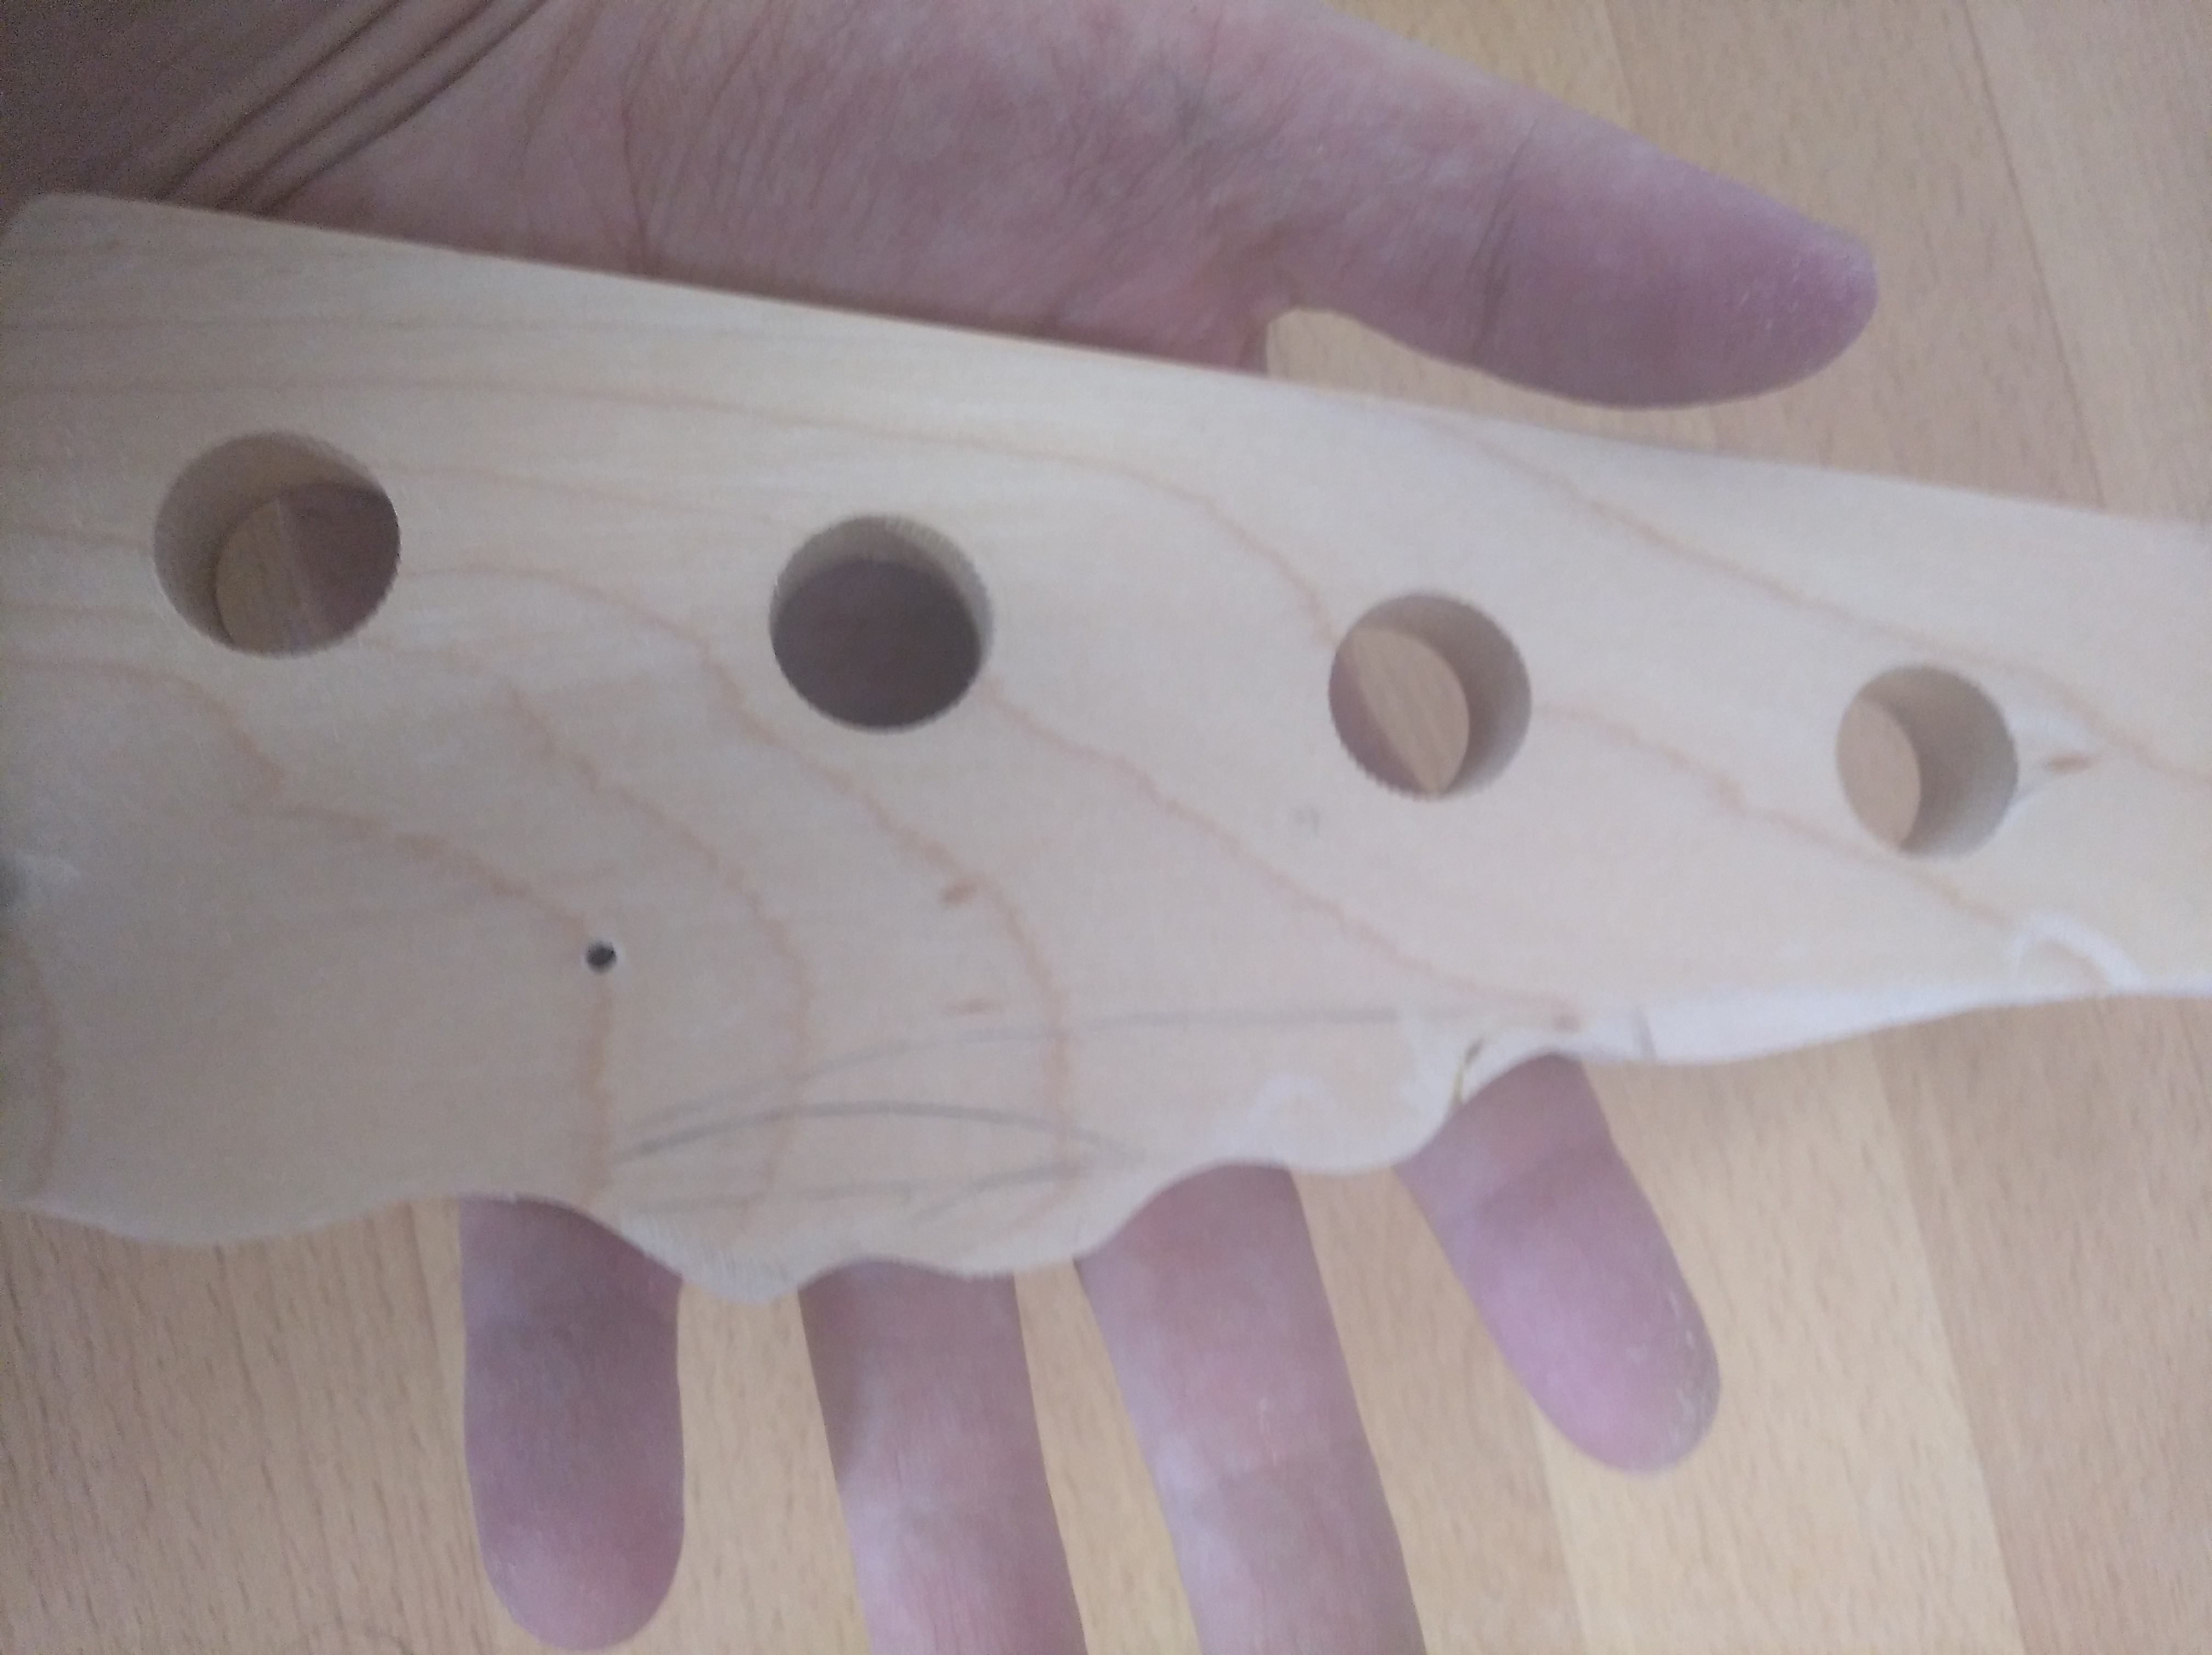
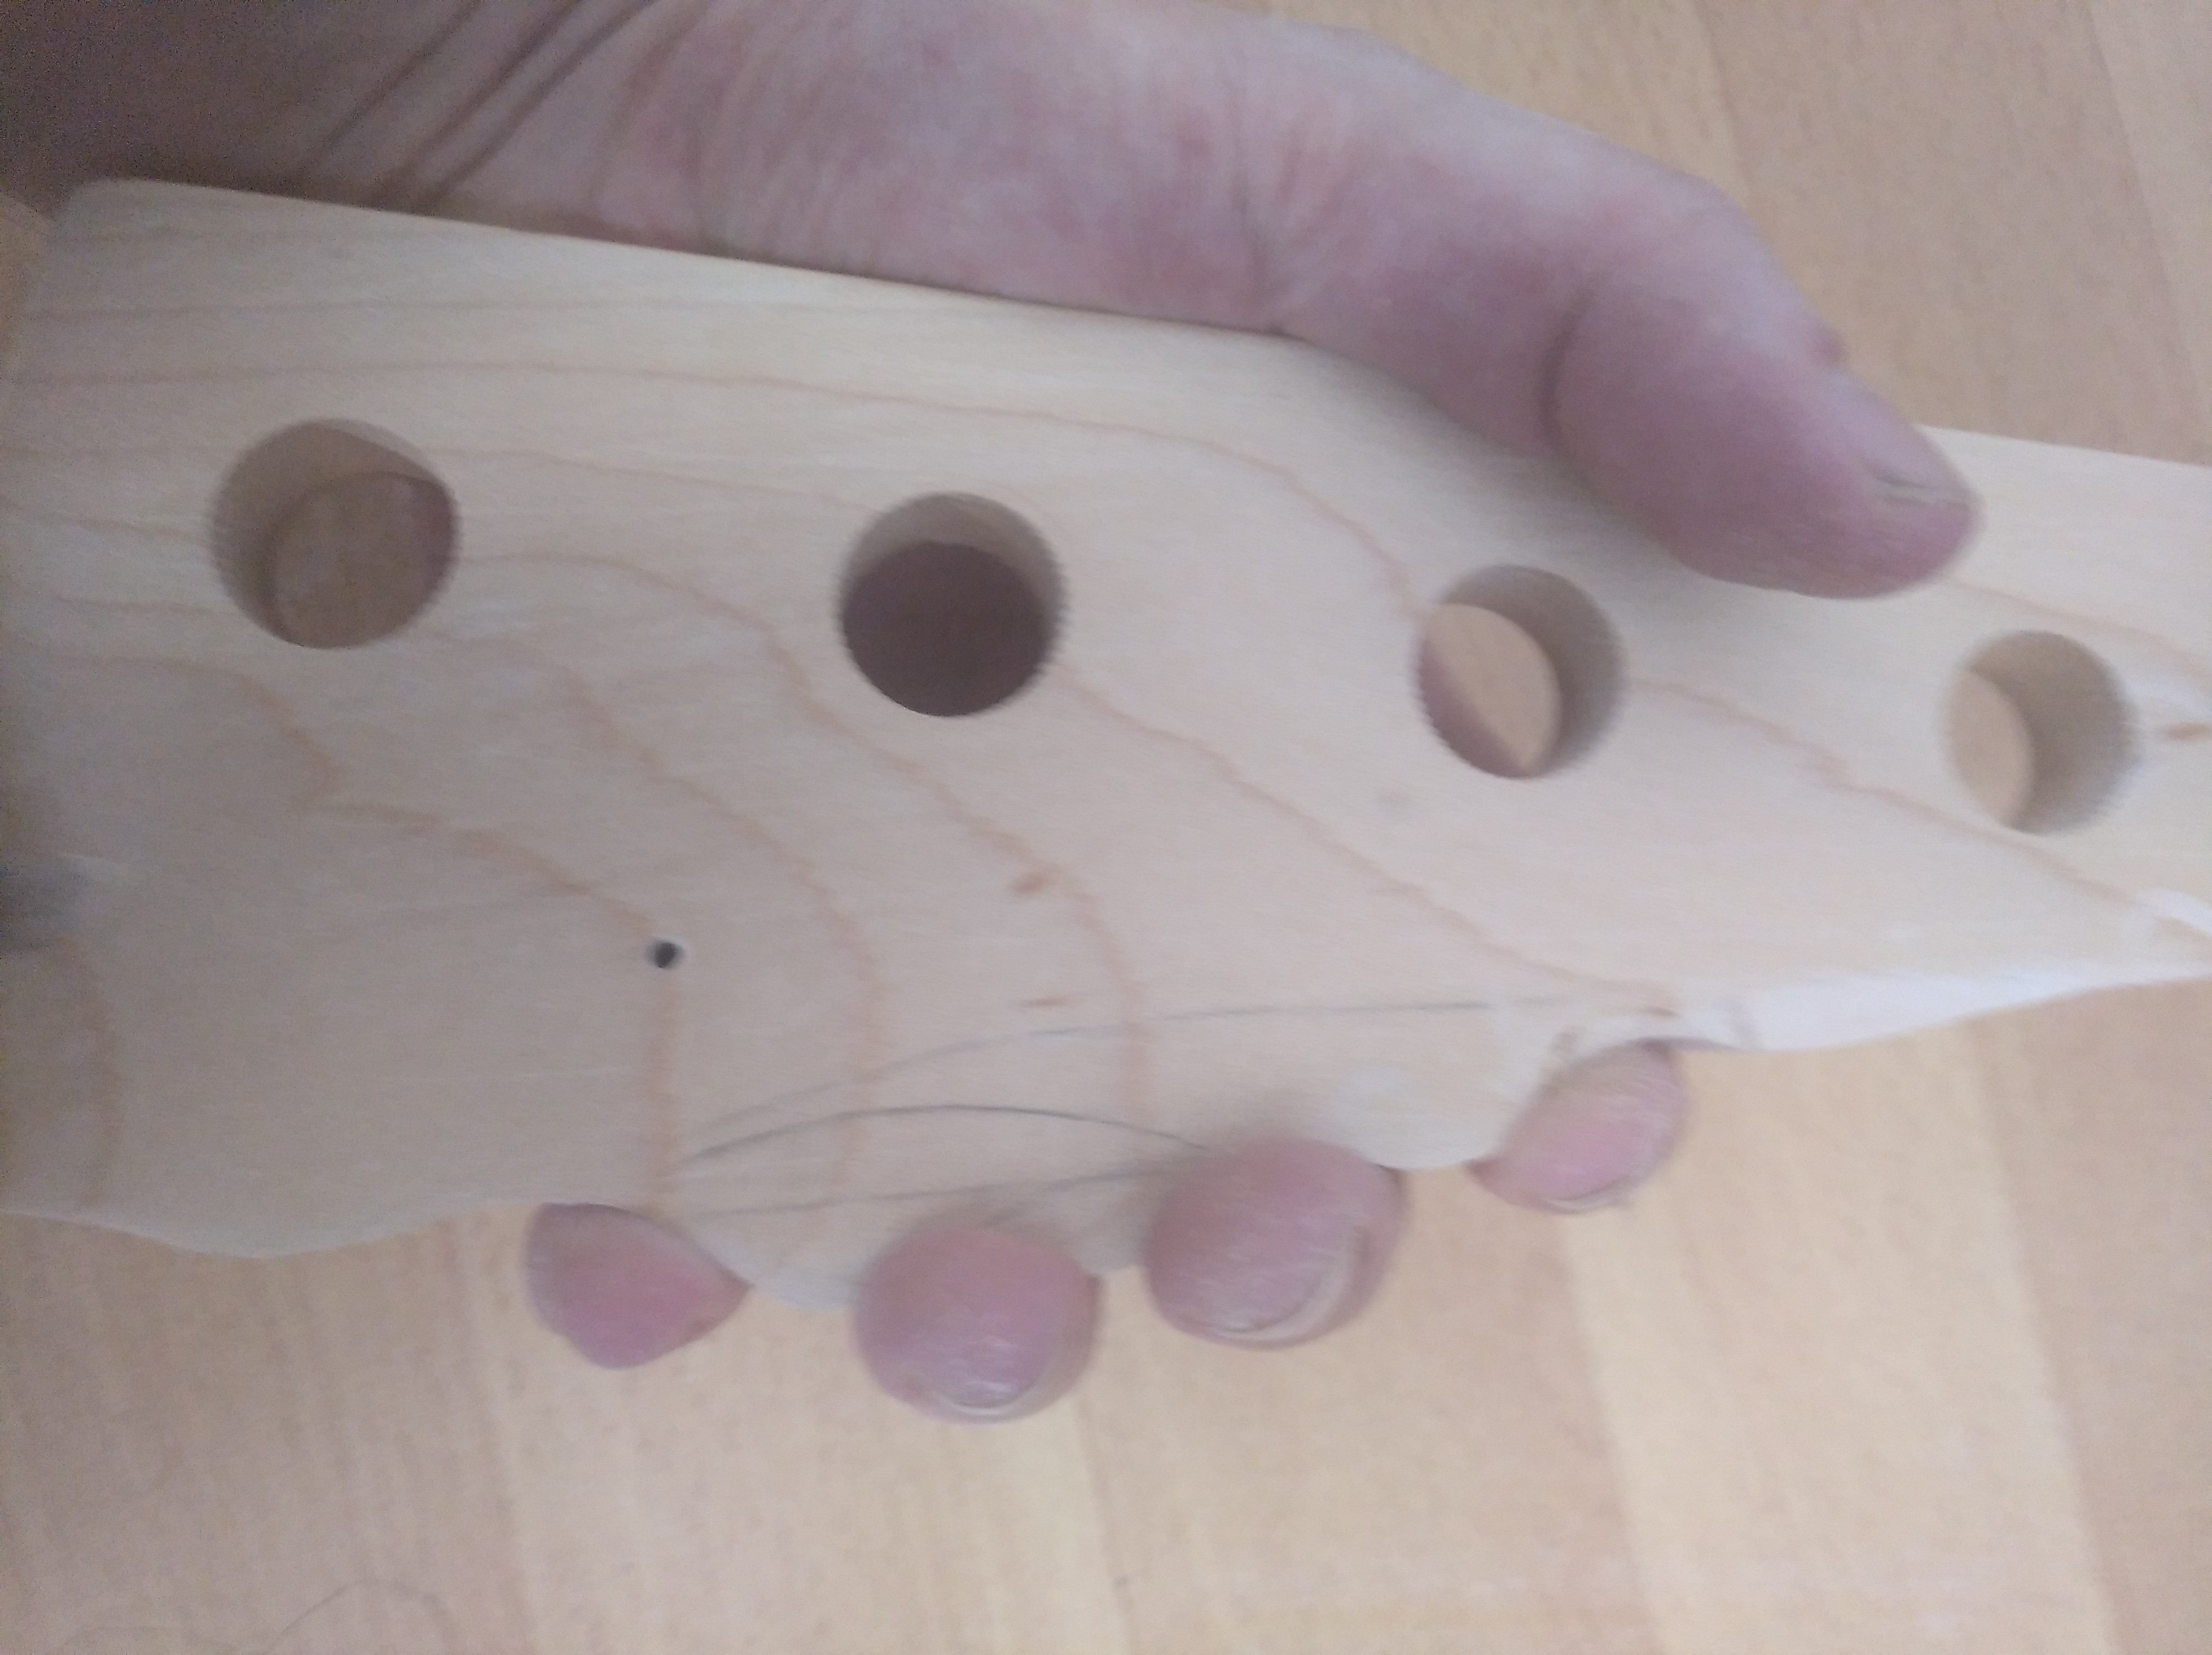
Step 1: Shape the Headstock
Step 2: Sand the Headstock and Body
Step 3: Clean and Oil the Headstock and Body
Step 4: Wait
Step 5: Wait some more
Step 6: Do another coat of oil. The strategies are numerous and I don’t feel experienced enough to recommend one. Only on this everyone agrees: Patience is key.
Step 7: Wait. For Real. Plan off-days or even off-weeks for the oil to get drawn into the wood.
Step 8: Did I say wait and that you should be patient? Yes? Oh. Okay. Just wanted to make sure.
Step 9: Build the thing together as they tell you in the instructions. I won’t repeat them because I realized apart from how to take care/seal and finish the wood the instructions are very clear and I would just repeat them. I will show pictures of the process though:
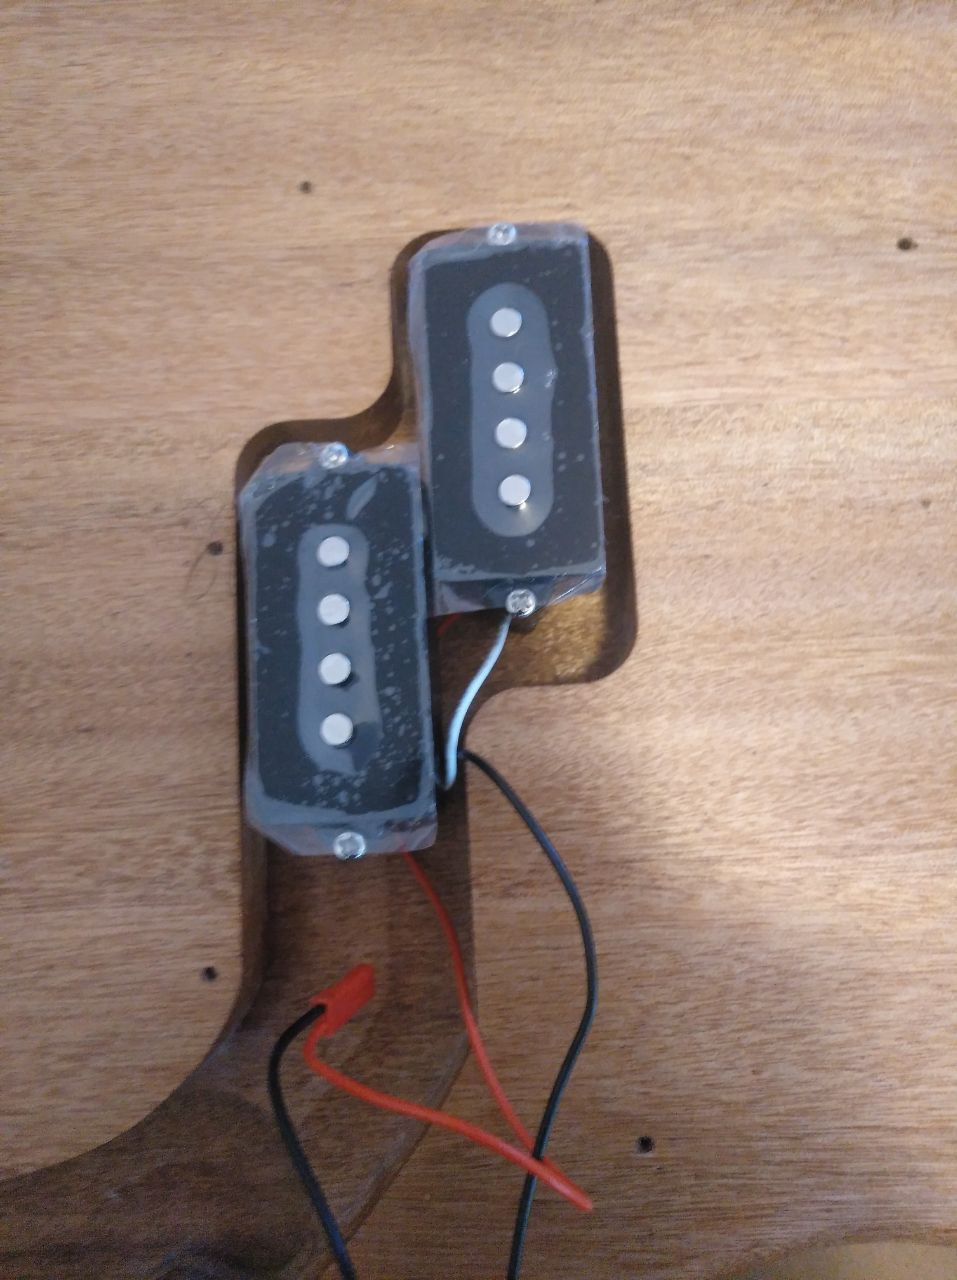
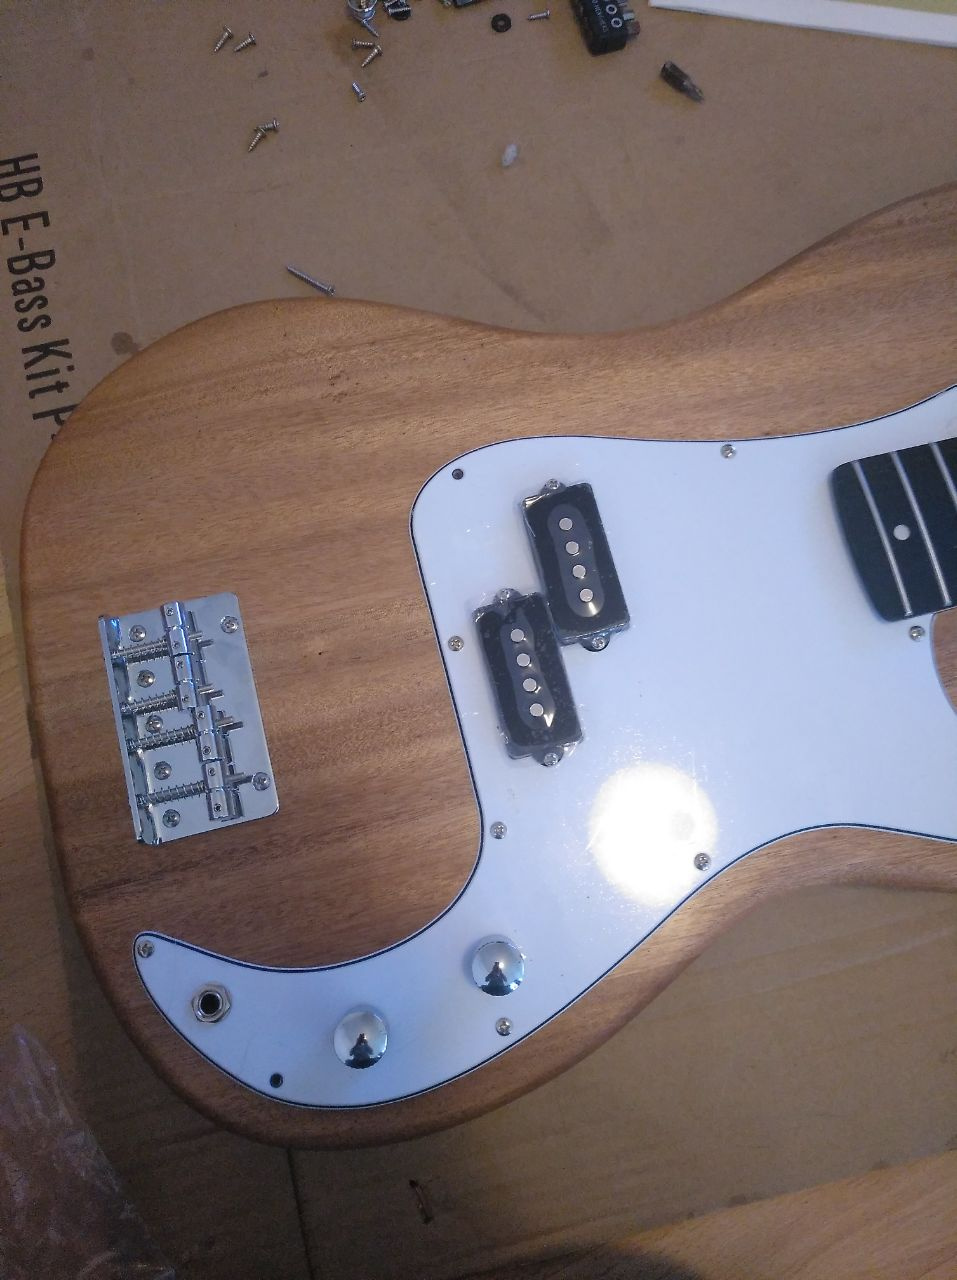
Screw in Pickups:
Make sure grounding wire goes to the bridge:
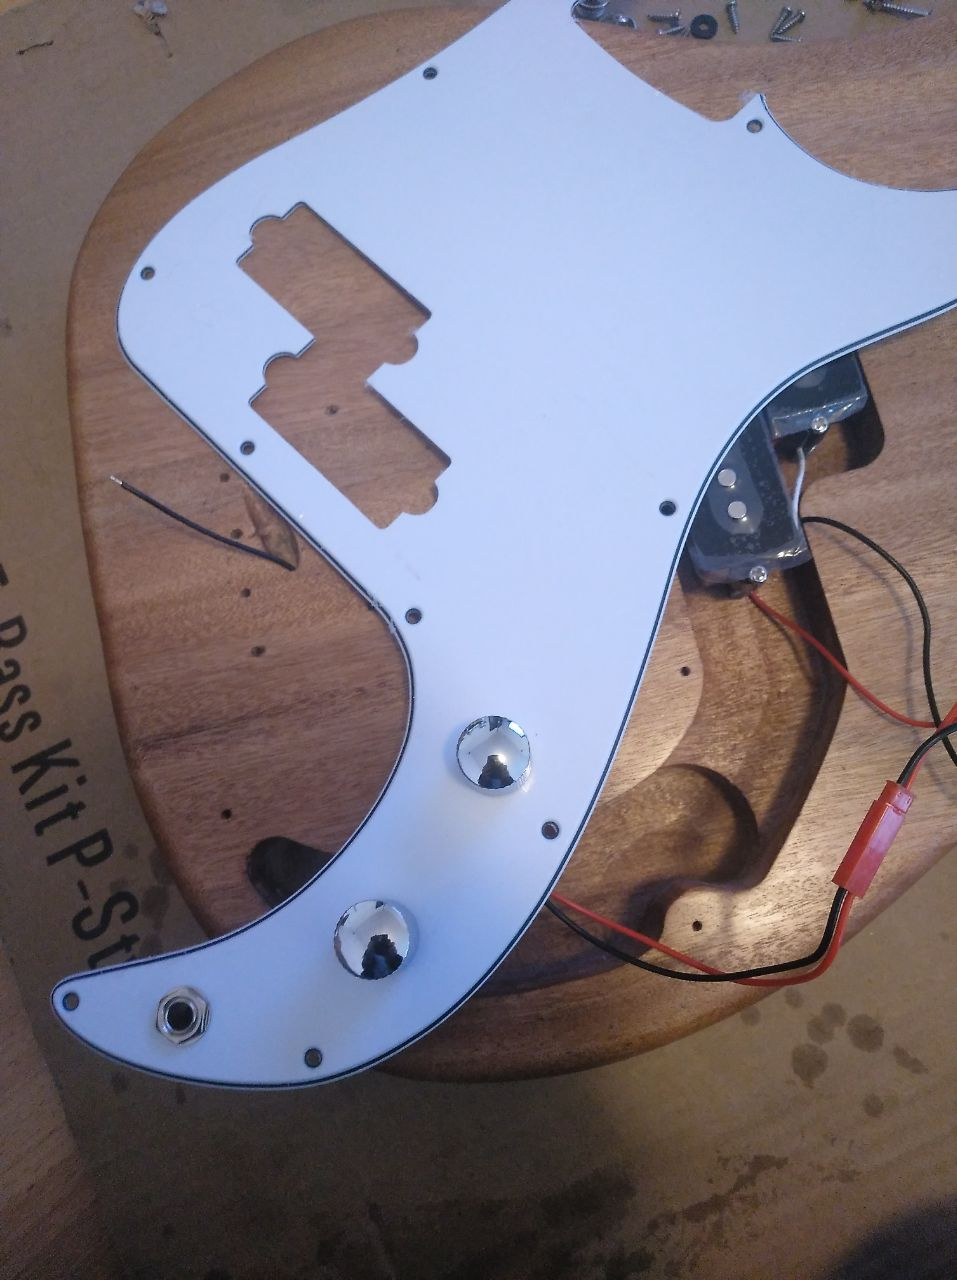
Attach bridge and fixate plate:
(Optional) Clean & Oil Neck with Lemon Oil

I won’t go into putting strings onto it and the setup. By the time I was done with the setup (30mins I guess) the strings have set and the bass didn’t go out of tune after a minute.
Be so friggin proud of what you build that you could burst. This step is important:
This step is not as important: Clean up after yourself as you surely will have created chaos for at least the last week while dragging out tools and machines you haven’t used for years.
In fact I think one would even manage without any help from the forum here as the instructions are pretty detailed but It was still good for me to get feedback. One huge point of criticism towards the instructions: It would have been helpful which screws are mentioned in the instructions. It never specifies, except that it should be those delivered with the kit. But as you have way more small screws than you need to complete the build you only have to make sure to not use the larger screws in the wrong place and I gotta give it them: the large screws are pretty obvious. I still was sorting 2 different kinds of small screws and was counting them because I wasn’t sure. Overall it probably doesn’t even matter as I noticed now as you got more than double the amount of small screws.
The sound of the finished product:
Billy Jean: https://drive.google.com/file/d/1_CcTWoRyIYJD51gnFs-aEjcldvjRYYW4/view?usp=sharing
Module 5 - Lesson 2: Stream M5 - L2 by Stedd Lautenfein | Listen online for free on SoundCloud
Just playing around: Stream Monking Around by Stedd Lautenfein | Listen online for free on SoundCloud
My opinion of the finished product:
I am very proud I build together a working instrument. I like the feel of the neck although I would prefer it to be a bit smaller.
Overall this kit is well worth the 100€ I spend.
Things I don’t like (now I judge this bass as if I would want to buy it and not as if I built it):
The range in tone options is limited up to non-existent. I had a passive bass before but you can hear for yourself in the DAI recording Billy Jean is Tone Knob on 0 and M5L2 is Tone Knob on 100. That’s the full range and it’s honestly almost the same tone. I mean I can hear the difference but it’s rather subtle.
It feels much lighter than both my other basses and that’s probably a sign for cheaper wood but I like the fact that it’s not so heavy on my shoulders.
Fretboard feels nice, Setup incl. Intonation was easy - I almost did not have to do anything for intonation to be honest.
Would not complain if this would be a retail bass for 100€. I’d probably spend more money to get more tone options but I can wholeheartedly recommend the harley benton kit to anyone interested in starting builds.
Sorry. I couldn’t be bothered with a caped bassist video because then I would have to clean up first and it would have taken way longer. I wanted to get this post out first.
14 Likes